
NSX-T 3.2 introduces a new Security feature on the Gateway Firewall, URL Filtering.
URL filtering can prevent malicious code, spyware, phishing attempts and other threats by blocking access to websites or URLs that may cause a security risk. URL filtering enables access-control based on URL categories, URL reputation, and custom URLs.
URL filtering is supported only on a Tier-1 gateway. URL filtering access control policy is enforced for both encrypted (https) and non-encrypted (http) traffic. With encrypted traffic, users must enable TLS Inspection policy to decrypt the traffic to get full URL filtering. Without TLS inspection, a URL filtering policy will enforce policy at the domain level using TLS Server Name Indication (SNI) extension in the TLS client hello.
This feature works hand in hand with FQDN Analysis (called URL Analysis in NSX-T 3.0) – covered in my blog post here.
Creating a URL Filtering Policy
URL filtering is configured using an L7 access profile in Gateway firewall rules.
Step 1 – Enable the URL Database on the Edge Cluster(s) where you want to enable this capability. This will trigger downloading latest URL database from the NSX Threat Intelligence Cloud Service.
From the NSX Manager -> Security -> General Settings -> URL Database

NOTE: NSX Edge Management Interface needs internet connectivity to download URL Database from NSX Threat Intelligence Cloud Service.
Step 2 – Create an L7 access profile for URL filtering.
The Profile will define how you want to handle accessing URL’s based on URL Category, Custom URL’s or URL Reputation.
From the NSX Manager -> Inventory -> Profiles -> L7 Access Profiles

Click ADD L7 ACCESS PROFILE if you want to create a custom profile and start by entering a name for the custom policy and the Click Set

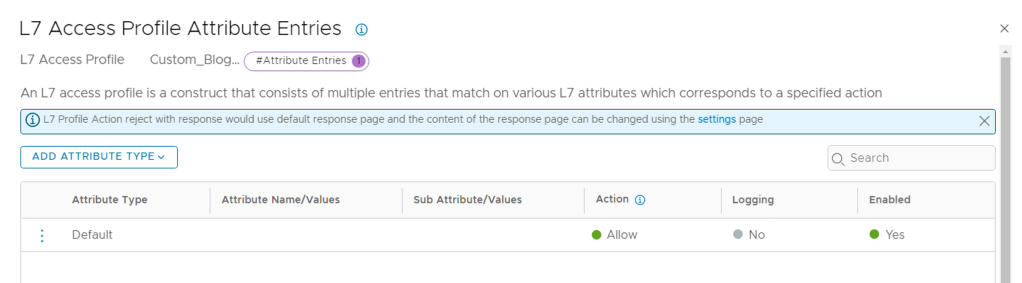
Now we can add attributes by Click ADD ATTRIBUTE TYPE. You can create Multiples of these with various actions.

Here are some guidelines on how to best use the attributes. Further details here.

I am going to create a Profile matching URL Category and then add some Attributes and then set the Action.

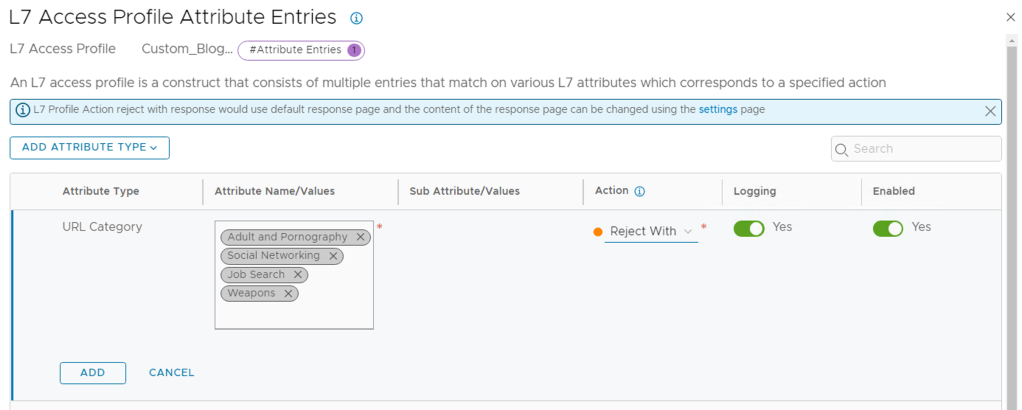
If you click in the Attribute Name/Values block it will list all the default values, let’s select some Categories we want to prevent access too.

I selected 4 Categories I want to block access too, if you select the Action you see three options (Allow, Reject, Reject with Response). Allow will allow access, Reject will just block access to a website that matches the category and Reject with Response will redirect the user to a splash page – covered in the next few steps. I am going to select Reject with Response to show what happens here.

I enabled logging and Clicked ADD.
Note: The logs for these Gateway rules are generated on the NSX Edge appliance associated to the T1 where you are apply the policies. So you need to make sure that you have enabled logging locally on the Edge appliance or using the Node Profile settings under System Fabric -> Profile -> Node Profiles -> All NSX nodes. I added the LogInsight IP and Port/Protocol details using 514/UDP. When I tried using the protocol as LI, I did not receive any logs in LogInsight.
Then click Apply at the bottom right

Lastly Click Save and this saves the new L7 Profile

Once saved, it should show the status as Success & Green

Step 3 – Create URL filtering policy. Create a gateway firewall rule using the URL filtering profile created in step 2. The filtering policy can only be Applied To Tier-1 gateways. The rule action with an L7 access profile must be Allow.
From the NSX Manager -> Security -> Gateway Firewall -> Gateway Specific Rules -> Select the T1 Gateway where you want to enabled the feature
Create a Policy -> ADD Policy, the ADD a rule under this policy – enter the names as needed.
- Source and Destination = any
- Services = HTTP & HTTPS
- Profiles = Custom_Blog-L7-Access-Profile (L7 Access Profile)
- Applied To = The T1 where we are enabling this (Auto populate)
- Action = Allow (This must set to allow, the action will be controlled by L7 Profile)

Step 4 (Optional) – Create a custom response or accept the default for when the L7 access profile Action is specified as Reject With Response.
From the NSX Manager -> Security -> Gateway Firewall -> Settings -> URL Filtering
You can edit the default Response Page text in the box provided or you can do some custom code – not sure if the custom code is officially supported. I used some code which I received from one of my fellow bloggers – https://cloudblog.tech/security/nsx-t-url-filtering-custom-response/

Once you have completed the customisation, click SAVE
Testing URL Analysis
I am using the test topology below and will be using Chrome on the My Test Server machine. The URL inspection is applied to the uplink interface on the T1_VDI.

We can monitor the URL Analysis activity from the NSX UI too
From the NSX Manager -> Security -> URL Filtering / FQDN Analysis -> URL Filtering -> Select the T1 under Gateway Traffic
It shows the following details:
- Reputation Score
- URL
- Gateway
- Category
- Edge Node
- Allow Action
- Reject Action
- Reject with Response

Test 1 – Accessing LinkedIn from my Test Server

From NSX UI the dashboard, I filtered to the URL LinkedIn and see that it was matched and marked with the correct Reject with Response page – as shown above too.

Test 2 – Accessing Google from my Test Server

Accessing to Google works fine and I can confirm this from the logs in Log Insight too


Test 3 – Accessing Social Network – Facebook
Accessing Facebook got blocked as expected but the action was just rejecting the access instead of reject and respond.

So I checked the logs in Log Insight to see why this would be happening, I see the connection matching the l7-access-profile and the destination IP belongs to Facebook and the URL is shown further into the logs but the action is set to “REJECT”.

From the NSX UI Dashboard, when I filtered to the URL facebook I saw the same results showing the Reject action instead of the Reject with Response.

I need figure out why Social Networking is being classified correctly but the action defaults to Reject instead of my configured behaviour option of Reject with Response.
Summary
I demonstrated the basic setup and matching URL on categories, but you have the option to add additional match criteria for URL Reputation and Custom URL’s too.
The setup and configurations are fairly straightforward, but you definitely need to make sure that your Management Interface on the NSX Edge appliance can reach the Internet and has DNS resolution working else you will not be able to download the database and will not see anything.
Lastly, this feature went General Available in NSX-T 3.2 and it is included in the NSX Gateway Firewall license package – if you do not have the NSX-T Gateway add-on license then you will not be entitled to use this capability. Refer to Product Offerings for NSX-T 3.2 Security for license requirements and entitlements.


I have recently started a website, the information you provide on this site has helped me tremendously. Thank you for all of your time & work.
LikeLike
You made some really good points there. I looked on the web for more information about the issue and found most individuals will go along with your views on this site.
LikeLike