
VMware NSX-T 3.2.1 went Generally Available on the 17th of May – Release Notes. This post will focus on upgrading my NSX-T 3.2.0 environment to NSX-T 3.2.1. This is not a major release so I am anticipating a fairly straightforward update.
My main reason for upgrading would be the Security features introduced in 3.2.0 as Tech Preview and now generally available in 3.2.1. (Gateway TLS Inspection & Gateway IDPS)
Here are some highlights taken from the release notes:
Distributed Firewall
- Distributed Firewall now supports Physical Server SLES 12 SP5.
Gateway Firewall
- TLS 1.2 Inspection was on Tech Preview mode in NSX-T 3.2, and now it is available for production environments in NSX-T 3.2.1. With this feature, Gateway Firewall can decrypt and inspect the payload to prevent any advanced persistent threats.
- IDPS (Intrusion Detection and Prevention System) is introduced in NSX-T 3.2.1. With this feature, Gateway Firewall IDPS detects any attempt to exploit system flaws or gain unauthorized access to systems.
Install and Upgrade
- Rolling upgrade of NSX Management Cluster – When upgrading the NSX Management Cluster from NSX-T 3.2.1, you can now get near-zero downtime of the NSX Management Plane (MP) by using the Rolling Upgrade feature. With this feature, the maintenance window for MP upgrade gets shortened, and NSX MP API/UI access is up throughout the upgrade process while not impacting Data Plane workloads, as before.
Getting Started
VMware provides an extensive upgrade process here. My intention is to follow the upgrade process and capture the process here with screen shots at each step.
Before upgrading your environment you must review the base requirements, if you don’t meet all these requirements then get those sorted out before proceeding to upgrade:
Just after the NSX-T 3.2.0 release, VMware released an NSX Upgrade Evaluation tool which was suggested to use for customers wanting to upgrade from earlier versions of NSX-T to 3.2.0.1 (3.2.0 was removed from the download portal). The tool can be downloaded from VMware’s download page and you can use it to verify you environment for 3.2.1 upgrades too. More details on the tool here.
Steps to run this tool:
1. Deploy the NSX Upgrade Evaluation Tool VM in your environment.
2. After deploying the VM, login to the CLI of the Upgrade Evaluation Tool VM as ‘admin’ user
3. Run the command: ‘start dry-run data-migration mp-ip <NSX Manager Node IP>’
a. Provide the IP of any one of the 3 NSX Manager nodes, and the root password

All pre-upgrade check(s) passed. You can proceed with the upgrade.
Now that we are comfortable that our environment has passed all the pre-upgrade checks, let’s move onto the upgrade process.
Upgrade Process
Make sure to download the Upgrade bundle from VMware’s website, it normally ends in mub
VMware-NSX-upgrade-bundle-3.2.1.0.0.19801959.mub
Step 1 – Access the NSX Manager Upgrade Portal
System -> Upgrade -> Upgrade under NSX Appliances

Step 2 – Upload the upgrade package
Bundle Setup -> Upload MUB File -> Browse to the upgrade file to import -> Upload

The upgrade package is roughly 8GB so depending on your environment, it could take some time to upload the file to the NSX Manager.

Step 3 – Click Prepare for Upgrade
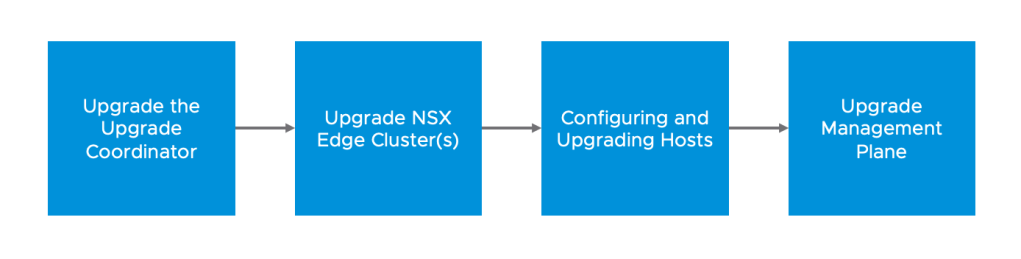
NOTE: System will be prepared for Upgrade and once it is done you can upgrade your Edge, Hosts and Management Nodes individually.

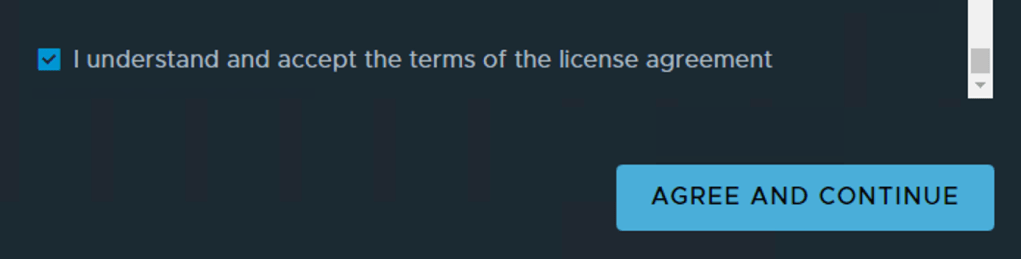
Accept the End User License Agreement

The extraction process does take some time – during this process the upgrade Coordinator is upgrade too.

Step 4 – Click Next at the bottom right.
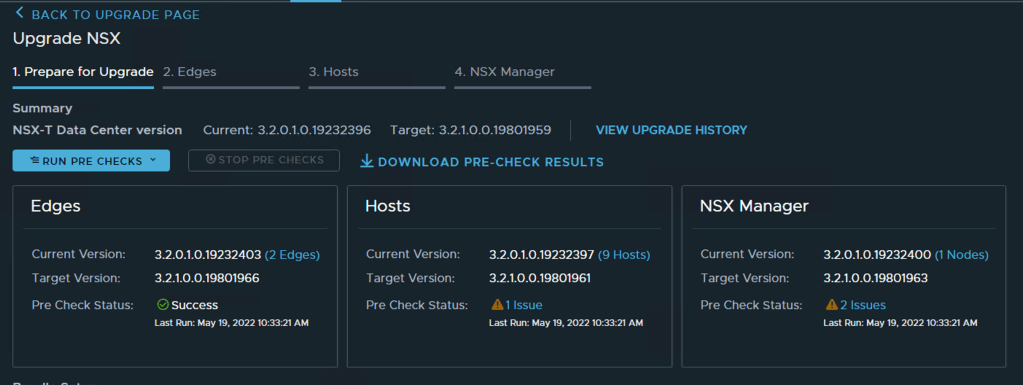
We can see from the dashboard that I am are currently on 3.2.0.1 and upgrading to 3.2.1.0

Step 5 – Run Pre Checks

Once the Pre Checks have completed, see if you have any warnings or anything that would prevent you from upgrading
I have one issue under my hosts, this cluster only has one ESXi Server and I don’t have DRS enabled. Since it is a critical error, I will pop over to vCenter and enable DRS even though its only a single host cluster – just to clear the errors.

I enabled DRS on the cluster from vCenter and ran the pre checks again selecting the hosts only option.

The NSX Manager now detects that there is only one host in the cluster gives me this warning – I powered off the workloads on this server to avoid the upgrade failing.

I have 2 issues highlighted on the NSX Manager. The first is warning me about the last time a configuration back up was done and the other recommends running the NSX Upgrade Evaluation tool which I have done at the start. So I will just ignore these.

After checking all the issues raised Click Next on the bottom right
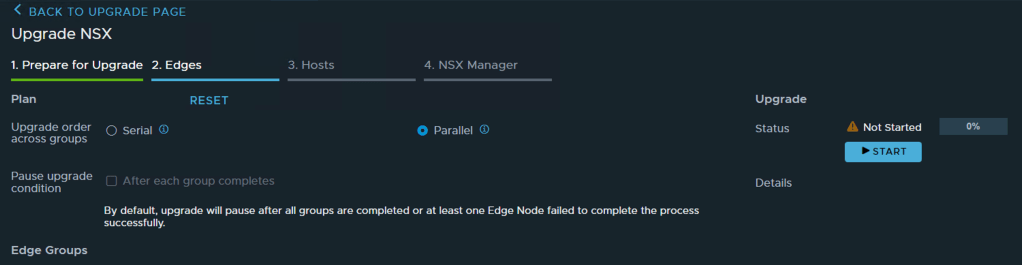
Step 6 – Upgrade Edge Nodes
The Edge Nodes can be upgraded in Serial or Parallel – depending on your environment and deployment you will need to work out what would makes sense for you.
I am going to select Parallel so that both my edge clusters get upgraded at the same time
Note: Edge VM’s within the same cluster will be upgraded in serial with this option
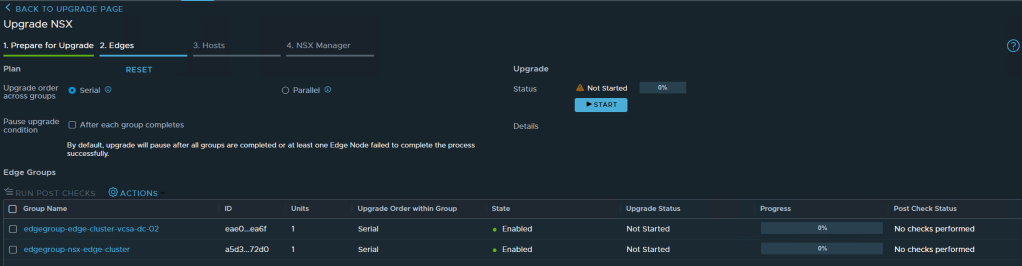


Select your preferred option and click Start
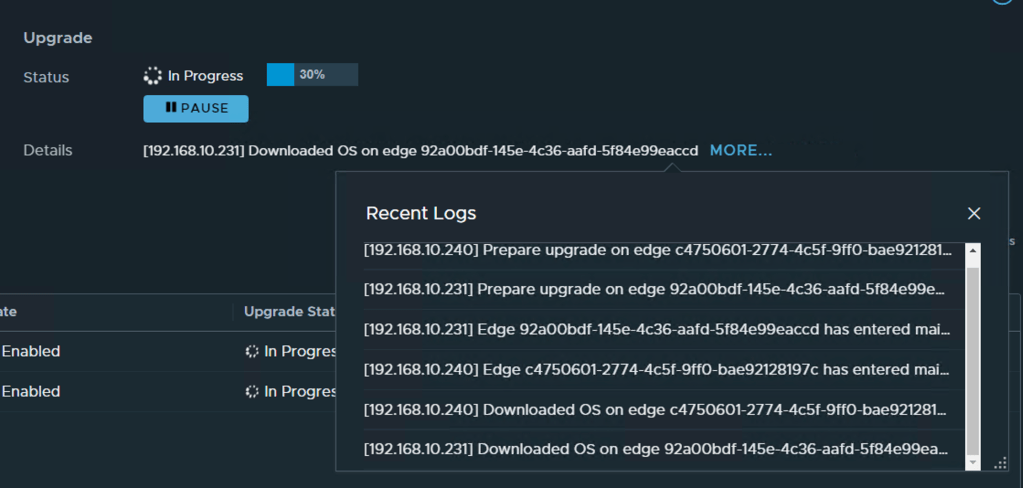
You can click on details and monitor the upgrade process
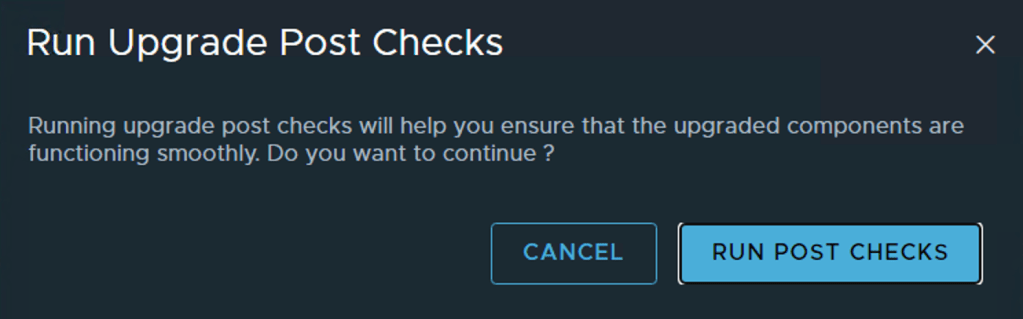
Once all the Edge Nodes are upgraded -> Click Run Post Checks

After the Post Checks are done Click Next on the bottom right
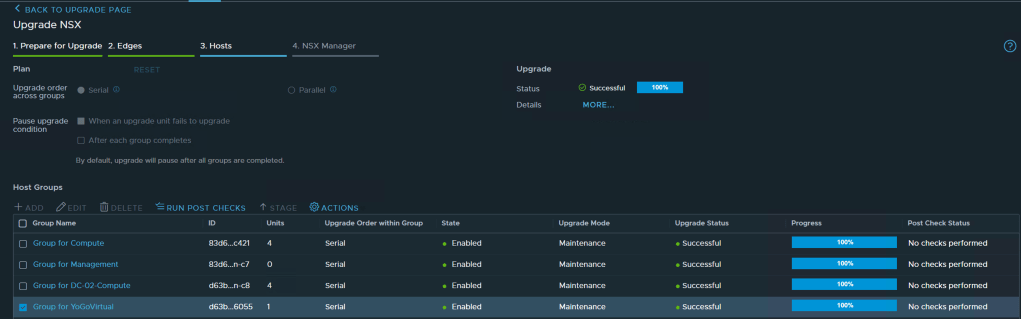
Step 7 – Upgrade Hosts
The hosts have the same options to upgrade in serial or parallel, you have some options to change the order in which clusters are upgrade too at the bottom. Again depending on your environment this order might differ from the details list in NSX Manager.
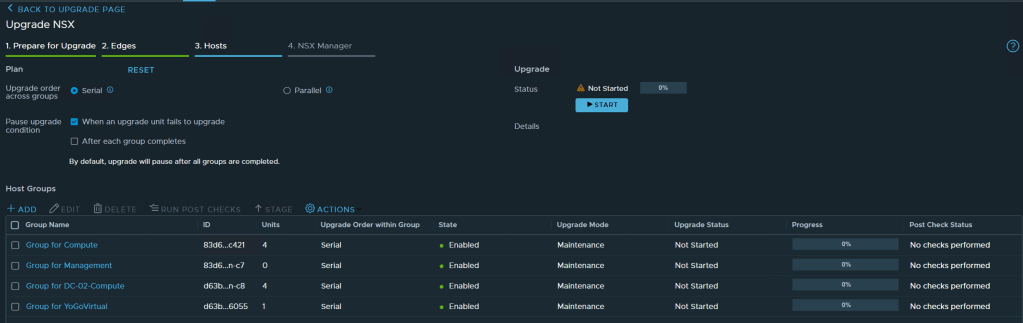
Select the preferred option, I am going to select serial here and let NSX Manager proceed with the upgrade.
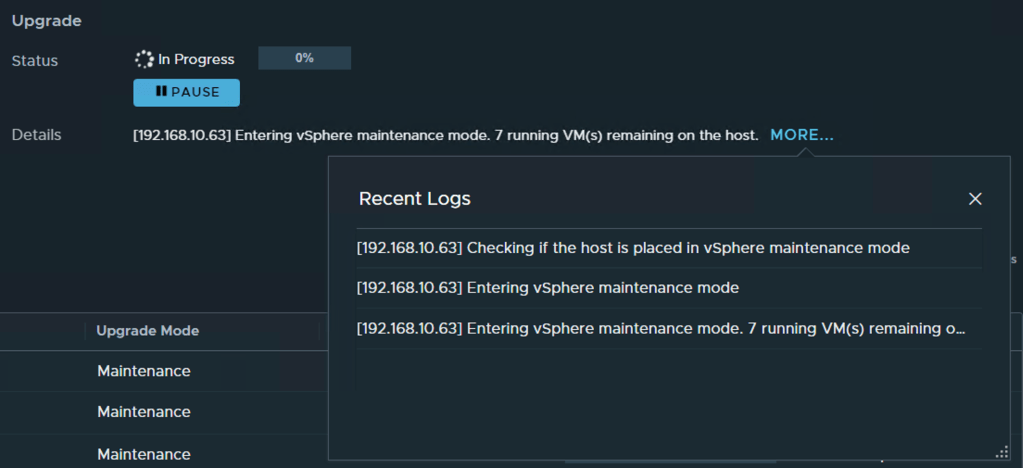
One you have selected all the options Click Start. During the host upgrade, hosts are placed in maintenance mode so any active VM on these hosts would be migrated to another host.
As the upgrade proceeds across all clusters, you can see the progress per cluster by selecting the cluster in Host Groups.

Once all the clusters/hosts have been upgraded you can run the Post Check -> Click Run Post Check

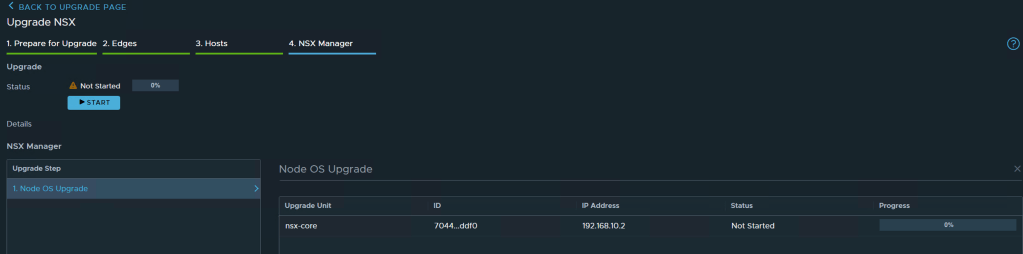
Step 8 – Upgrade NSX Manager
The final step in the upgrade process would be to upgrade the NSX Manager(s). My setup has a single manager so only one needs to be upgraded.

Click -> Node OS Upgrade -> Click Start -> Confirm to start the upgrade now.
This would take some, monitor progress on the right in the progress meter or follow the logs next to the Details line, click more to expand the logs.
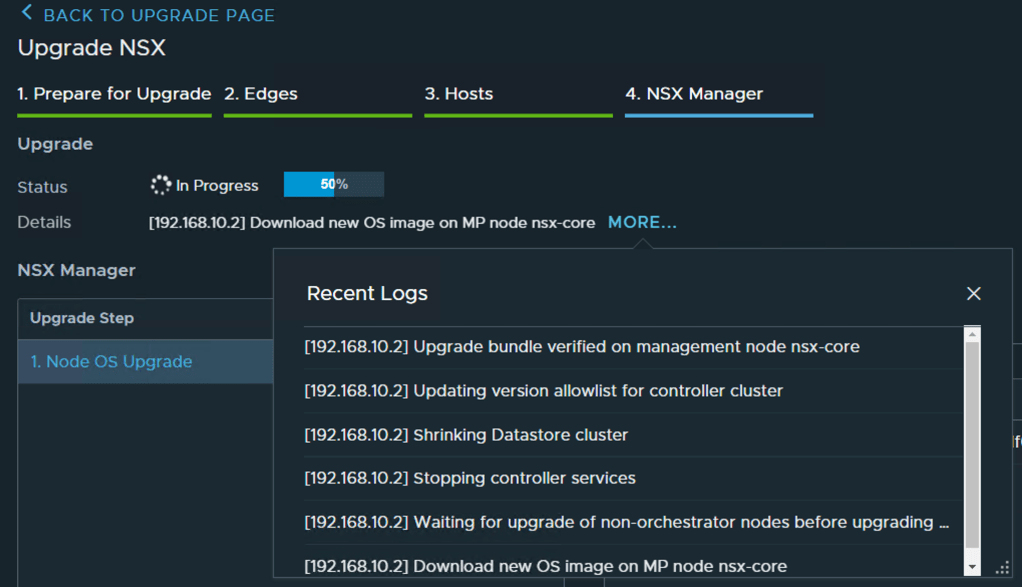
At some stage in the upgrade I lost access to the Manager, assuming this is durning the reload. I waited a few minutes and accessed the Manager. You can monitor the status from the CLI too.
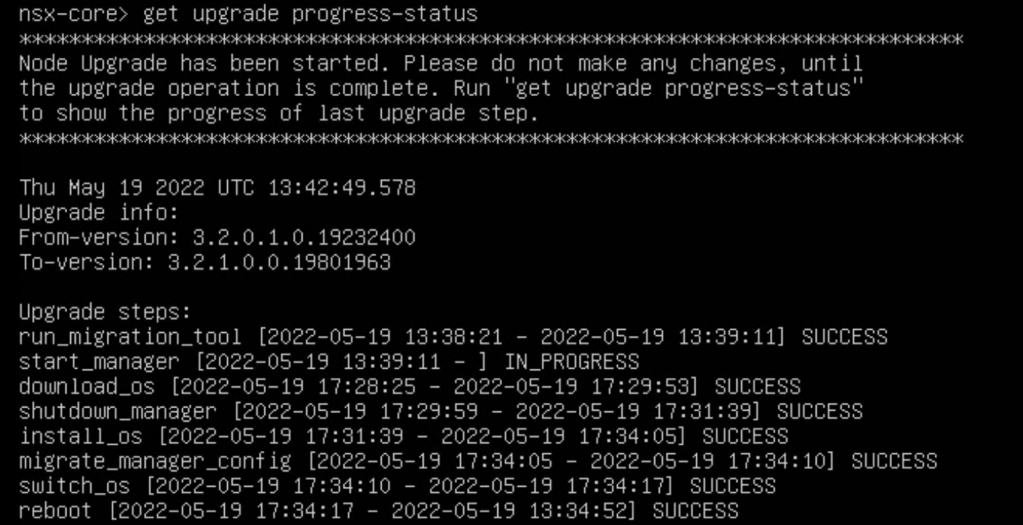
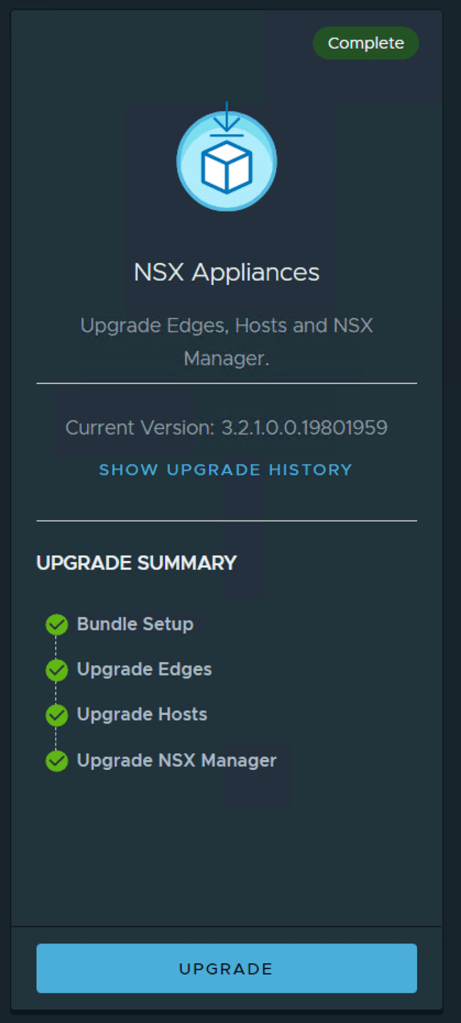
Once the Manager has fully started up all the needed services, you can return to the upgrade tool and check the status of the manager up. Status should be Successful and Progress should be 100%.

Click ->Done
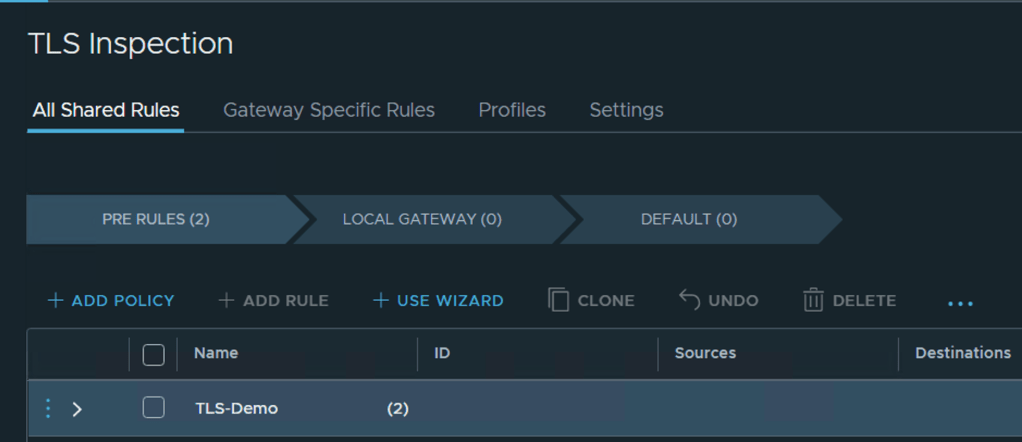
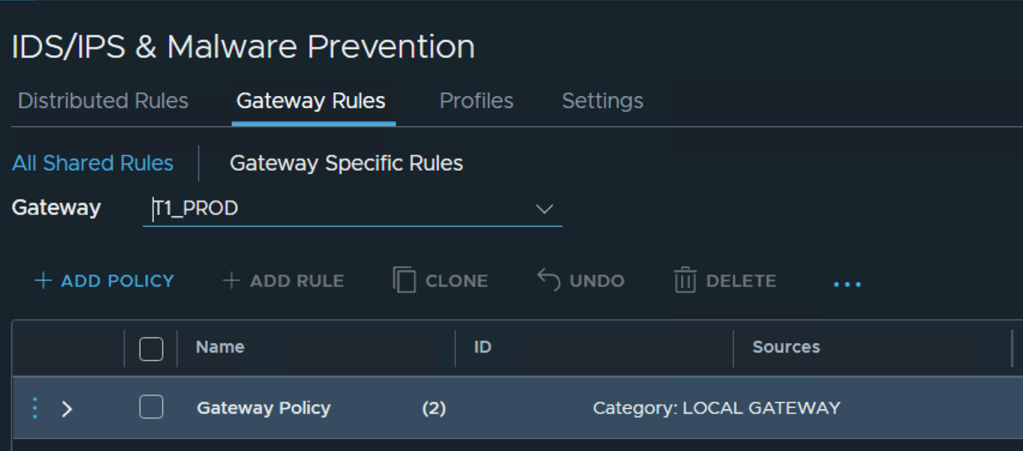
Now that all components have been successfully upgraded from 3.2.0 to 3.2.1, I wanted to confirm that the TLS Inspection feature and Gateway IDPS is now available. Prior to the upgrade these dashboards had a banner stating it that these features were Tech Preview.
Summary
The upgrade process was pretty simple and easy to follow using the upgrade tool. Once the upgrade completed, it did take some before I could successfully access the dashboard but everything cleared fine.
