VMware recently announced the availability of NSX-T 3.0.1 on 23 June 2020. This post shows the steps I followed to upgrade my lab environment from my NSX-T 3.0 to NSX-T 3.0.1.
NSX-T Data Center 3.0.1 is a maintenance release which includes new features and bug fixes – I am upgrading my lab to stay on the latest release as I use this setup for demo’s but also to fix one or two bugs.
As with any upgrade always check the compatibility and system requirements information, see the NSX-T Data Center Installation Guide.
You are going to need to download the upgrade bundle from the download page. This requires an active support contract.

Let’s Get Started with the upgrade

My lab is hosted in a nested ESXi environment with two simulated sites (DC-01 and DC-02). Each site has their own local vCenter and local NSX-T Manager and all management components are hosted outside in a management cluster where my Global NSX-T Manager is also deployed. Both DC-01 and DC-02 Local NSX-T Managers are registered with the Global Manager shown below.
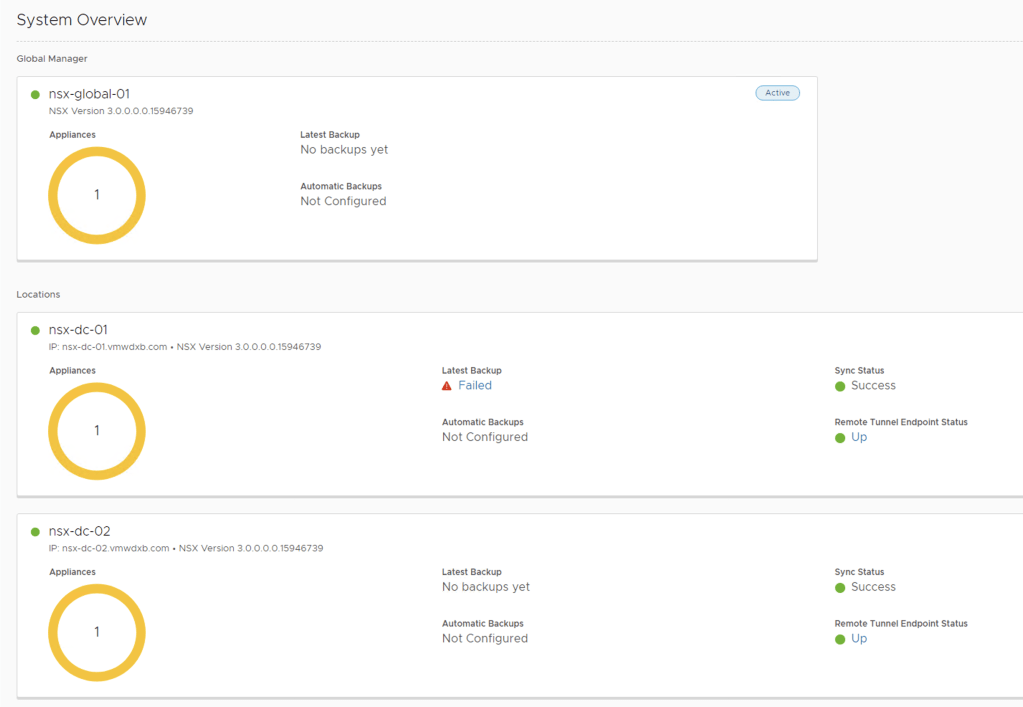
Since this is only a lab environment, I am only using a single NSX-T Manager appliance for each of the NSX Managers (Local and Global) *At the time of release of Federation in NSX-T 3.0, only one Global Manager virtual appliance is supported.
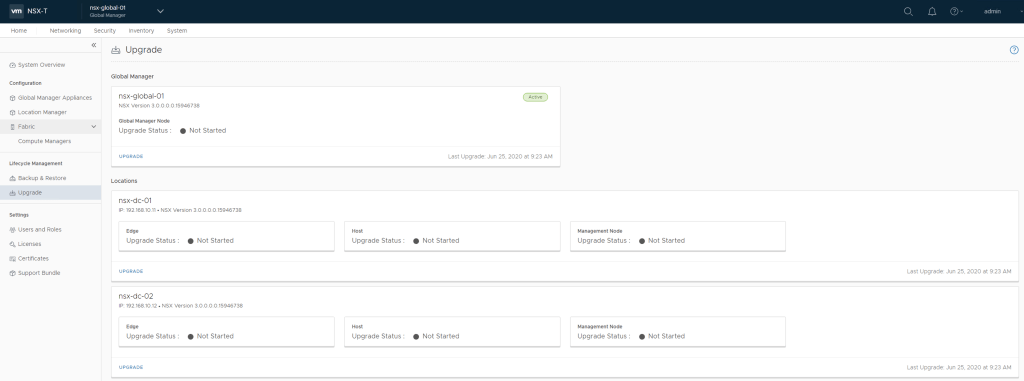
I am going to use the built-in NSX-T upgrade coordinator under the system tab for the upgrade process. The upgrade coordinator runs in the NSX Manager. It is a self-contained web application that orchestrates the upgrade process of hosts, NSX Edge cluster, NSX Controller cluster, and Management plane.
The upgrade coordinator will be upgraded first followed by the Global Manager management plane will be updated followed by the Local Managers.
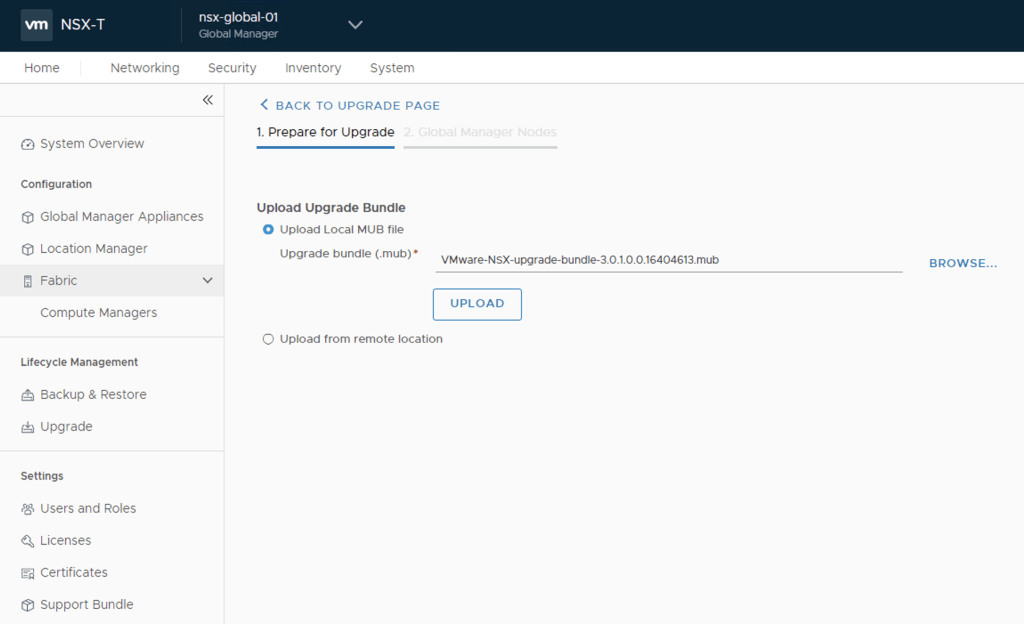
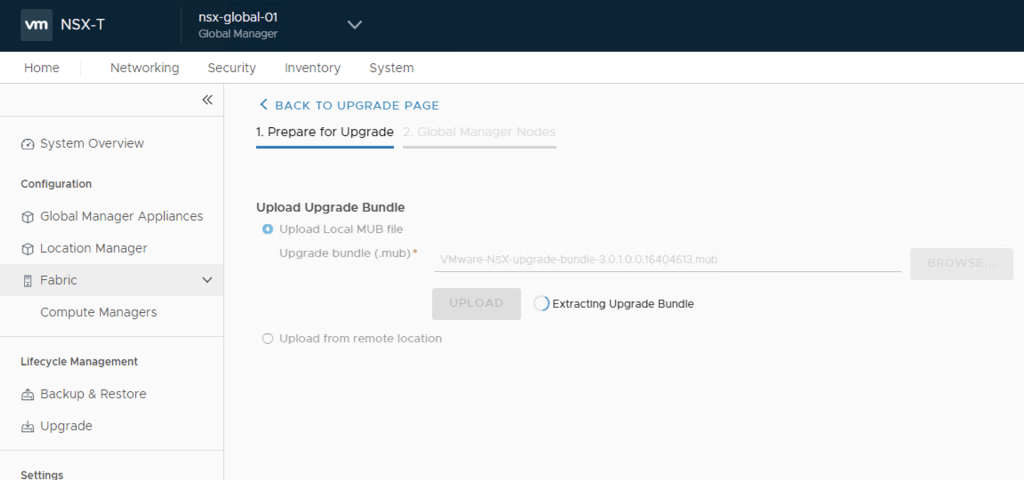
Let me start by upgrading the upgrade coordinator by clicking the blue UPGRADE notice on the Global Manager. Next I will need to upload the upgrade bundle package file so browse to where you have saved the package image and hit upload.
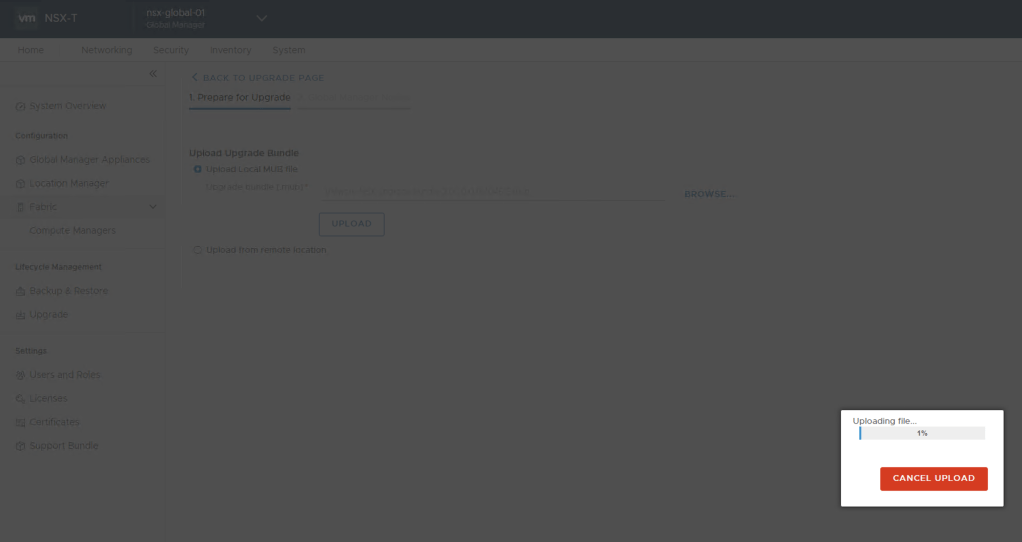
Once you hit upload, the NSX-T Manager starts uploading the image and you will see the upload progress meter as shown below – depending on your setup and bandwidth available between the NSX Manager and where the file is copied from, this could take a few minutes – Its a 8.6GB image.
Once the upload is completed, NSX-T Manager will start extracting the upgrade bundle and perform a compatibility matrix check – this can take some time too, 10-20min.
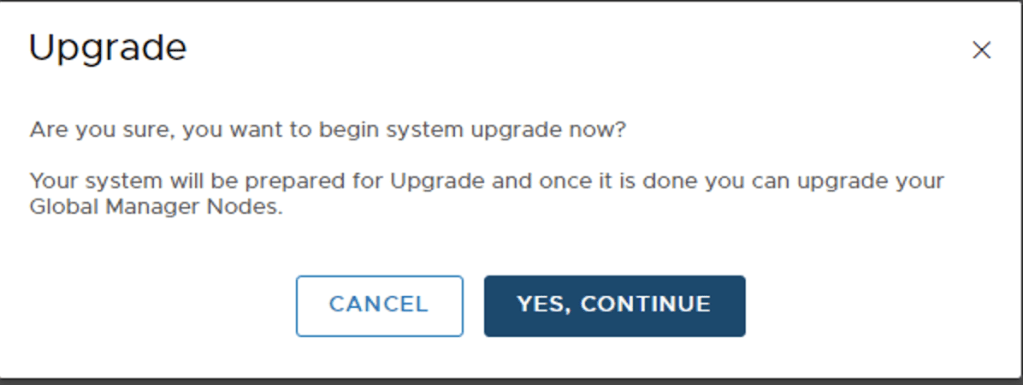
So now that all the checks have been done, we are ready to start the upgrade process on the coordinator. Let’s hit the upgrade button.

Read and accept the EULA terms, hit continue

Confirm if you are sure and want to continue… Hit Yes, Continue
At this point it seems that nothing is happening but the upgrade coordinator is being upgraded and it should take a couple of minutes.
