As I build out various demonstrations in my lab I wanted to reduce the amount of static IP allocations on my demo work loads so that I can move them between network segments for different demonstrations and with this enabling a DHCP Server in my NSX-T deployment makes sense.
So in this post I will cover the steps and procedure to follow enabling DHCP on my Local NSX-T Manager.
Overview
DHCP (Dynamic Host Configuration Protocol) allows clients to automatically obtain network configuration, such as IP address, subnet mask, default gateway, and DNS configuration, from a DHCP server.
As per VMware documentation, NSX-T Data Center supports three types of DHCP on a segment:
- DHCP local server
- Gateway DHCP
- DHCP relay.
DHCP Local Server
As the name suggests, it is a DHCP server that is local to the segment and not available to the other segments in the network. A local DHCP server provides a dynamic IP assignment service only to the VMs that are attached to the segment. The IP address of a local DHCP server must be in the subnet that is configured on the segment.
Gateway DHCP
It is analogous to a central DHCP service that dynamically assigns IP and other network configuration to the VMs on all the segments that are connected to the gateway and using Gateway DHCP. Depending on the type of DHCP profile you attach to the gateway, you can configure a Gateway DHCP server or a Gateway DHCP relay on the segment. By default, segments that are connected to a tier-1 or tier-0 gateway use Gateway DHCP. The IP address of a Gateway DHCP server can be different from the subnets that are configured in the segments.
DHCP Relay
It is a DHCP relay service that is local to the segment and not available to the other segments in the network. The DHCP relay service relays the DHCP requests of the VMs that are attached to the segment to the remote DHCP servers. The remote DHCP servers can be in any subnet, outside the SDDC, or in the physical network.
You can configure DHCP on each segment regardless of whether the segment is connected to a gateway. Both DHCP for IPv4 (DHCPv4) and DHCP for IPv6 (DHCPv6) servers are supported.
For a gateway-connected segment, all the three DHCP types are supported. However, Gateway DHCP is supported only in the IPv4 subnet of a segment.
For a standalone segment that is not connected to a gateway, only local DHCP server is supported.
Assumptions
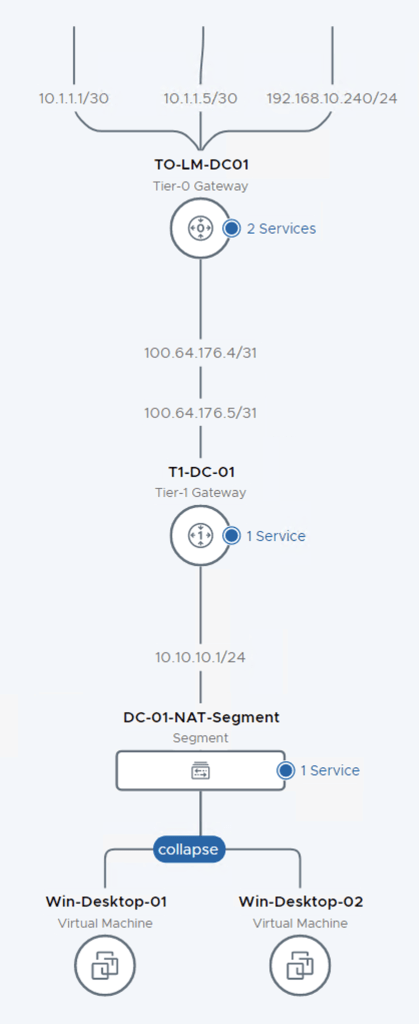
My base networking has already been configured and deployed and I will address enabling the DHCP services on one segment which I want to allocate Private IP’s too and translate these with Source based NAT to provide Internet access to this segment.
Configuration
For the purpose of this demonstration which I am working on, I will configure a DHCP Local Server on my segment with network range 10.10.10.0/24. My T1 default gateway is 10.10.10.1.
Step 1 – Create a DHCP Profile
You can create DHCP servers to service DHCP requests from VMs that are connected to logical switches.
Select Networking > DHCP > ADD DHCP Profile> Add.
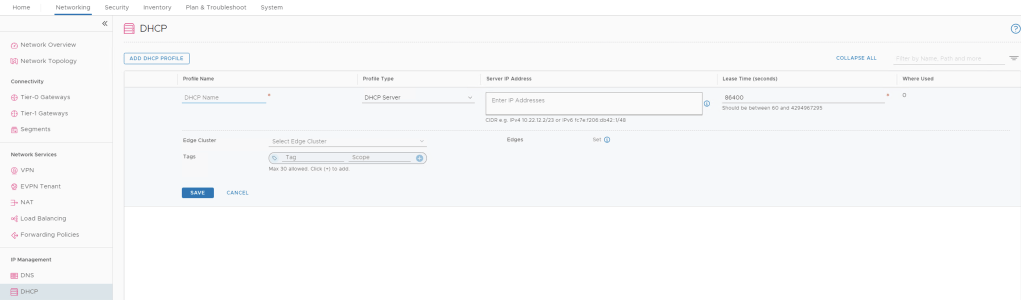
- Enter a Profile name = DHCP-LM-DC-01
- Profile Type (DHCP Server / DHCP Relay) = DHCP Server
- Enter the IP address of the DHCP server and its subnet mask in CIDR format: 192.168.10.240/24
- Lease Time (Should be between 60 and 4294967295): Default is 84600
- Select the Edge Cluster: LM-EDGE-Cluster-DC-01
- Select the Edge(s): edge-dc-03 for my lab

Once all the fields are populated, hit save

Step 2 – Attach a DHCP Server to a Segment
Networking > Segments > Select Segment
Configure a new segment or select the one you want to edit, in my case I will edit DC-01-NAT-Segment
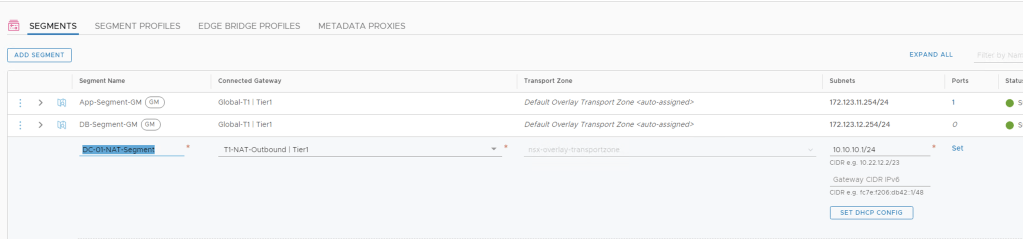
SET DHCP CONIFG
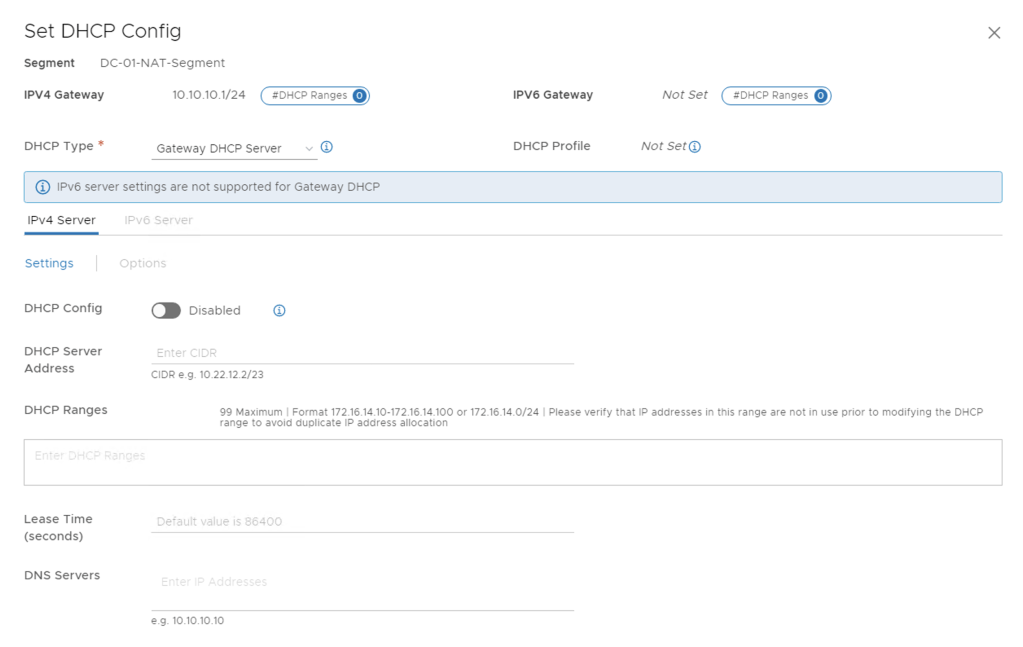
Now we need to populate the details and select the options matching our requirements.
- DHCP TYPE: LOCAL DHCP Server
- DHCP Profile: DHCP-LM-DC-01
- IP Server Settings:
- DHCP Config: Enable
- DHCP Server IP Address: 10.10.10.254/24
- DHCP Ranges: 10.10.10.10-10.10.10.100
- Lease Time (seconds): 3600
- DNS Servers: 192.168.10.5
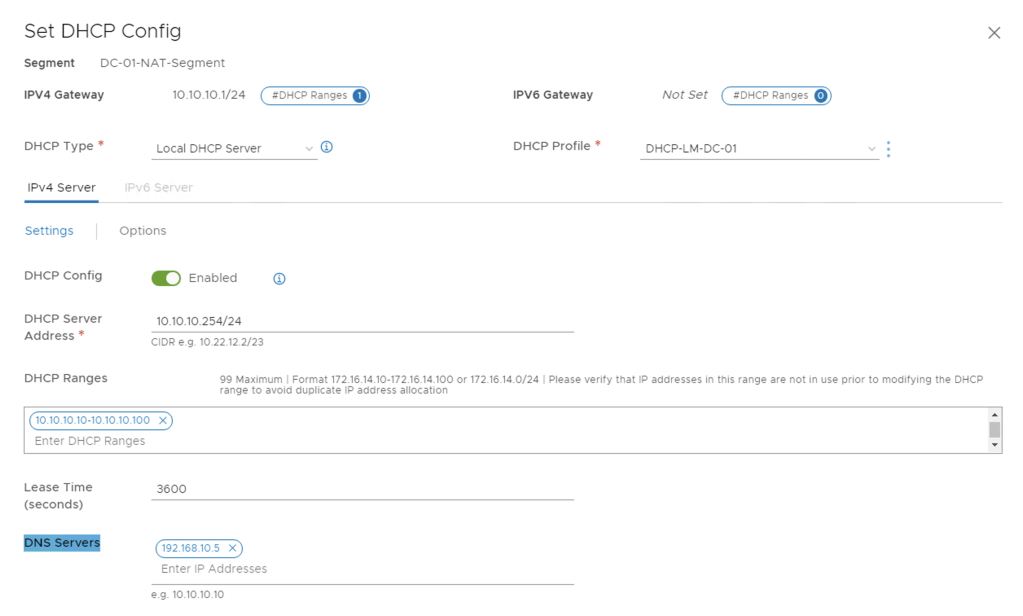
APPLY and SAVE.
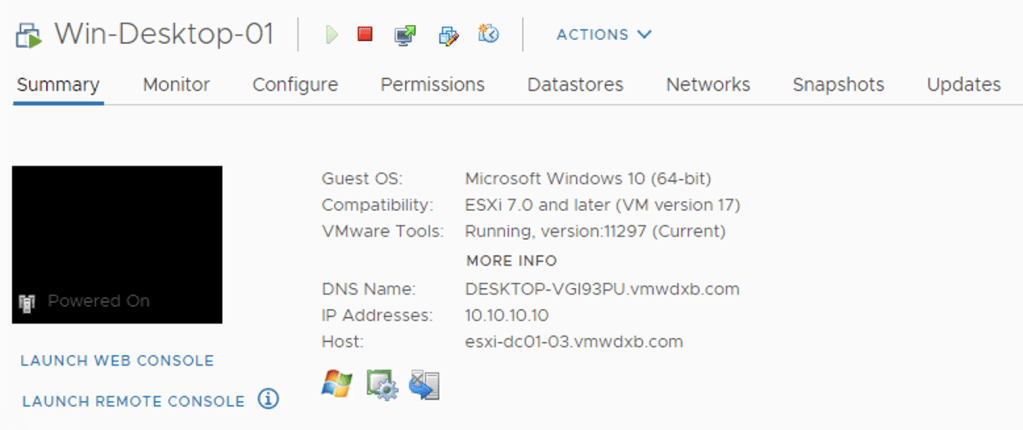
Step 3 – Attach Virtual Machine to the Network and set networking settings to DHCP
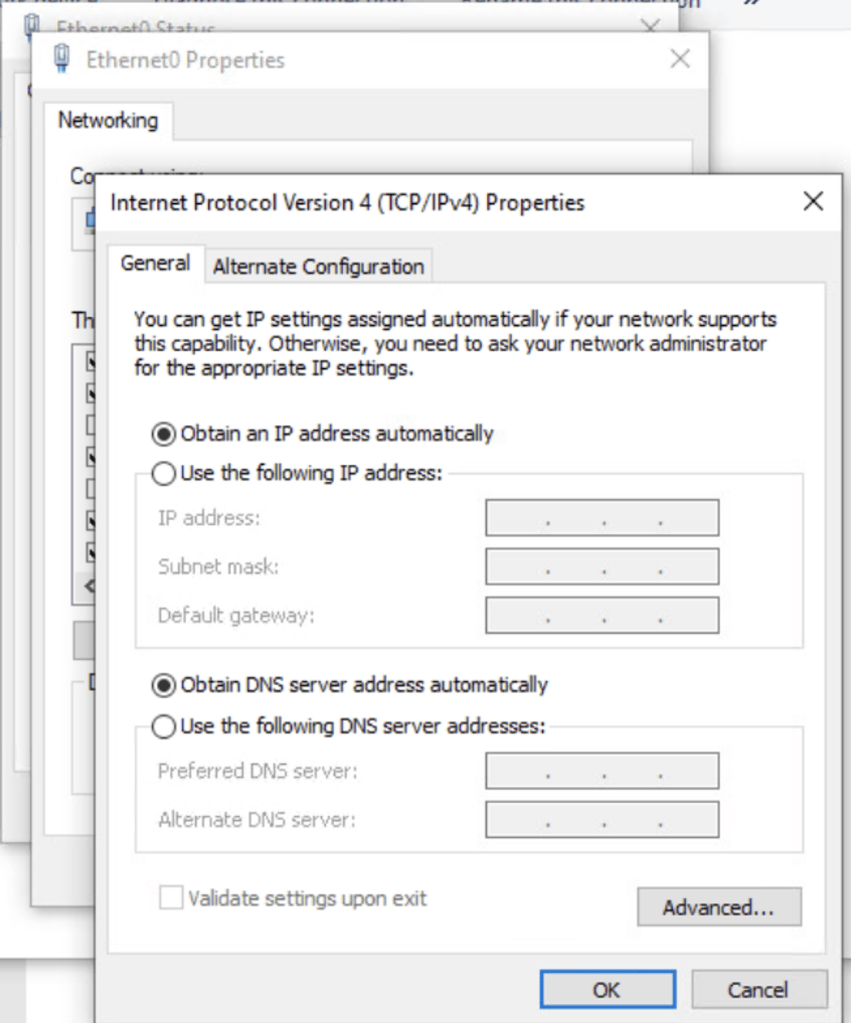
The virtual machine has succesfully obtain a dynamic IP address from the DHCP Server created in NSX-T


Hey just wanted to give you a quick heads up. The text in your content seem to be running off the screen in Safari. I’m not sure if this is a formatting issue or something to do with internet browser compatibility but I figured I’d post to let you know. The design look great though! Hope you get the issue solved soon. Cheers
LikeLike