In NSX-T 3.0 VMware introduce distributed IDS and now in NSX-T 3.1 this has been expanded to include distributed IPS. In this blog I will highlight the steps to enabled and configured distributed IDS/IPS and end with a demonstration.
Overview
Distributed Intrusion Detection and Prevention Service (IDS/IPS) monitors network traffic on the host for suspicious activity.Signatures can be enabled based on severity. A higher severity score indicates an increased risk associated with the intrusion event. Severity is determined based on the following:
- Severity specified in the signature itself
- CVSS (Common Vulnerability Scoring System) score specified in the signature
- Type-rating associated with the classification type
IDS detects intrusion attempts based on already known malicious instruction sequences. The detected patterns in the IDS are known as signatures. You can set a specific signature alert/drop/reject actions globally, or by profile.
Actions
- Alert – An alert is generated and no automatic preventative action is taken.
- Drop – An alert is generated and the offending packets are dropped.
- Reject – An alert is generated and the offending packets are dropped. For TCP flows, a TCP reset package is generated by IDS and sent to the source and destination of the connection. For other protocols, an ICMP-error packet sent to the source and destination of the connection.
***Do not enable Distributed Intrusion Detection and Prevention Service (IDS/IPS) in an environment that is using Distributed Load Balancer. NSX-T Data Center does not support using IDS/IPS with a Distributed Load Balancer.***
***Distributed IDS/IPS is a licensed feature which is not included in the traditional NSX per CPU licenses. You will need to apply the Add-On NSX Advanced Threat Prevention license in your NSX-T Manager to enable these capabilities***

Distributed IDS/IPS Configuration
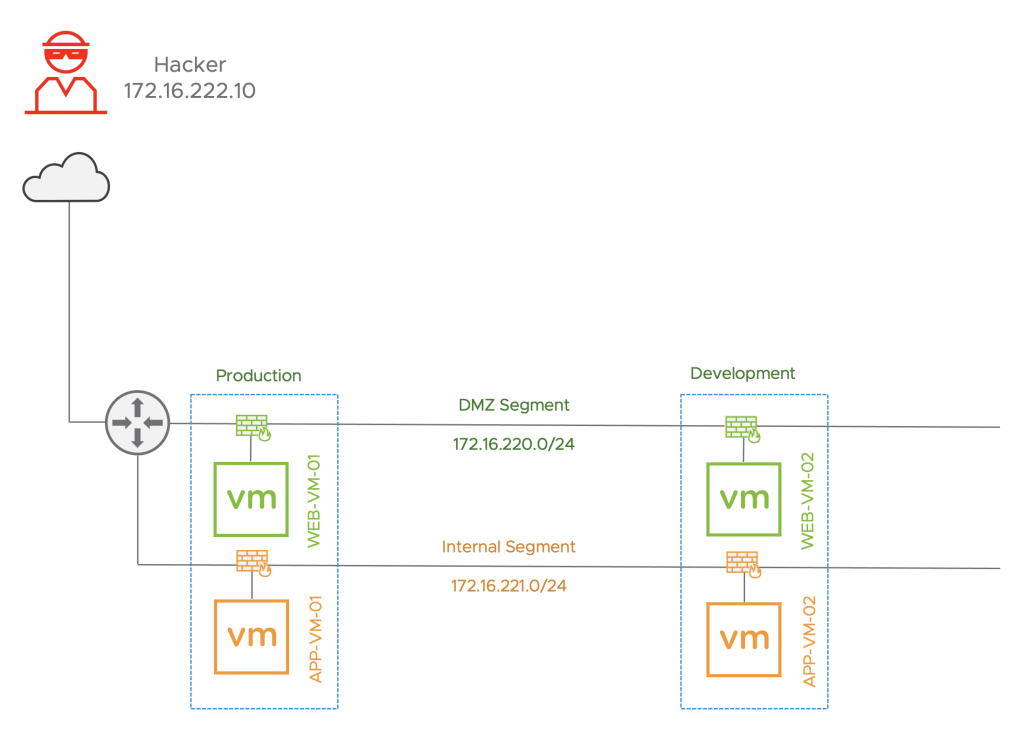
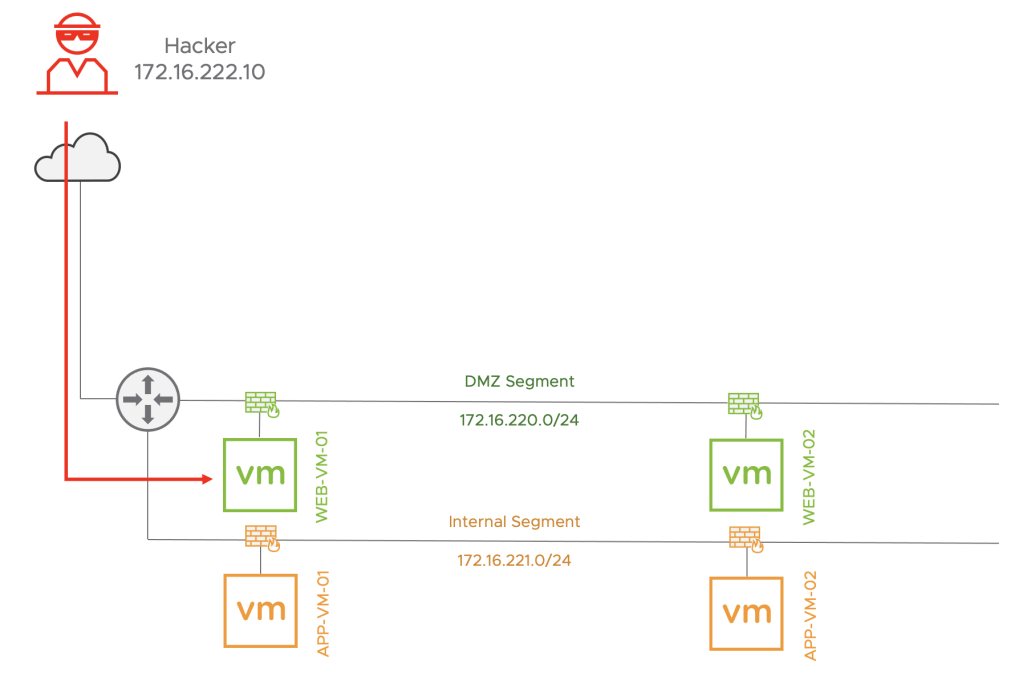
I will be using the topology highlighted below for this demonstration setup so I will do some pre-work configurations in NSX-T so that I can consume these in the subsequent steps (Creating Segments, T1/T0, Demo Virtual Machines, Groups)
Pre-Work
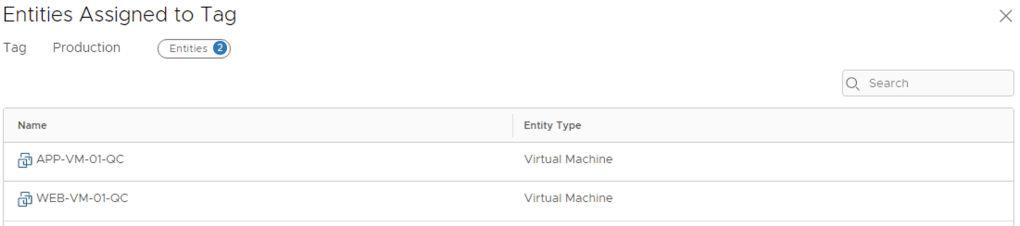
- Create 2 Tags for the workloads: Home -> Inventory -> Tags ->Add Tag
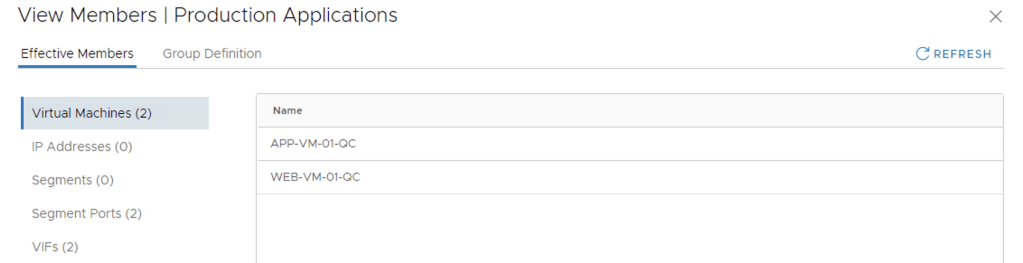
- Name: Production
- Assign: WEB-VM-01 and APP-VM-01
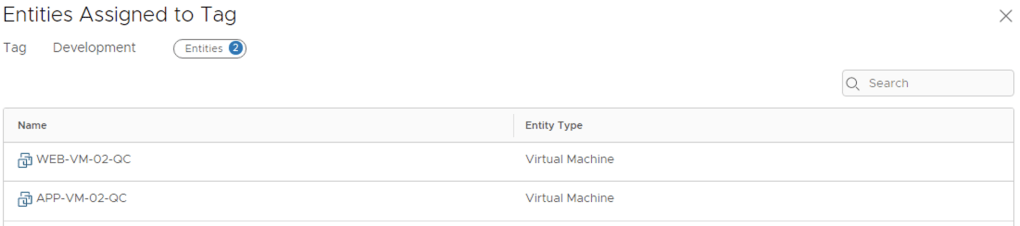
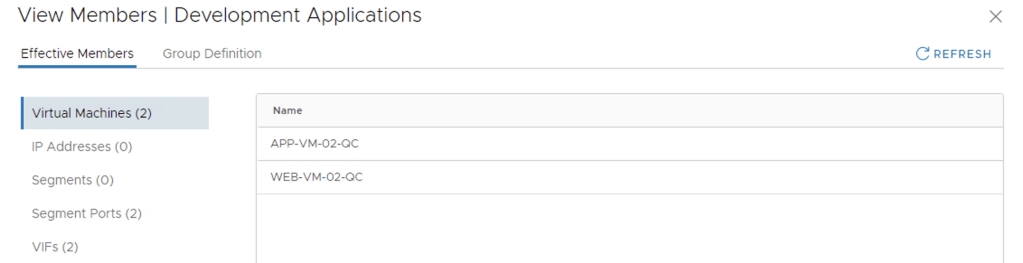
- Name: Development
- Assign: WEB-VM-02 and APP-VM-02
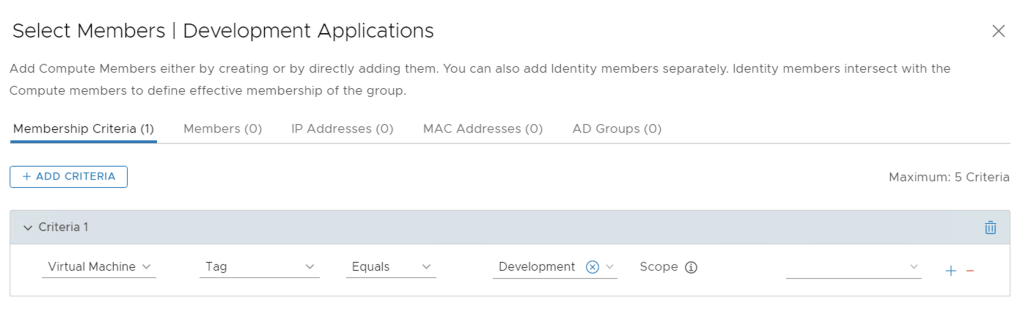
- Create 2 Groups for the Workloads: Home -> Inventory -> Groups
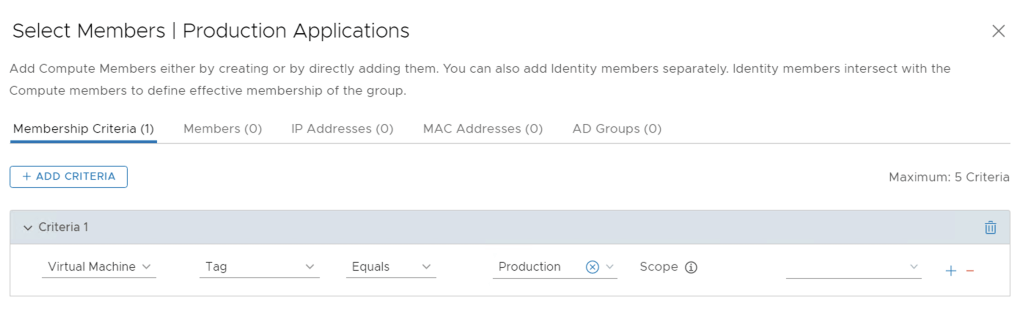
- Name: Production Applications
- Compute Members: Membership Criteria: Virtual Machine Tag Equals: Production
- Name: Development Applications
- Compute Members: Membership Criteria: Virtual Machine Tag Equals: Development
- Confirm previously deployed VMs became a member of appropriate groups due to applied tags. Click View Members for the 2 groups you created and confirm
1. Enable IDS/IPS on hosts, download latest signature set, and configure signature settings.
Home -> Security -> Distributed IDS/IPS -> Settings
NSX-T IDS/IPS can automatically apply signatures to your hosts, and update intrusion detection signatures by checking our cloud-based service

- Intrusion Detection and Prevention Signatures = Enable Auto Updates. The NSX-T Manager requires Internet access for Auto Updates.
- Enable Intrusion Detection and Prevention for Cluster(s) = DC-02-Compute, select the cluster where you workloads are and select enable. When prompted “Are you sure you want to Enable Intrusion Detection and Prevention for selected clusters?” click YES

NSX can automatically update it’s IDS signatures by checking the cloud-based service. By default, NSX manager will check once per day and VMware publishes new signature update versions every two week (with additional non-scheduled 0-day updates). NSX can also be configured to optionally automatically apply newly updated signatures to all hosts that have IDS enabled.
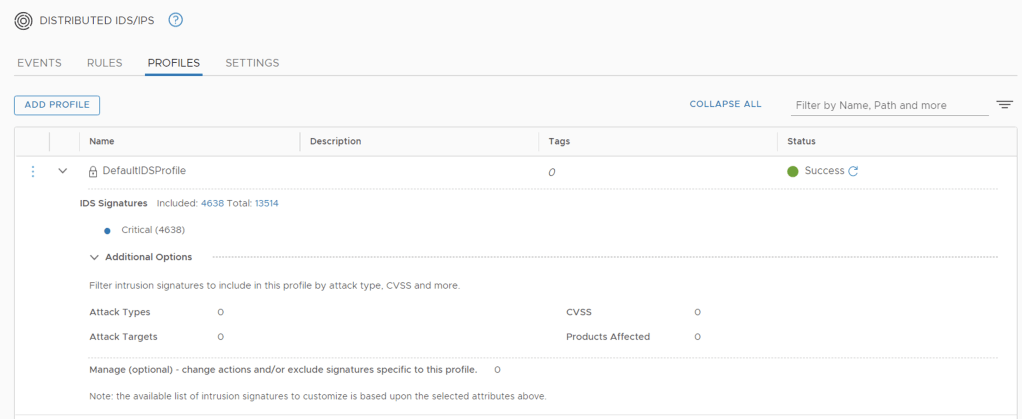
2. Create IDS/IPS profiles
Home -> Security -> Distributed IDS/IPS -> Profiles
IDS/IPS Profiles are used to group signatures, which can then be applied to select applications. You can create 24 custom profiles in addition to the default profile
We will be create two new IDS/IPS profiles, one for Production and another one for Development
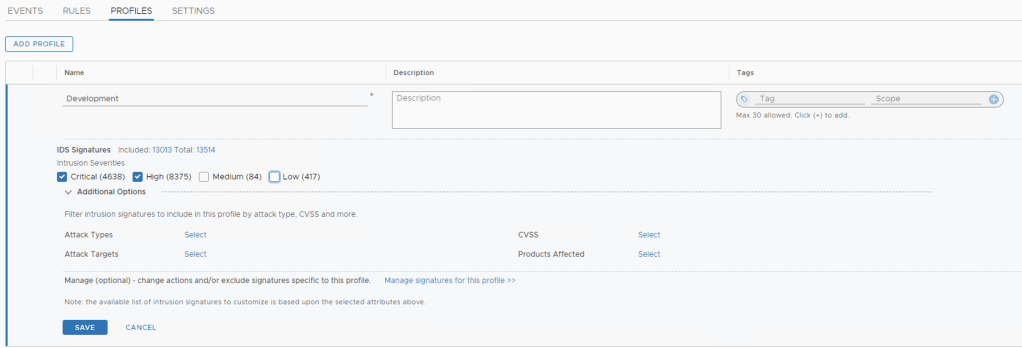
Home -> Security -> Distributed IDS/IPS -> Profiles -> ADD PROFILE
- Name: Production
- Signatures to Include: Critical, High, Medium

- Name: Development
- Signatures to include: Critical & High

3. Create IDS/IPS rules
IDS/IPS rules are used to apply a previously created profile to select applications and traffic. I am going to create one rule for the Production VM’s and a second rule for the Development VM’s
Home -> Security -> Distributed IDS/IPS -> Rules -> Add Policy
- Click Add a New Policy – Renamed my default name to NSX Demo
Now lets create the Production Policy Rule
- Add a Rule to the Policy – Click ADD RULE
- Rule Name: Production Policy
- IDS Profile: Production
- Applied to Group: Production Applications
- The rest is left default
Next we create the Development Policy Rule
- Add a Rule to the Policy – Click ADD RULE
- Rule Name: Development Policy
- IDS Profile: Development
- Applied to Group: Development Applications
- The rest is left default

Last step is to publish the Policy – Click Publish on the top left.
The mode setting will determine if we are doing IDS or IDS/IPS.
- Detect Only – Detects signatures and does not take action.
- Detect and Prevent – detects signatures and takes into account profile or global action of drop or reject.
There are some other optional settings when you click on the gear at the end of the rule:
- Logging
- Direction
- IP Protocol
- Log Label
4. Verify IDS/IPS status on hosts
To use the NSX virtual appliance CLI, you must have SSH access to an NSX virtual appliance. Each NSX virtual appliance contains a command-line interface (CLI)
- Open a ssh session to one of the ESXi hosts
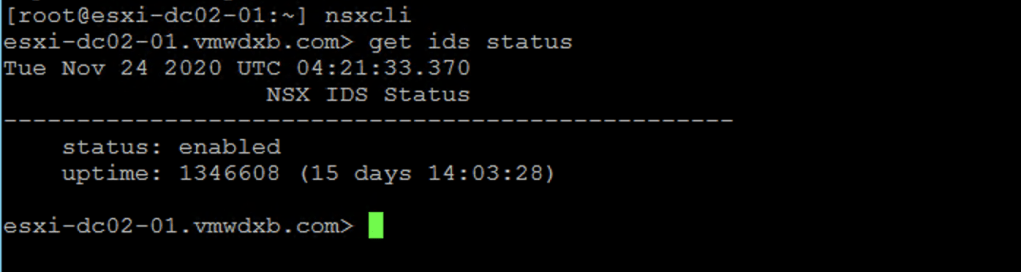
- Enter nsxcli command to open the NSX-T Data Center CLI.
- To confirm that IDS is enabled on this host, run the command get ids status
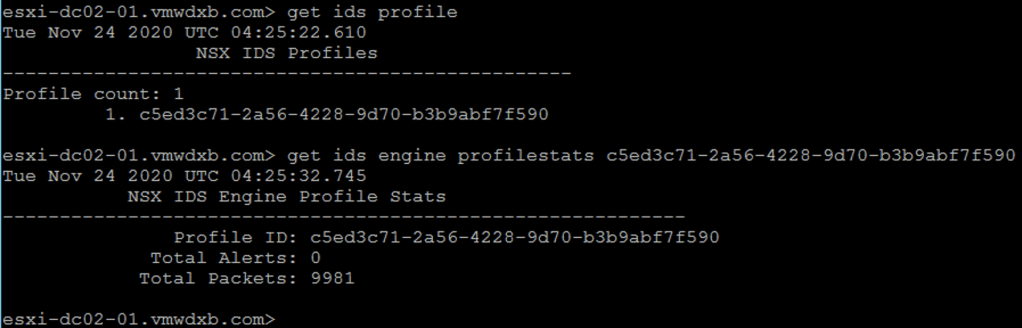
- To confirm both of the IDS profiles have been applied to this host, run the command get ids profile

- To review IDS profile (engine) statistics including the number of packets processed and alerts generated, run the command get ids engine profilestats <tab_to_select_profile_ID>
5. Distributed IDS/IPS Events
I have set up basic demonstration using Metasploit to launch a simple exploit against the Drupal service running on the Web-VM-01 and confirm the NSX Distributed IDS/IPS was able to detect this exploit attempt.
In this demonstration, the IDS/IPS engine is set to detect only

When I trigger the exploit from the Hacker to WEB-VM-01, I am able to do a reverse shell and gather system information on the victim.

Now when I go over to the IDS/IPS dashboard in NSX-T, I can see the event and expand to see the details and showing this as a detected only event.
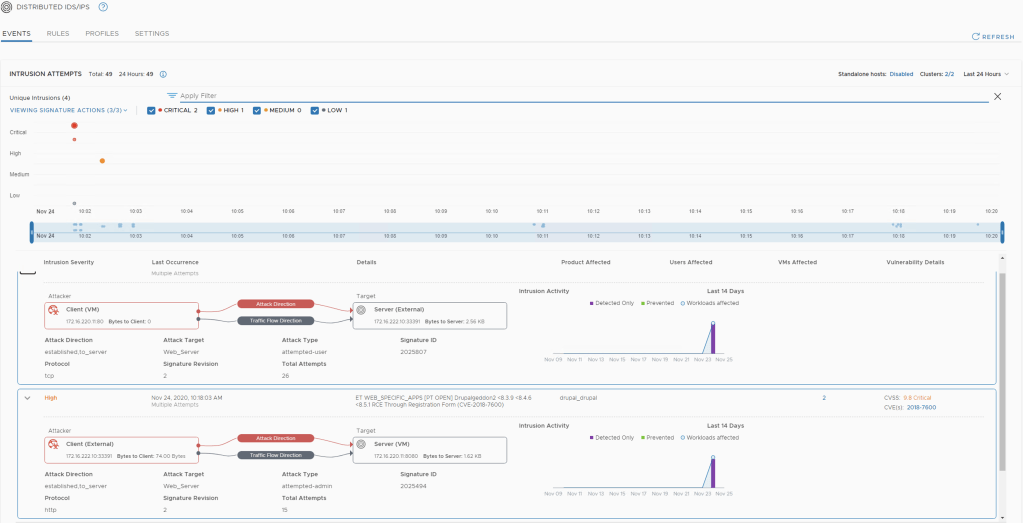
IDS/IPS Dashboard
Thank-you you taking the time to read the blog, if you found it useful or have any feedback feel free to ping or provide comments.

2 thoughts on “NSX-T 3.1 – Deploying Distributed IDS/IPS”