In this blog post I will cover NSX-T UI integrated with vCenter introduced in NSX-T 3.2.0. This feature allows the VI admin deploy the NSX Manager from the vCenter UI and then do NSX Networking and Security configurations from the vCenter UI. I will focus on the Security use case.
In my previous post I covered a similar topic – VMware NSX Switch Agnostic Distributed Security but it was focused on doing all the configurations via an NSX-T Manager using the NSX Deployment wizard of NSX-T for common use cases.
Overview
As described in the NSX-T 3.2.0 release notes
NSX-T UI Integrated in vCenter – NSX-T can now be installed and configured via the vCenter UI with the vCenter plugin for NSX-T. This feature is supported ONLY from vCenter 7.0U3 onwards.
As a VI admin, you can install NSX Manager and NSX-T for virtual networking or security-only use case. The Virtual Networking deployment workflow includes both networking and security use cases. In contrast, if you choose to configure Security Only type of deployment, then you cannot configure virtual networking on the selected cluster hosts.
Prerequisites
The feature was introduced with vCenter v7.0.3 but does work with hosts which are at least compatible with vCenter v7.0.3 and workloads need to be attached to dvportgroups on a VDS 6.6 or later.
- Ensure that ESXi host version is compatible with vCenter Server version v7.0.3.
- Ensure that vCenter Server version is v7.0.3 or later.
- To provision a thick disk, ensure the disk size on host has at least 300GB free space.
- Configure a vSphere Distributed Switch (VDS) switch on hosts. Only VDS 6.6 or later is supported.
- Ensure vCenter Server points to an FQDN address and the DNS server must be able to resolve the address.
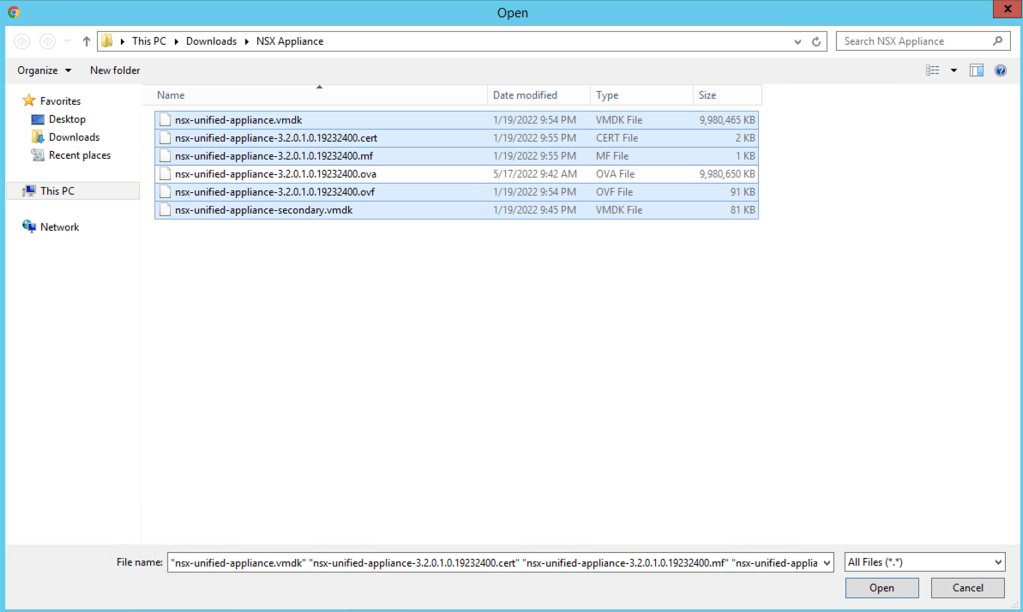
NOTE: When deploying the NSX-T Manager from vCenter you need to download these specific files from VMware download page. “There is a separate OVF file available for NSX Manager deployed from vSphere Client.”
- NSX Manager with vCenter Plugin OVF File
- NSX Manager with vCenter Plugin CERT File
- NSX Manager with vCenter Plugin MF File
- NSX Manager with vCenter Plugin System Disk File
- NSX Manager with vCenter Plugin System Disk File Secondary
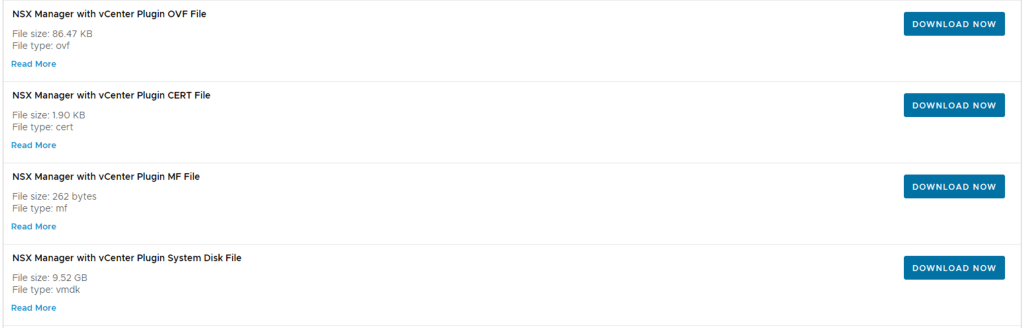
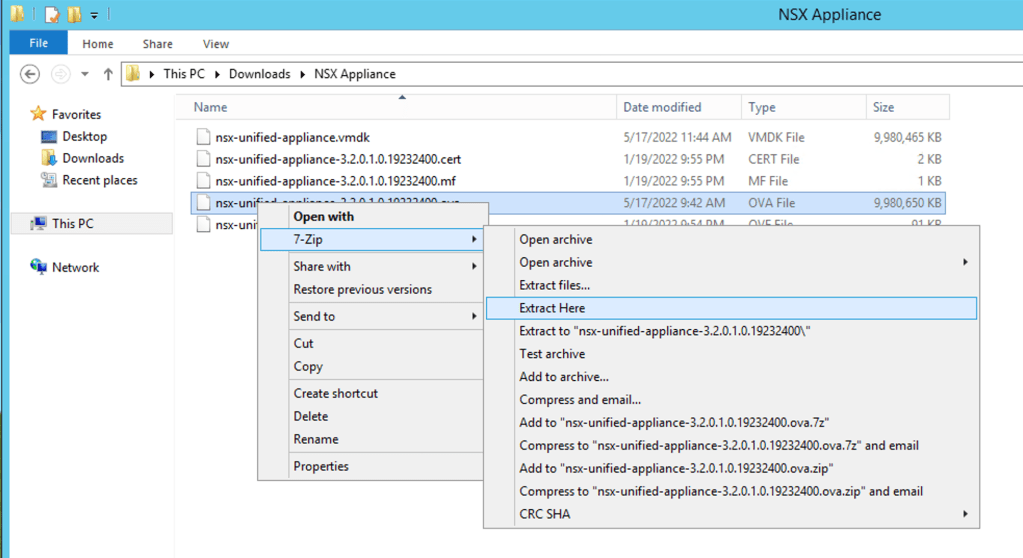
If you downloaded the complete OVA package you could use a tool extract the contents of the OVA and extra these files. I used 7-Zip.
NOTE: In NSX-T Data Center 3.2, only a single NSX Manager cluster is supported.
The deployment involves only deploying a single NSX-T Manager and therefor you should make sure to take a configuration back-up of the NSX-T Manager configuration and rely on vSphere High-Availability to protect the NSX Manager VM.
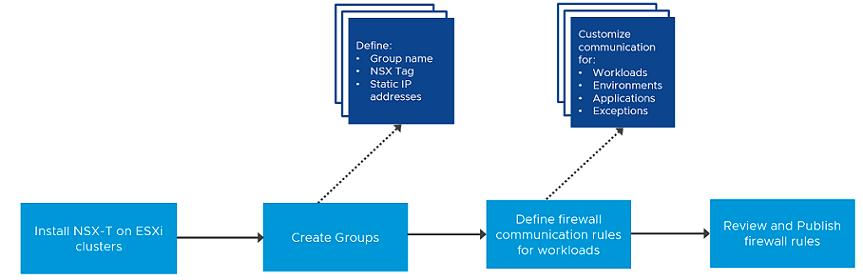
Workflow
The workflow has a few simple steps to get from zero to Hero!
I have a simple setup which I will focus on how to get the NSX Manager deployed and run through a basic Firewall rule creation process.
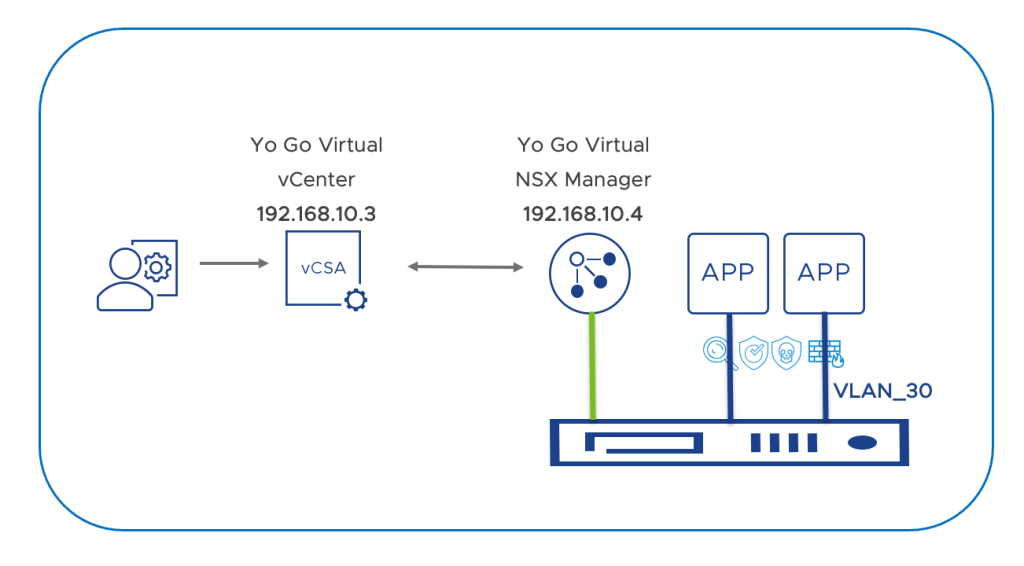
My demo setup consists of the following components and versions
- vCenter virtual Appliance – Version 7.0.3.00600, Build number 19717403
- VMware ESXi, 7.0.3, 19482537
- VDS – Version 7.0.3
- NSX-T Manager: Version 3.2.0.1
Before proceeding make sure you have the files mentioned above ready and accessible.
NSX Manager Deployment
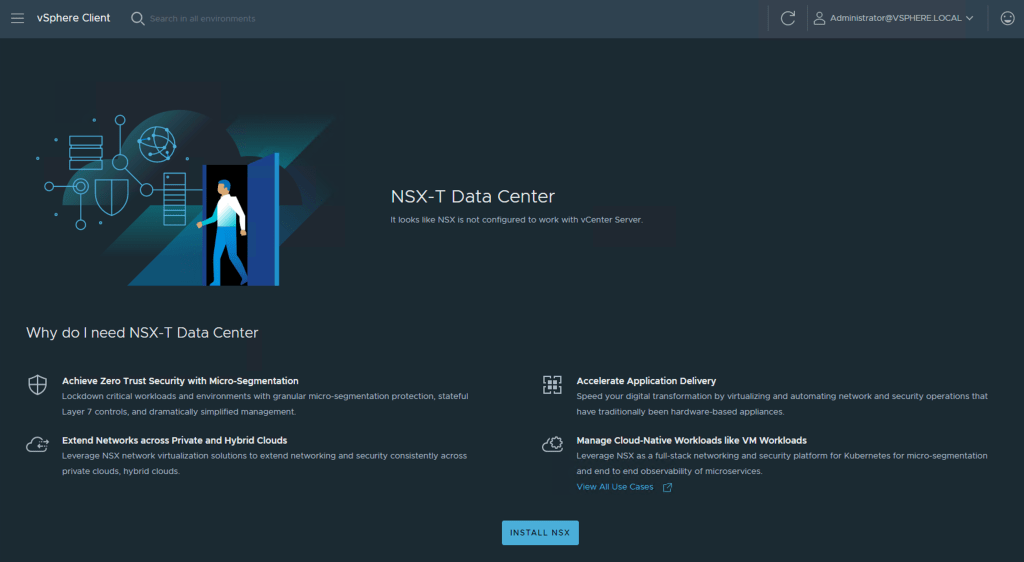
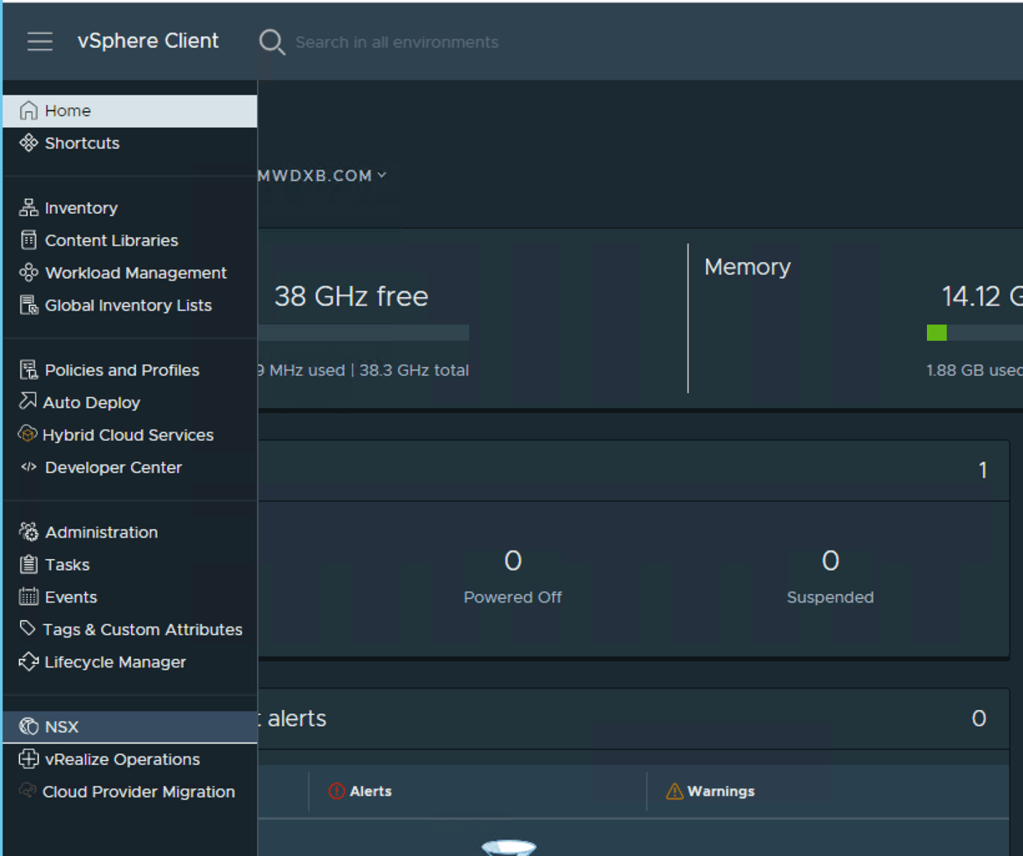
Step 1 – Lets start -> vCenter UI -> Home -> Drop menu -> NSX
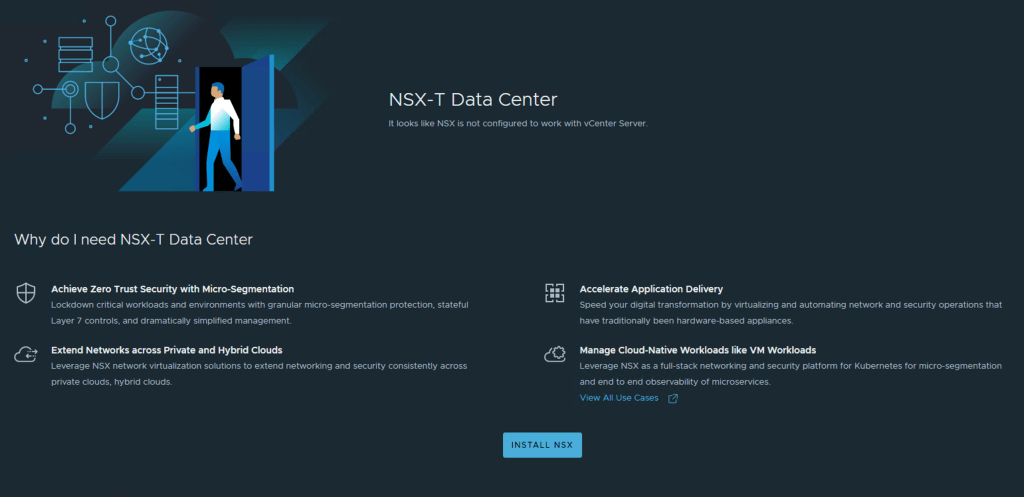
At this point you would have decided if you are going to deploy the full stack NSX which includes Network and Security or Security only – I am covering the Security Use Case here
Step 2 – Click Install NSX
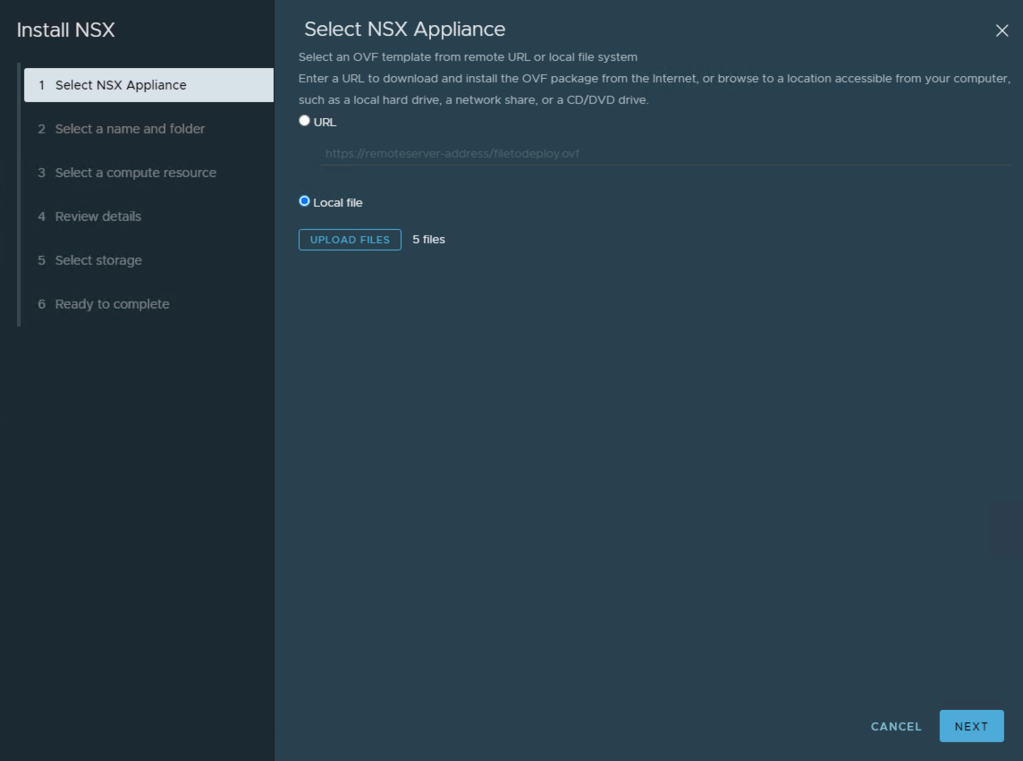
Step 3 – We need to locate the NSX Manager OVA file, either you published on a URL or you have it downloaded to your local machine. In my case, I have downloaded the OVA from VMware’s website and will follow that option. Click Local File
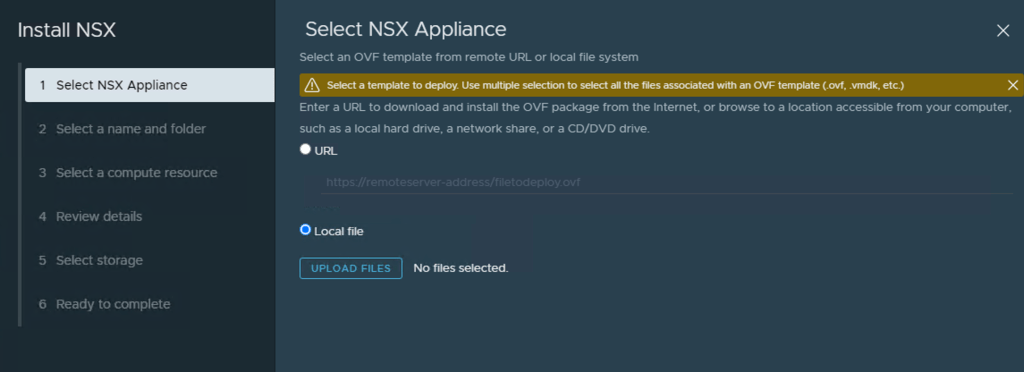
Then Click Upload Files and select the five (5) files and click Open. Below I have an additional file in my directory which was the OVA I dowloaded and just extracted to the contents to this local directory.
Now Click Next at the bottom Right
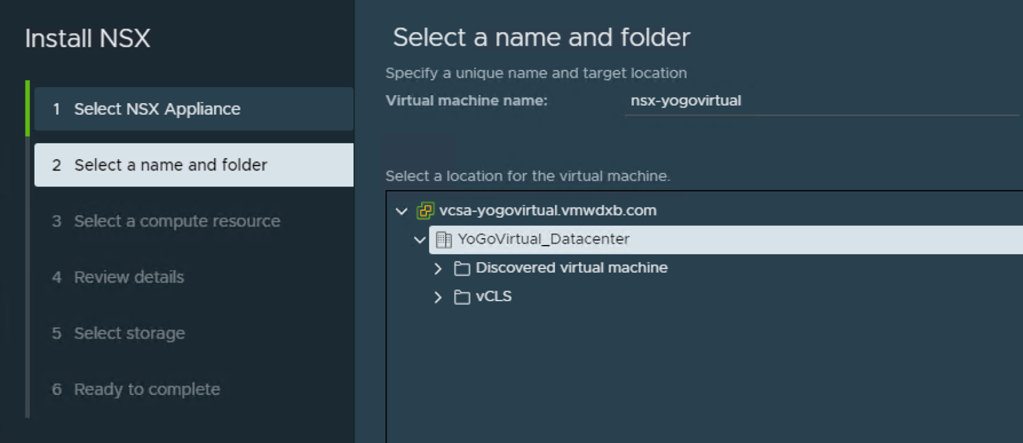
Step 4 – Now we need to specify the deployment details of the NSX Manager VM which will be deployed in vCenter – we will be deploying the NSX Manager on compute managed by the vCenter that we are integrating NSX-T too.
Select a name for NSX VM Manager VM and deployment location – I just named it nsx-yogovirtual. I created a DNS entry in my local DNS for the same and mapped it to the IP address I will be using in the next few steps. Click Next
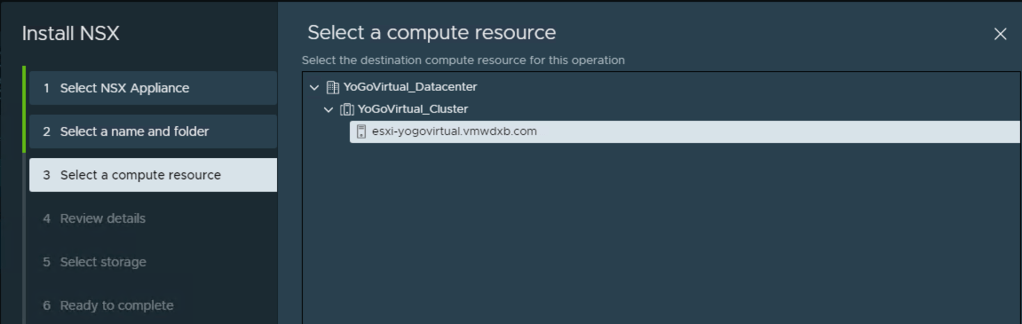
Select a compute resource – Click Next
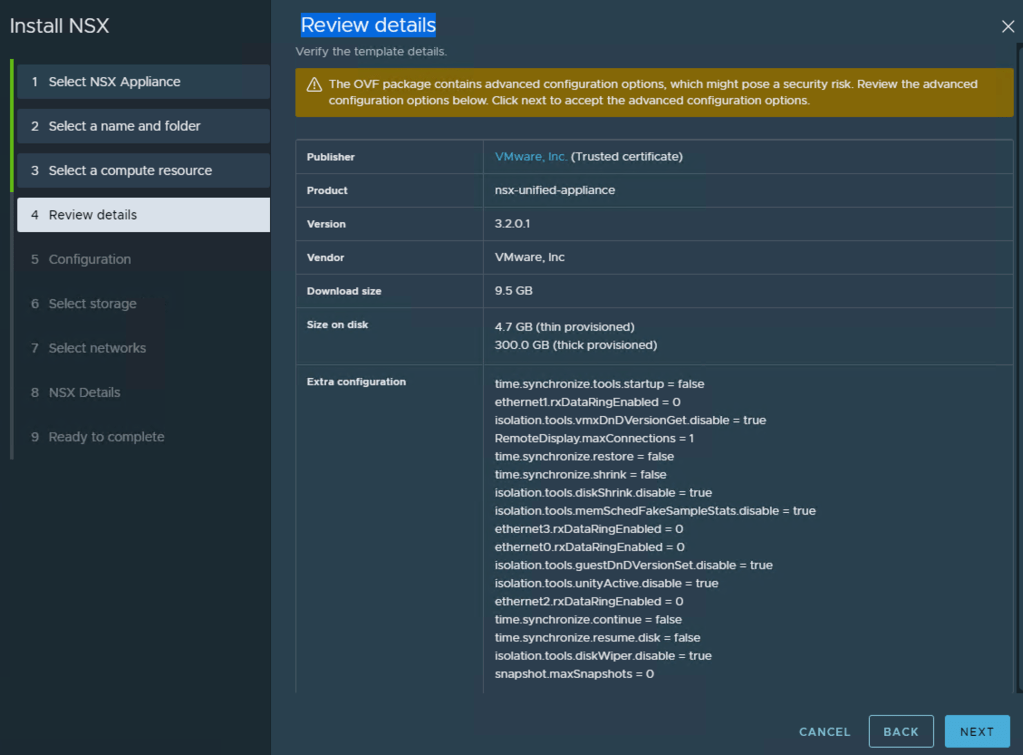
Review details – Click Next
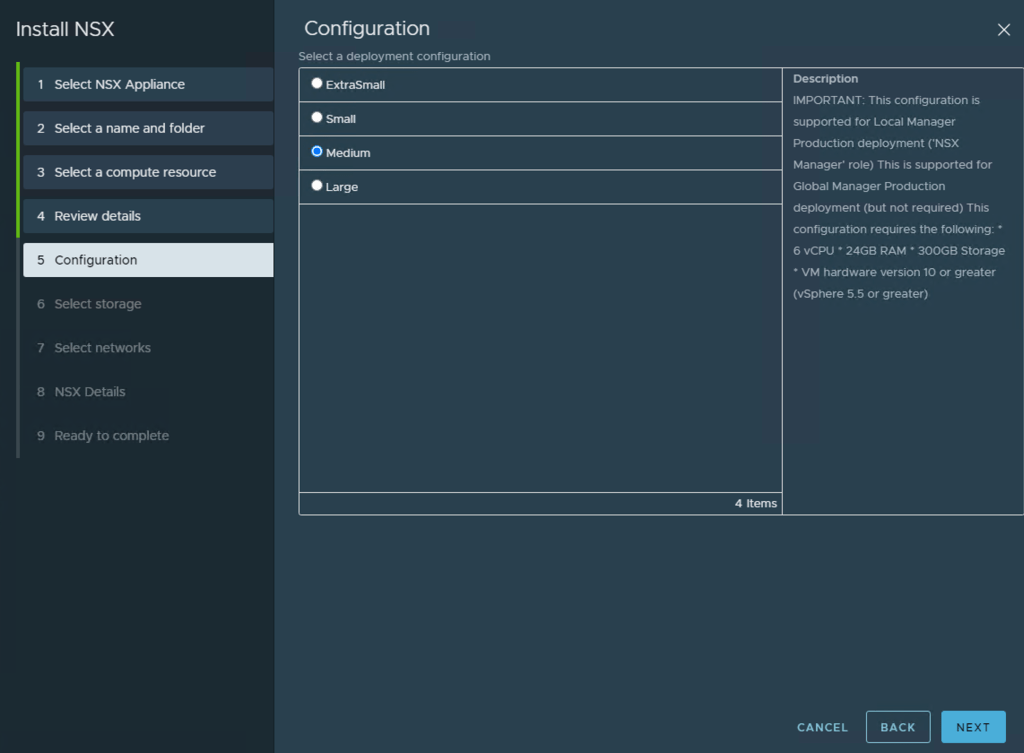
Configuration – Select the appropriate NSX Manager deployment configuration for your environment, I selected Medium. Click Next
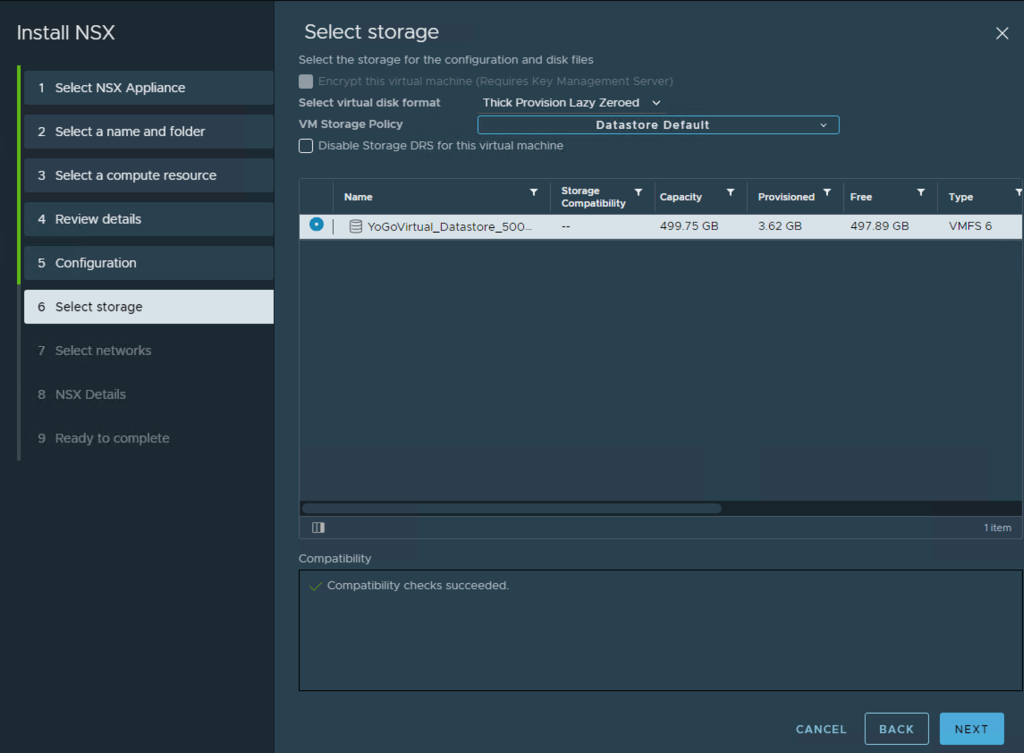
Select Storage – Select the datastore that you want the NSX Manager deployed too. Click Next
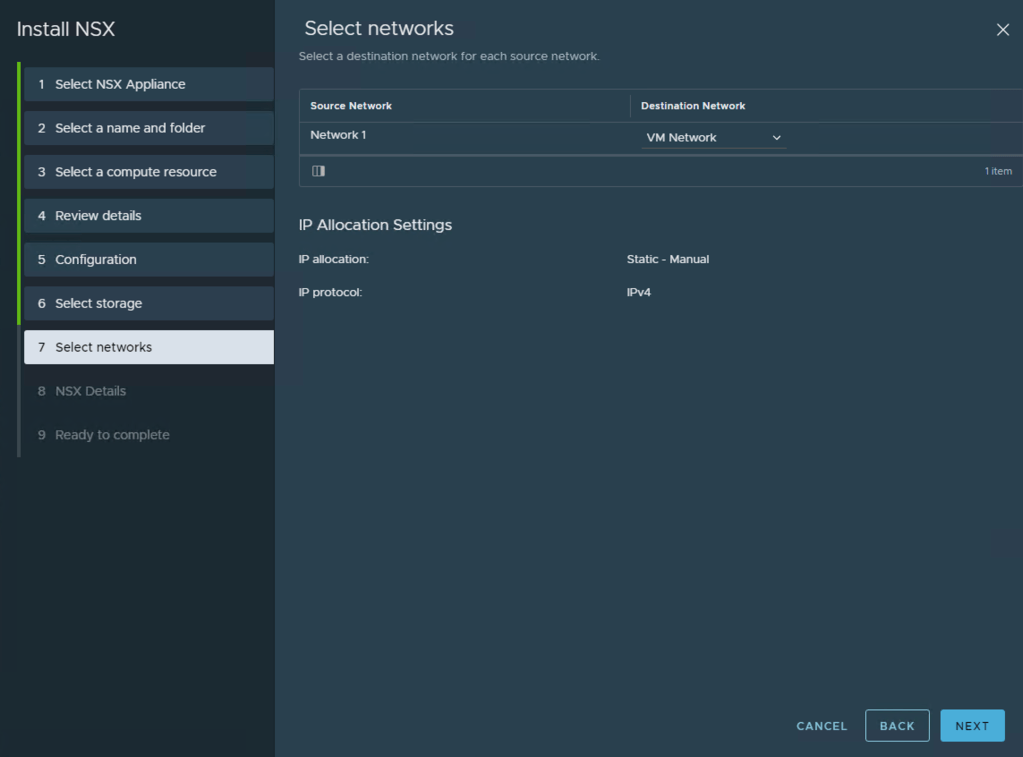
Select Networks – Below the Destination Network, click on the drop menu there and select the correct portgroup where the NSX Manager will be connected too – remember the NSX Manager needs to have reachability to vCenter and the ESXi hosts once deployed.
Once selected, click Next
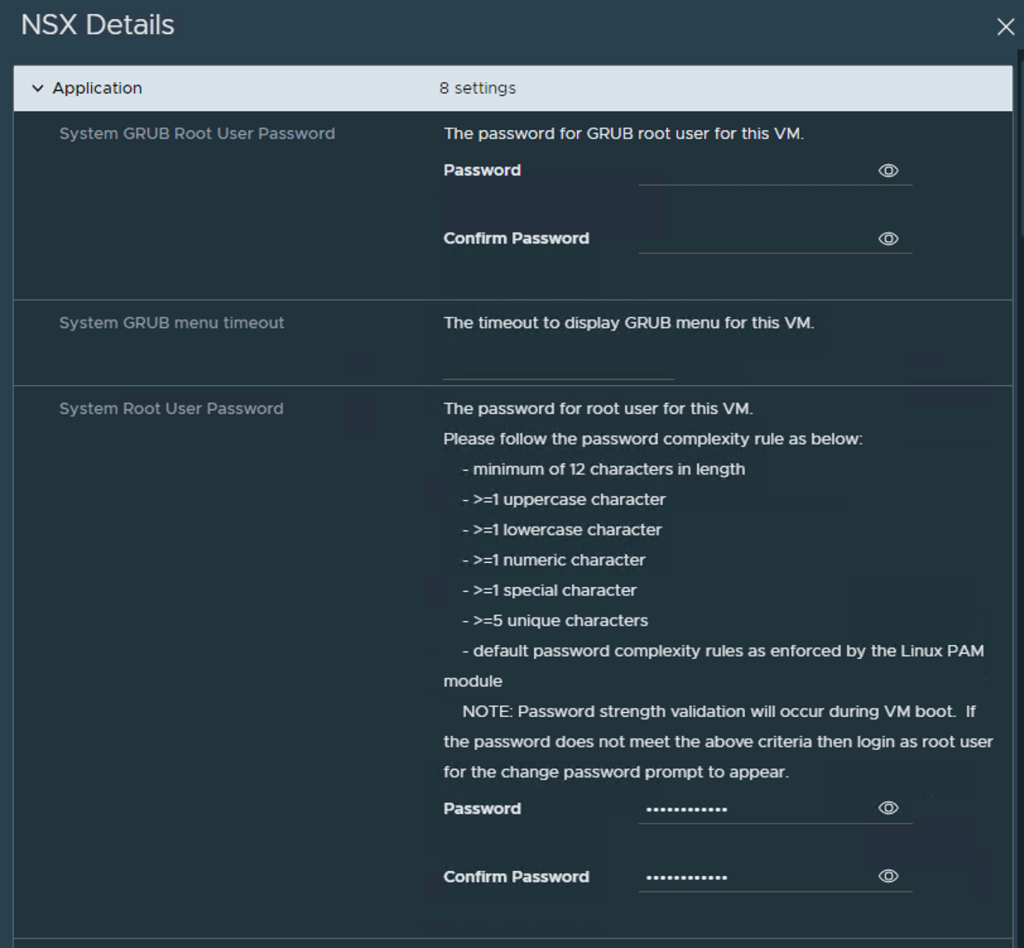
NSX Details – Now we need to configure both system root and admin passwords and then specify the IP details for the NSX Manager. The other settings are optional or can be ignored.
System Root User Password
The password for root user for this VM.
Please follow the password complexity rule as below:
– minimum of 12 characters in length
– >=1 uppercase character
– >=1 lowercase character
– >=1 numeric character
– >=1 special character
– >=5 unique characters
– default password complexity rules as enforced by the Linux PAM module
Enter the password under System Root User Password and confirm the password too.
Now enter a password CLI “admin” User Password

Now Move the slide bar on the right hand side down so that you can enter the IP address details.
Below is a list of all the details I populated, the rest are optional can be ignored.
- Hostname: nsx-yogovirtual
- Rolename: nsx-manager
- Management Network IPv4 Address: 192.168.10.4
- Management Network Netmask: 255.255.255.0
- Default IPv4 Gateway: 192.168.10.253
- DNS Server list: 192.168.10.5
- Domain Search List: vmwdxb.com
- NTP Server List: ae.pool.ntp.org
- Enable SSH: enabled
- Allow root SSH logins: enabled
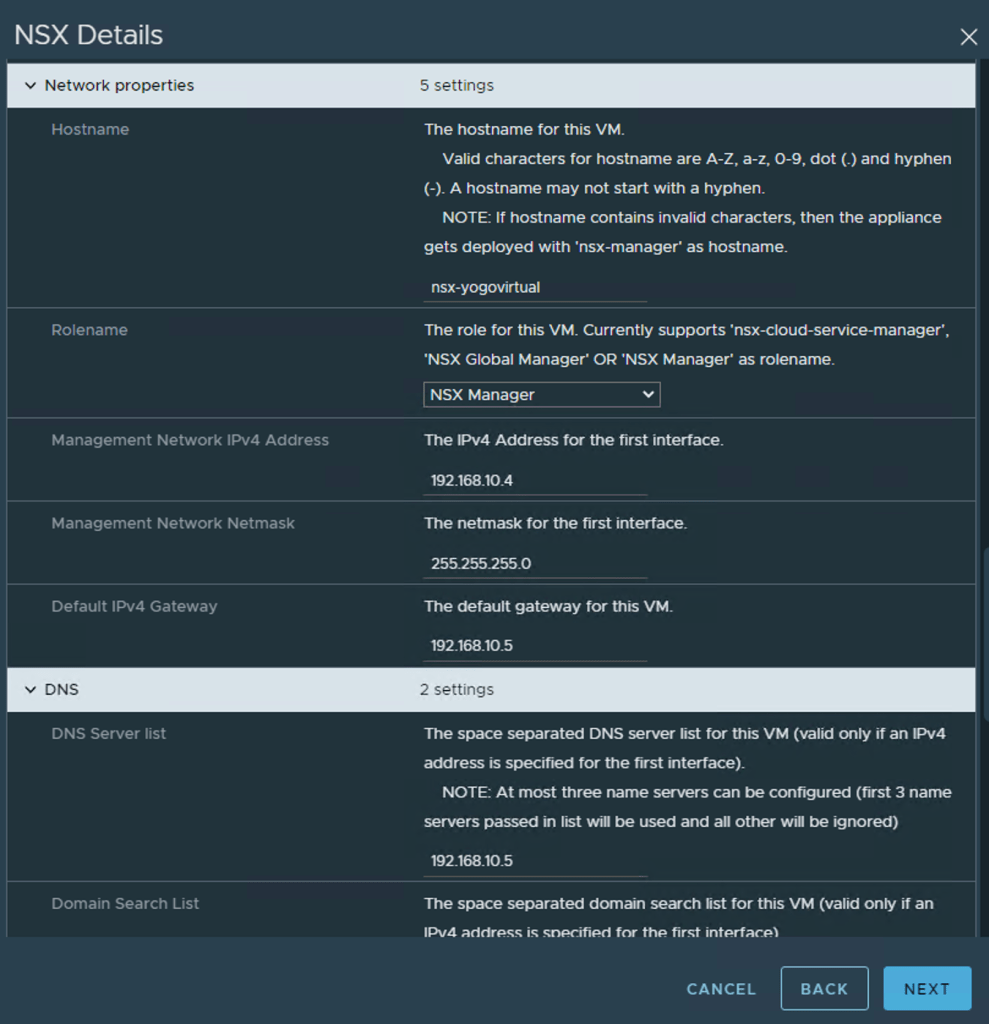
Once all the details have been populated, Click Next
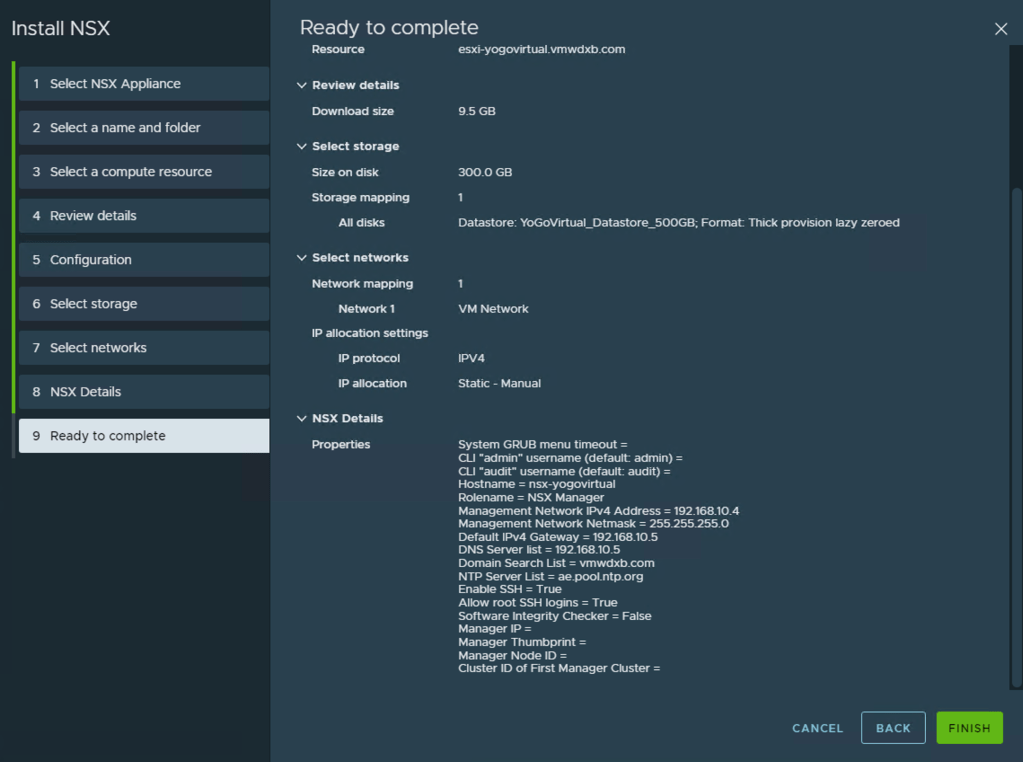
Ready to Complete – Review all the settings and if everything is in order, Click Finish
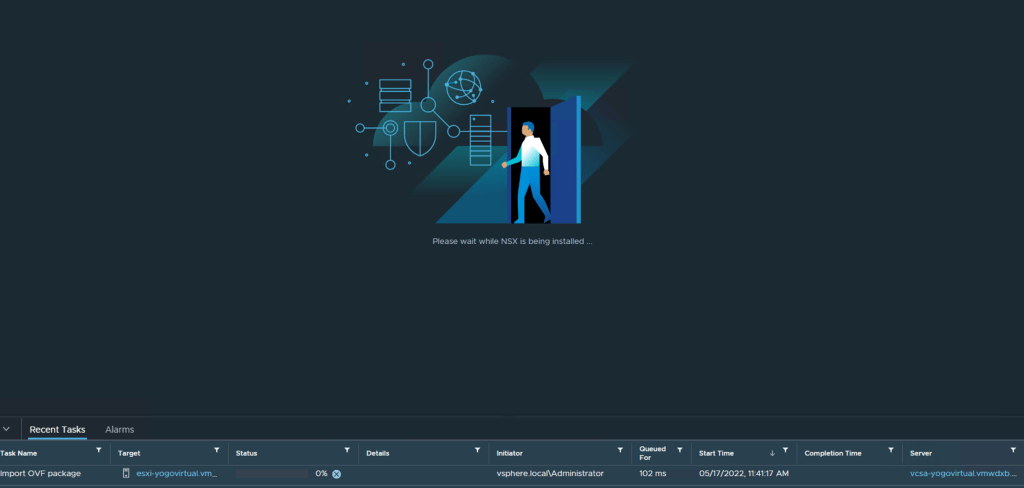
vCenter will now start creating the NSX Manager VM and importing the deployment package.
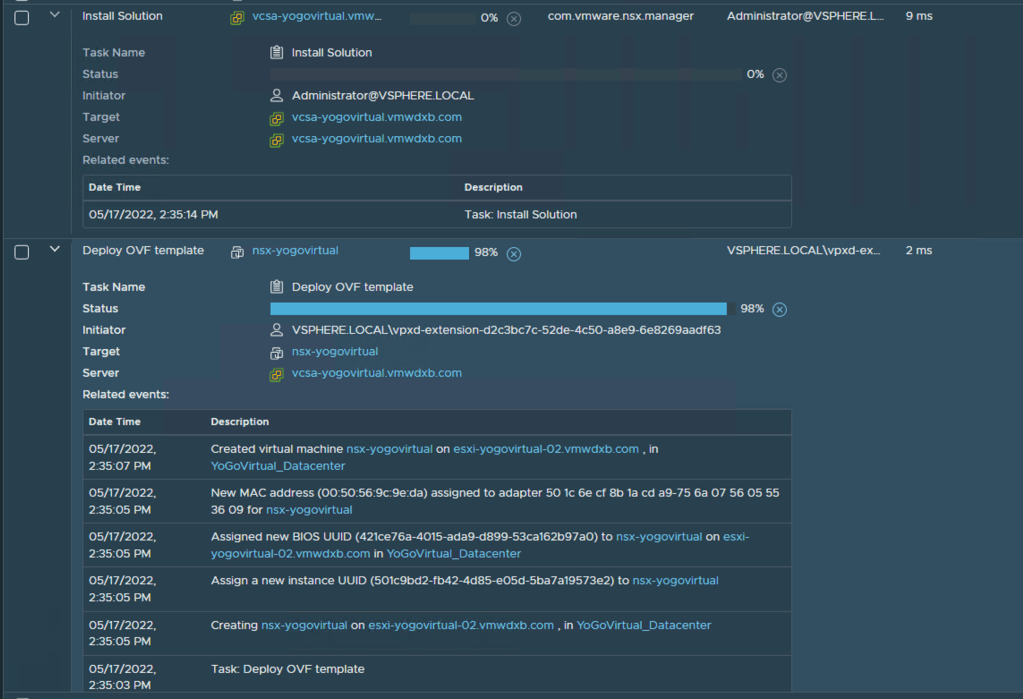
Once the deployment has completed and the NSX Manager is powered on by vCenter and it will take sometime for all the services to start up.
Step 4 – Open a page to the NSX Manager UI and login with the admin user details and accept the agreement.
***I found that the VMware documentation was not 100% clear on this point and I noticed that my plugin pop-up only appeared once I done this step.***
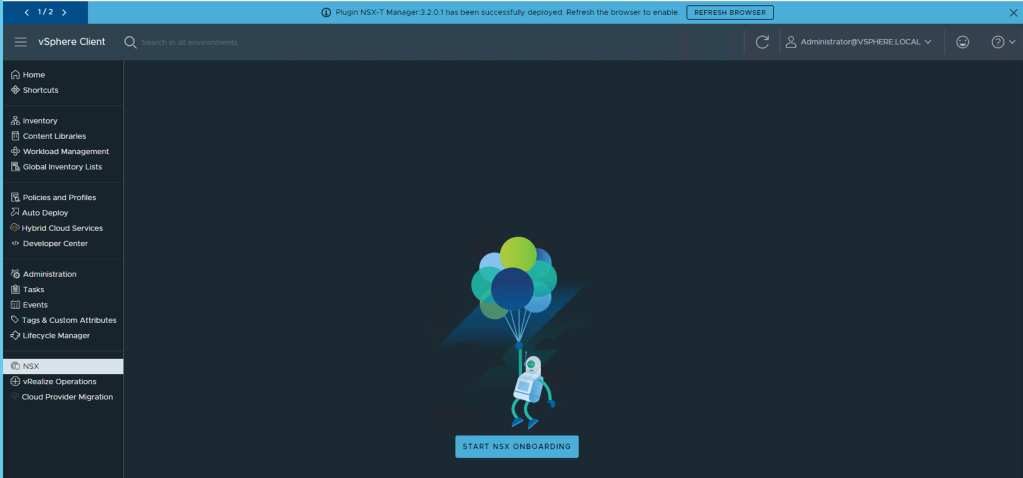
Step 5 – From the vCenter UI under NSX -> Start NSX Onboarding and or refresh browser if you see this banner at the top of the page Plugin NSX-T Manager:3.2.0.1 has been successfully deployed. Refresh the browser to enable
Step 6 – Apply NSX license.

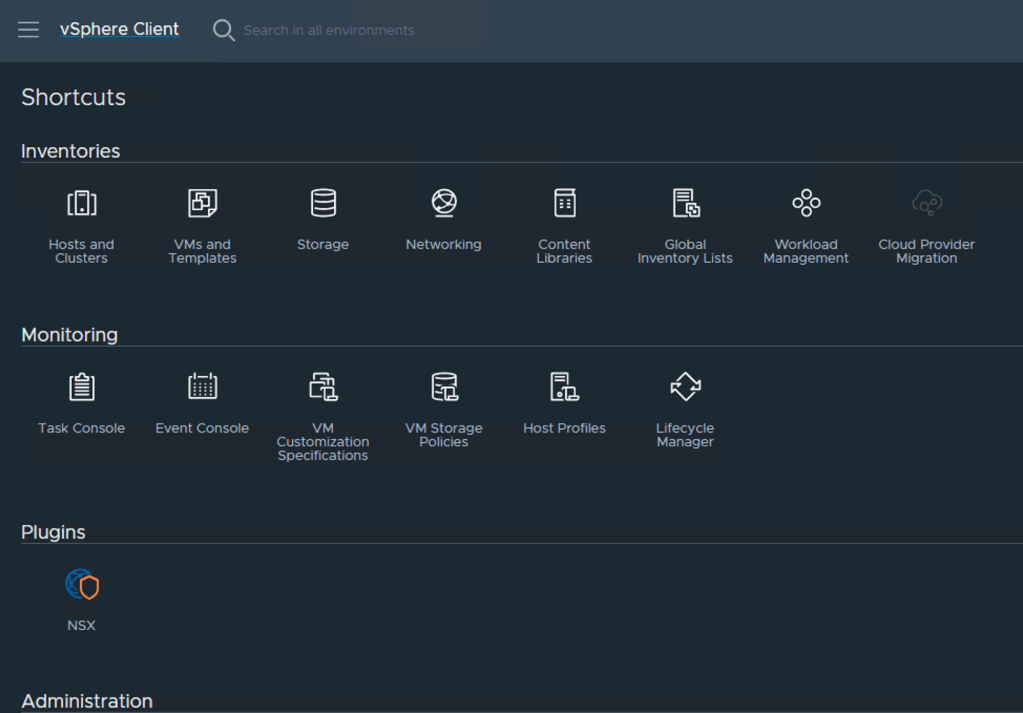
If you refreshed the browser and access the vCenter home page, you see the new NSX icon under plugins.
Deploying NSX
Once the license has successfully validated you need to select Security Only or Virtual Networking
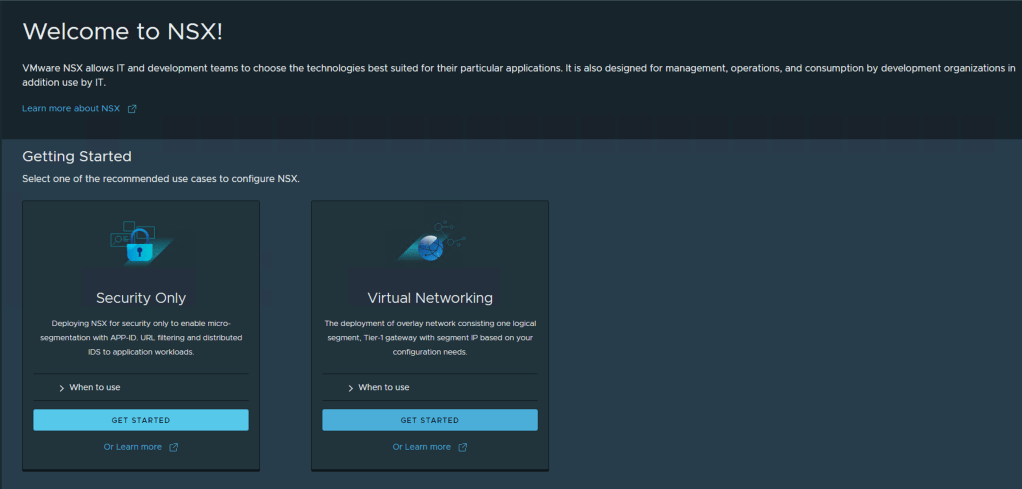
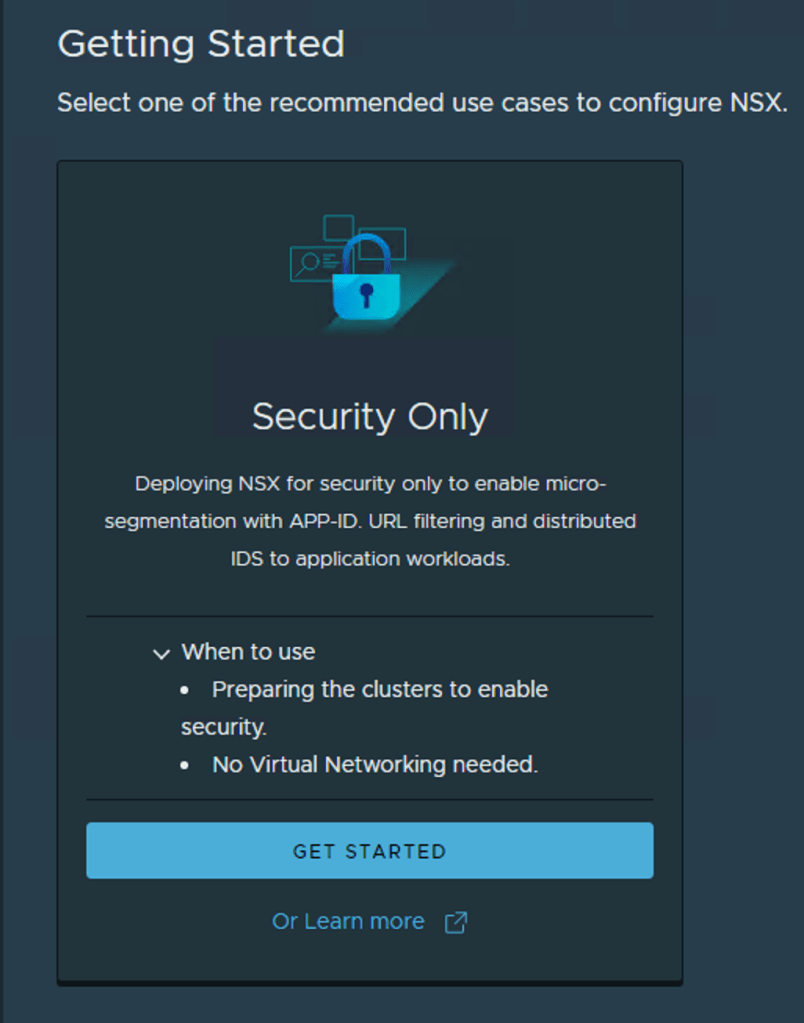
Since this blog is focused on Security, I am going to click Get Started under the Security Only option
Select the vSphere Cluster where you want to have NSX Security installed and click Install NSX

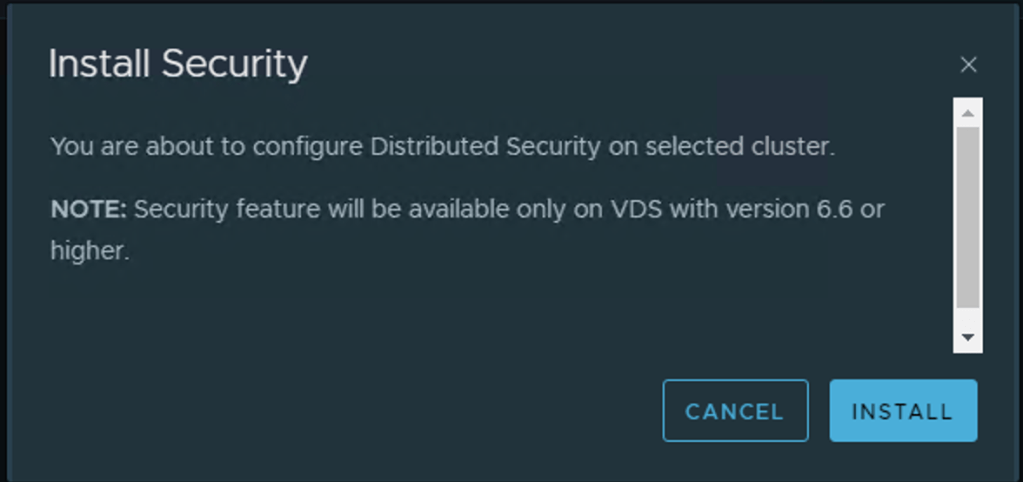
Install Security – Click Install
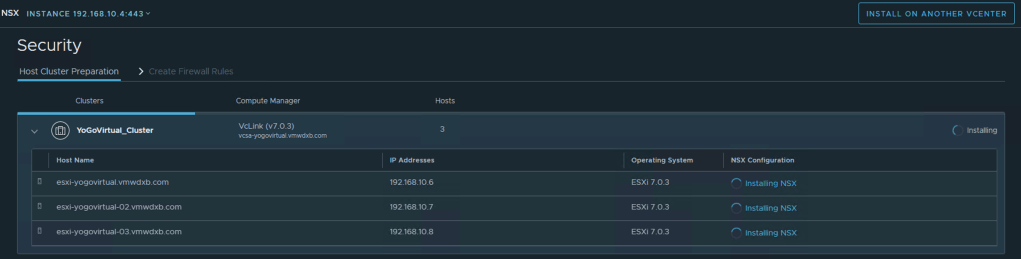
Monitor deployment in progress
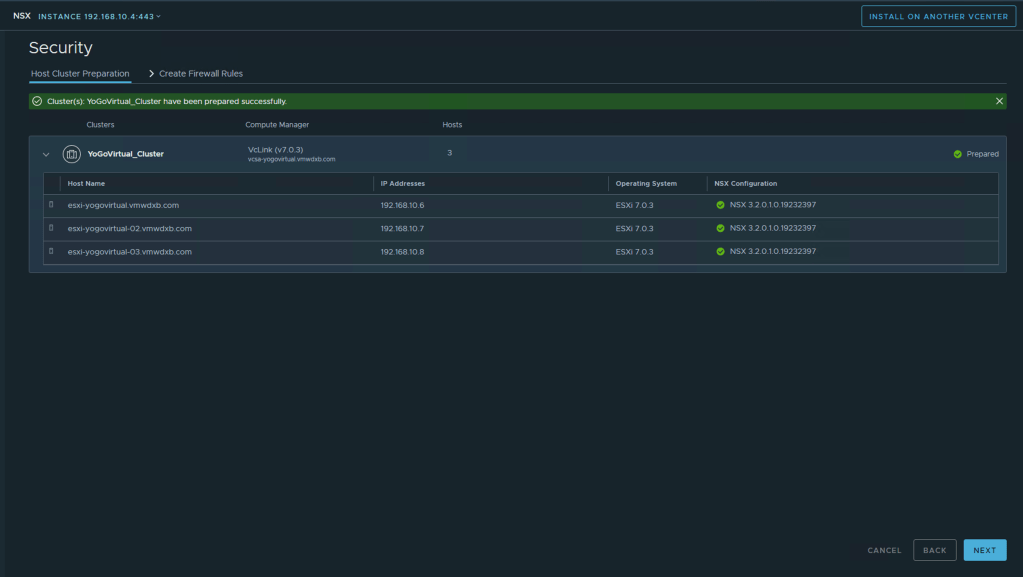
After successful host preparation and installation of NSX, you should see Cluster(s): YoGoVirtual_Cluster have been prepared successfully.

Configuring NSX-T for Security from vSphere Client
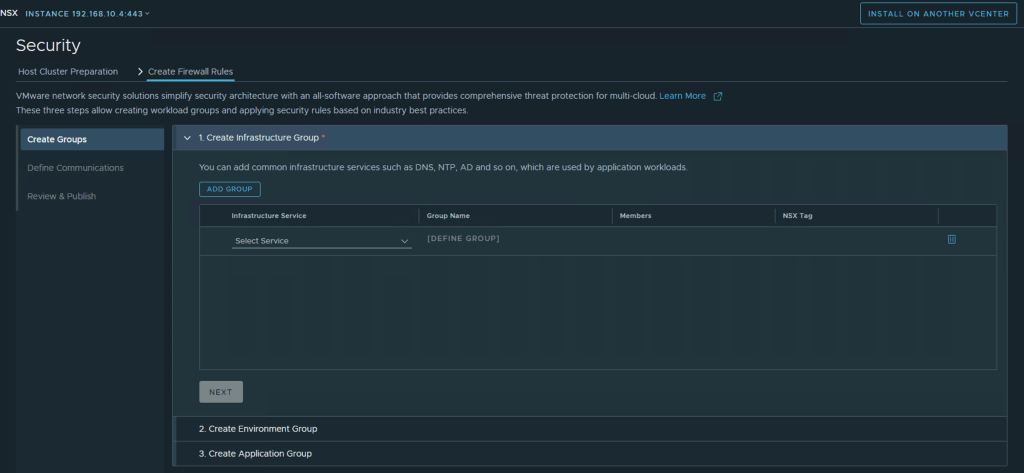
After complete the NSX installation on the ESXi hosts, we can now proceed with Firewall Policy creations, Click Next
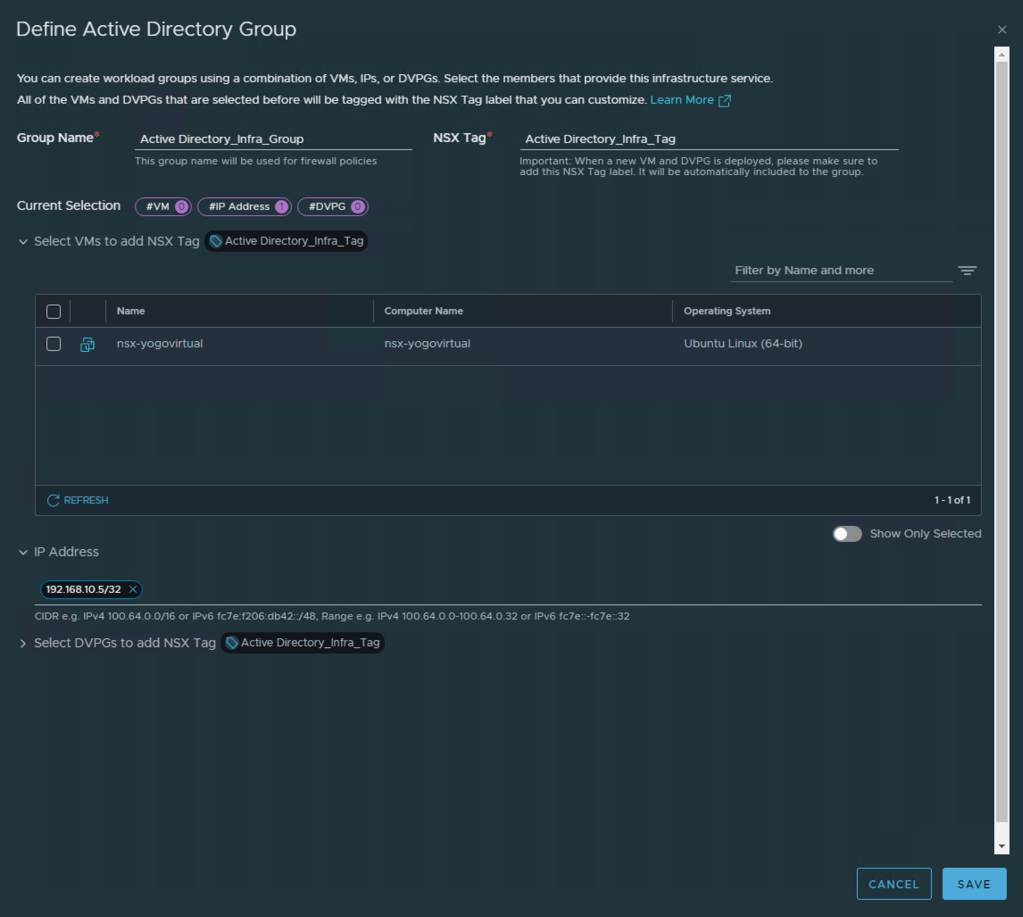
Step 1 – Create Infrastructure Group(S)
You can add common infrastructure services such as DNS, NTP, AD and so on, which are used by application workloads.
Click Add Group -> Select Service from the drop down menu
Click Define Group -> Select VM(S) for the active directory service.
You can rename the default Group Name and NSX Tag if needed
My setup does not have any workloads yet so I just used the IP address for the AD Server which is outside this environment for demonstration purpose.
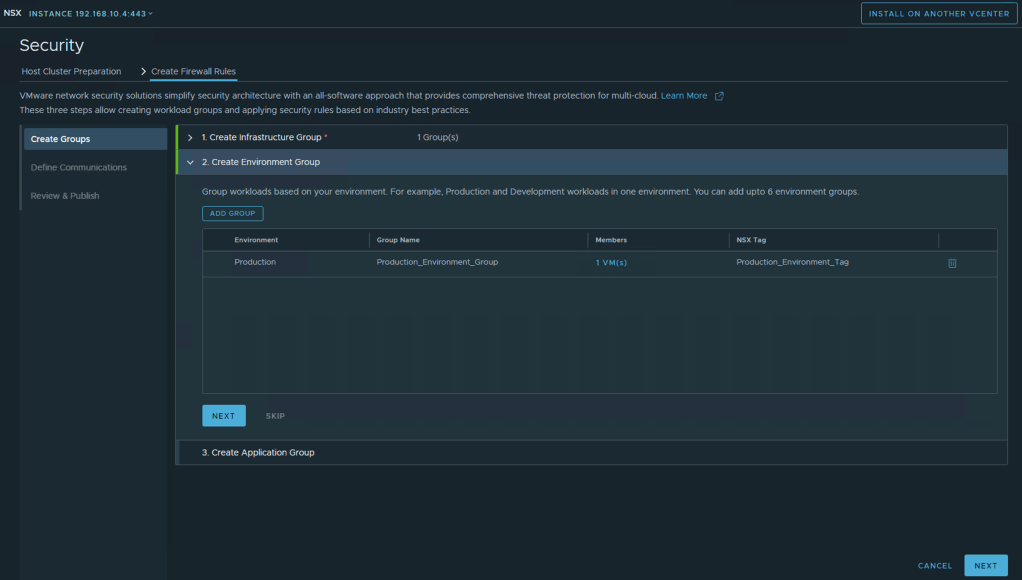
Step 2 – Create Environment Group -> ADD Group -> Select Environment -> Define Group
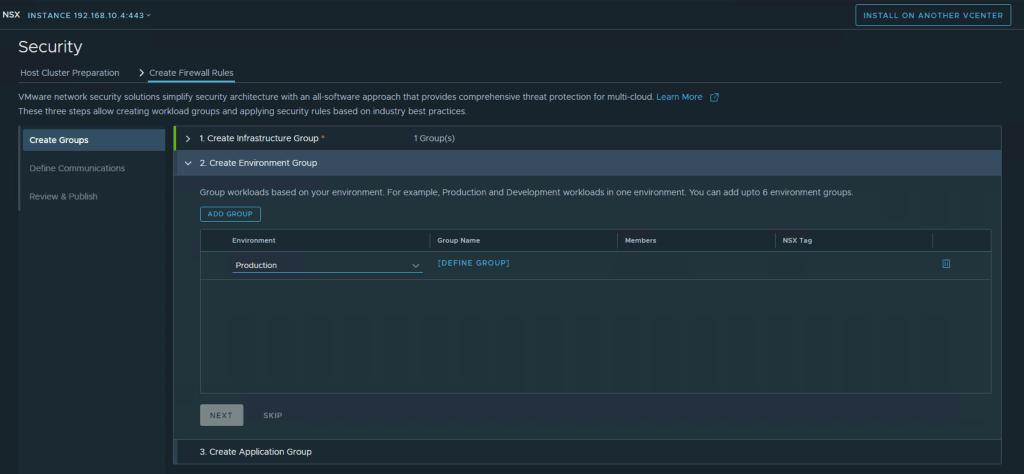
Select the VM’s in your environment that matches the selected Environment
- Production
- Development
- Testing
- Partner
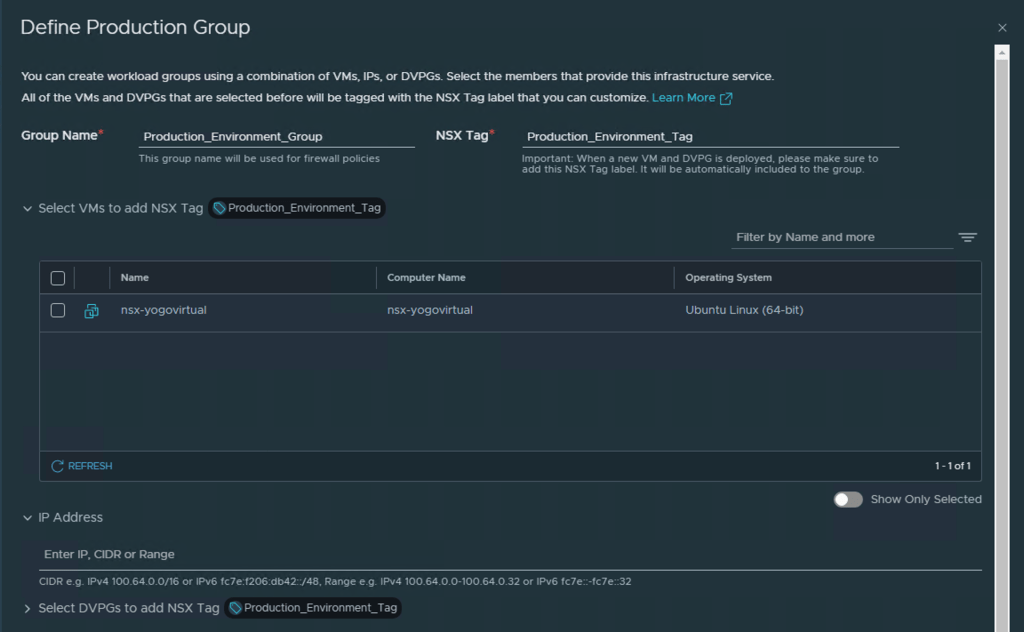
After selecting the VM’s to include in this group Click Save and proceed to Next
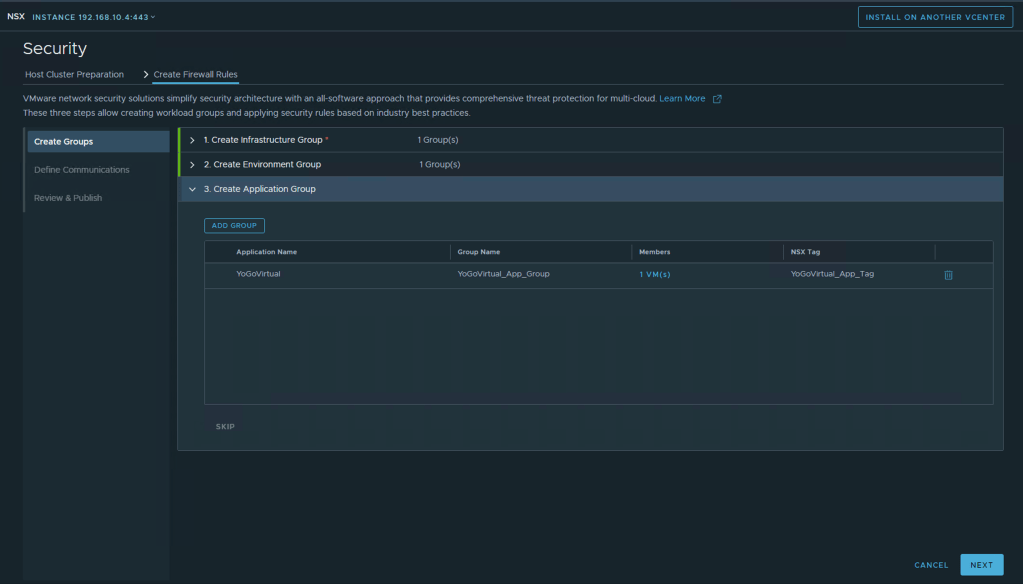
Step 3 – Create Application Group ADD Group -> Enter Application Name -> Define Group -> Select the VM’s and Click Save
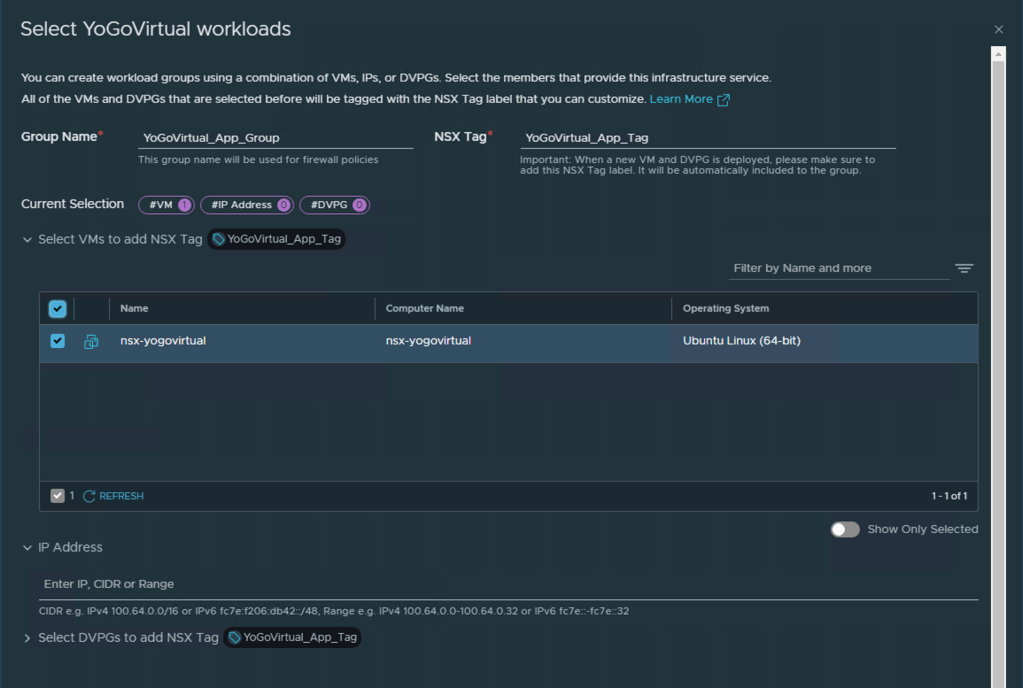
Click Next
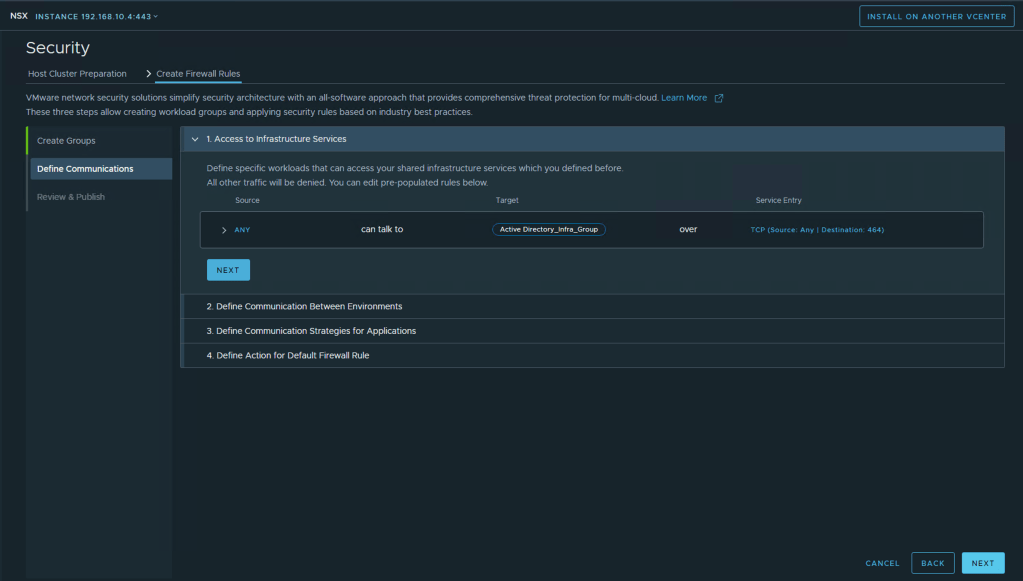
Security Policies
Next step would be to tweak the access for policy and environment created in the previous steps. Since I have no workloads in this environment besides my NSX Manager I am just going to leave all the suggest rules as is and just click Next, Next
Define specific workloads that can access your shared infrastructure services which you defined before.
All other traffic will be denied. You can edit pre-populated rules below.
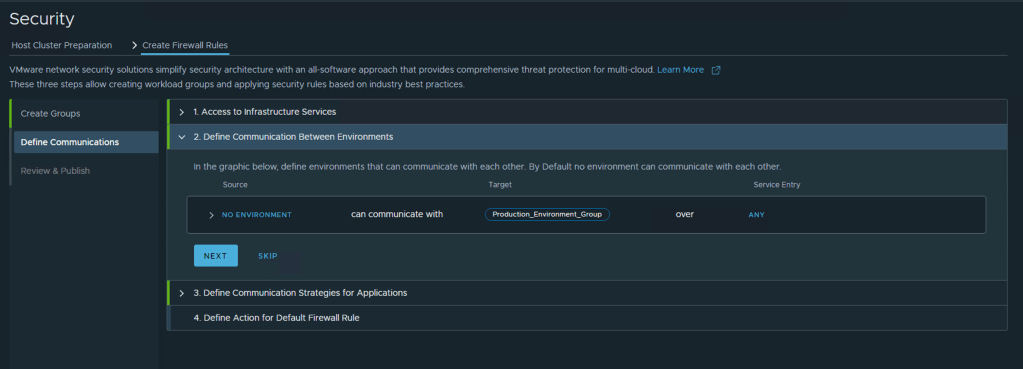
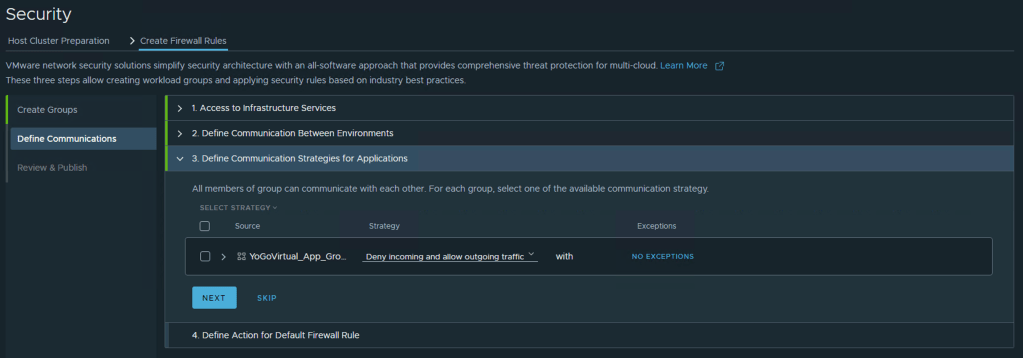
In the graphic below, define environments that can communicate with each other. By Default no environment can communicate with each other.
All members of group can communicate with each other. For each group, select one of the available communication strategy.
Define an action for the default rule. This action is applied to traffic that does not match rules or criteria defined in the earlier sections. The wizard always sets the Default Rule Action to Allow. During staging or migration, the Allow action ensures that communication between VMs is not broken.
However, to enforce access control in your network, change the default action to Drop or Reject so that only traffic packets that match the firewall rules are allowed inside the network.

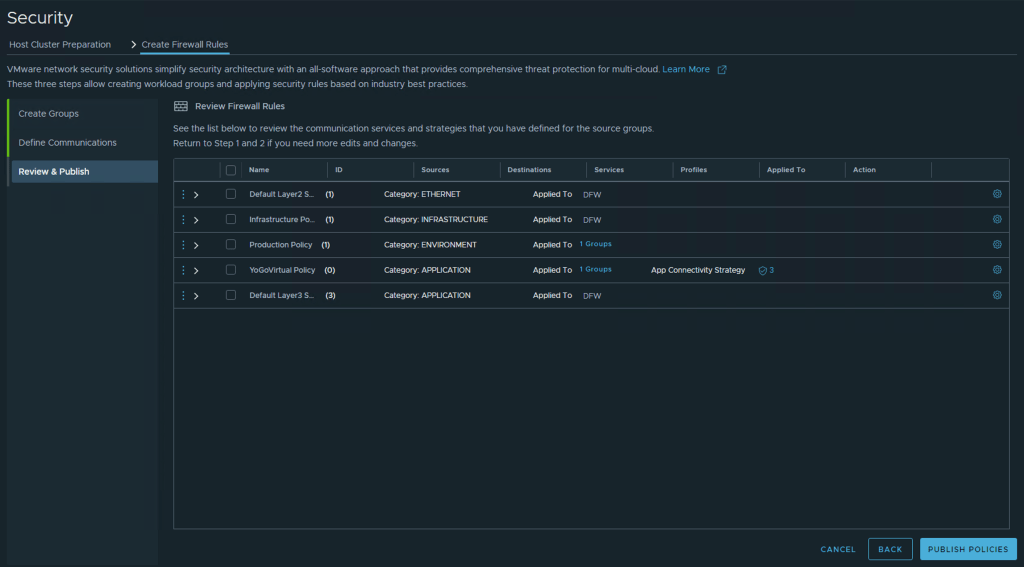
Review Firewall Rules
The final step is to review the Firewall Rules created and if everything looks good, go ahead and publish policies

Once this has been completed yo have Security configuration completed successfully! Click Done
Once this has been completed and return to the vCenter home page and select the NSX plugin you will land on the NSX Manager page.
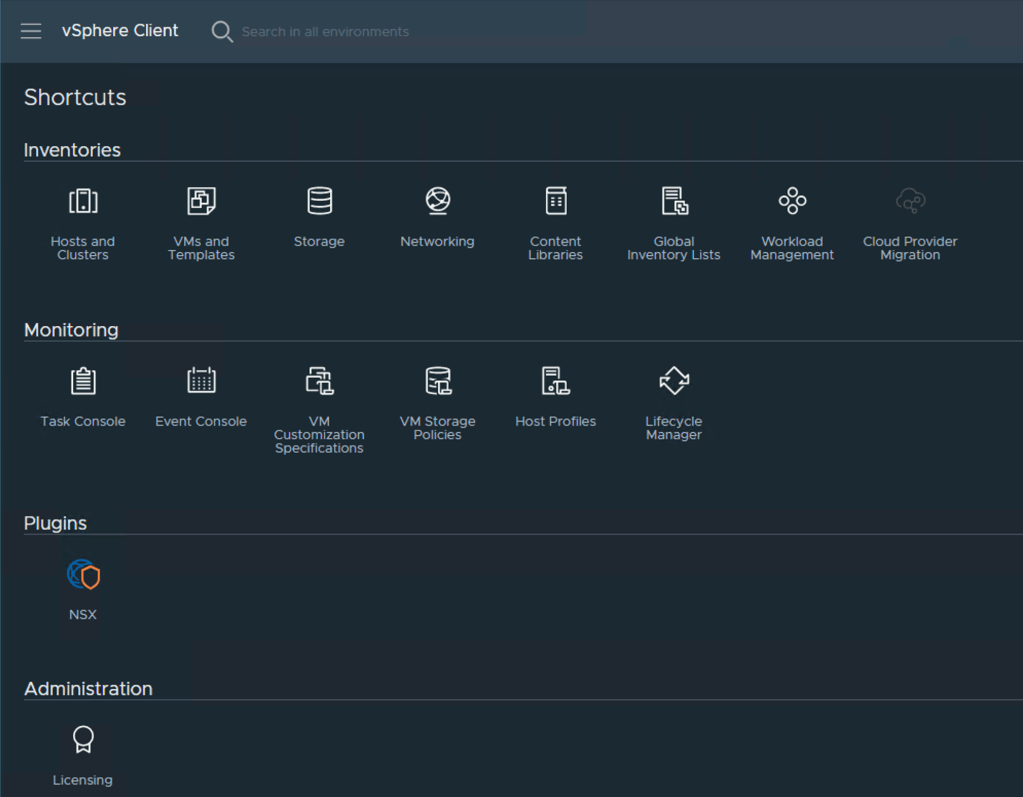
It will look and feel as if you have logged directly into the NSX-T Manager but instead its viewed and configured from within vCenter UI.

You can review the settings under the system page or do any further security configurations as needed.
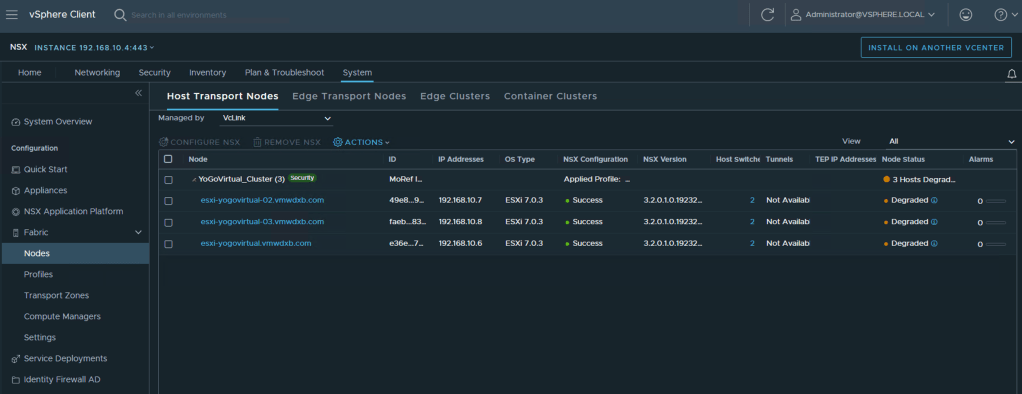

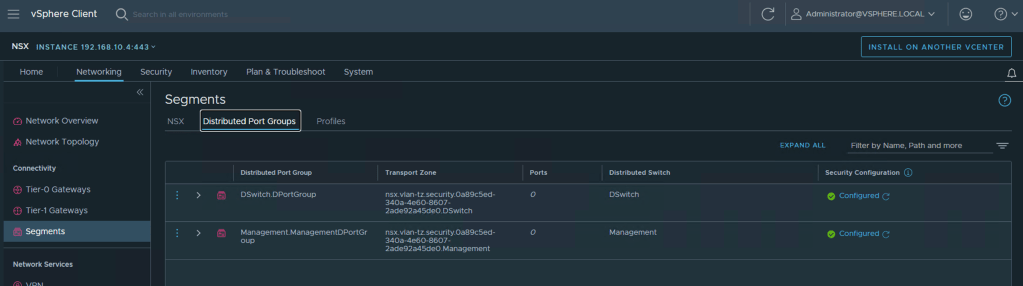
Under Network -> Segments -> Distributed Port Groups you find all the dvportgroups NSX has discovered in the vCenter system and you can apply security policies to any workload attached to these
Summary
With my first attempt, the deployment failed with this error – Transfer failed: The OVF descriptor is not available. This was because I did not follow the documentation properly a missed the note that stated “There is a separate OVF file available for NSX Manager deployed from vSphere Client.” I was using the regular OVA package instead of the OVF and files as described in this blog.
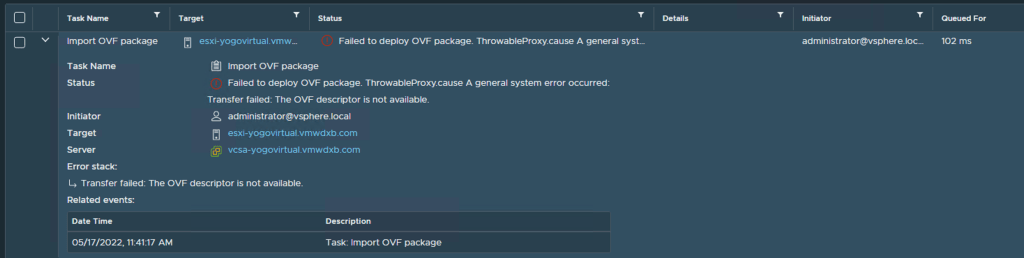
To fix this, I used 7-Zip on my Windows machine and I extracted the OVA contents to my local directory and ran the deployment steps again. Or I could have just downloaded the files individually from the VMware site.
Another point to highlight – Since we are deploying a Single NSX-T Manager and will be using vSphere HA to protect the VM appliance, I found that the VM would no power up with my initial test topology where I only had one ESXi host in my vCenter Cluster.
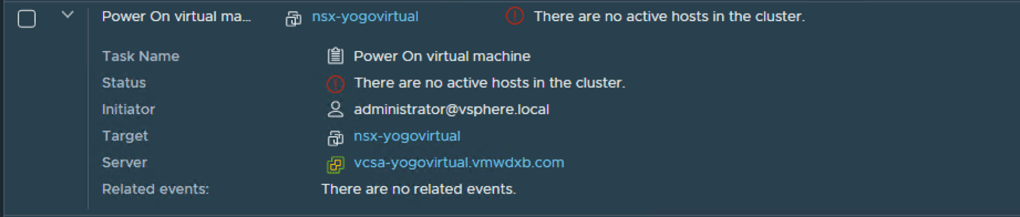
To get around this, I added 2 more ESXi Servers to the vCenter cluster and then setup a 3 node vSAN cluster with DRS and vSphere HA enabled and migrated the VM files from the initial local datastore to the vSAN datastore and powered up the VM successfully.

I need to find out if this is the expected behaviour or if I had done something incorrectly in my vSphere deployment.
Hopefully you found this helpful. It definitely helped me to understand the deployment and configurations and consumption of this feature.

Very good postings. Thanks! [url=https://theessayswriters.com/#]thesis writing service[/url] writing my essay
LikeLike