
In my previous post I covered the deployment and enabling of NSX Intelligence on our NSX Application Platform. So the next would be enabling the integrated NSX Network Detection & Response (NDR) feature. I say integrated here because VMware offers NDR as a full stand alone deployment option which is based on the Lastline acquisition. NSX-T 3.2 introduces the Integrated solution. This post assumes that the NSX Application Platform (NAPP) has been successfully deployed and you have the required licenses. The post will help guide you activating the NSX-T NDR solution.
The NDR solution in NSX-T 3.2 does not require the deployment of any sensors which is typically required by an NDR solution. NSX-T becomes the sensor monitoring the traffic via NSX Intelligence, leveraging inputs from the NSX Malware Prevention solution and the NSX Intrusion Detection & Prevention and performs all the machine learning and correlation.
The NSX Network Detection and Response feature sends threat alert data to the VMware NSX® Advanced Threat Prevention cloud services, which then performs correlation and visualization on those data using the NSX Network Detection and Response user interface.
Requirements
The feature is available beginning with VMware NSX-T Data Center™ 3.2 and VMware NSX® Intelligence™ 3.2. VMware NSX Application Platform must be installed.
NSX Advanced Threat Prevention License – see these notes on license requirements.
I am using NSX-T Version: 3.2.0.0.0.19067744
Overview of NSX Network Detection & Response
Sourced from VMware
The NSX Network Detection and Response maps and defends against MITRE ATT&ACK techniques. It provides a cloud-based architecture that enables detectors to gain comprehensive visibility into network traffic that crosses the network perimeter (north/south), and traffic that moves laterally inside the perimeter (east/west).
Main Objective
The main objective of the NSX Network Detection and Response feature is to collect key abnormal activity or malicious events from every event source that is activated in your NSX-T Data Center environment. The collected events that are determined to require further analysis are then submitted to the VMware NSX® Advanced Threat Prevention cloud service for correlation and visualization. You can view and manage the results using the NSX Network Detection and Response user interface (UI).
NSX Network Detection and Response correlates events that are determined to be related into campaigns. The threat events in a campaign are organized into a timeline that is available for a security analyst to view and triage using the NSX Network Detection and Response UI.
Event Types and Event Sources
The following table lists the event types that NSX Network Detection and Response can collect and the sources that generate those events. In order for any of the event source to send the events to NSX Network Detection and Response, you must activate the corresponding NSX feature mentioned for the event type.
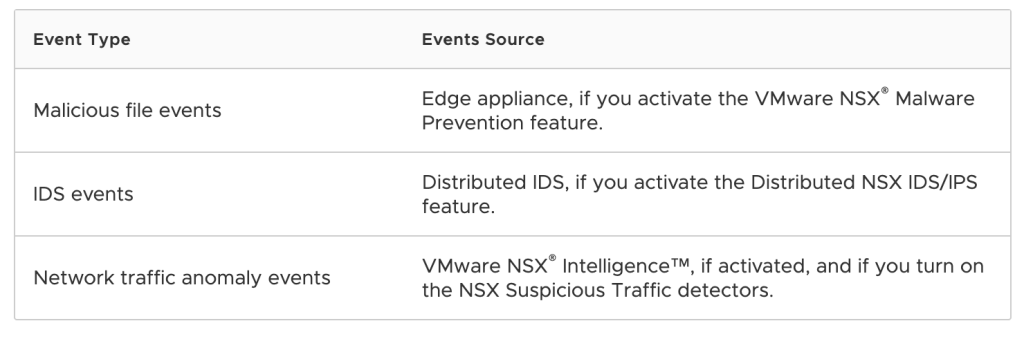
Important:To maximize the NSX Network Detection and Response feature, activate one or more of the NSX features whose events it consumes. Although you can activate the NSX Network Detection and Response feature on its own, if you do not activate any of the NSX features mentioned in the previous table, NSX Network Detection and Response does not have any events to analyze and, thus, cannot give any of the benefits it has to offer.
Activating and Using NSX Network Detection & Response
Before you can start using the NSX Network Detection and Response feature, the license and software requirements must be met and you will need activate the feature under NAPP. You must activate and configure the corresponding NSX features to start using NSX NDR to manage the different event types that you can monitor in your NSX-T Data Center environment.
Step 1 – Under System -> NSX Application Platform select NSX NETWORK DETECTION AND RESPONSE.

Step 2 – Once have your mouse over NSX NETWORK DETECTION AND RESPONSE you should see the Activate option, click this.

Step 3 – Next you will need to select one of the available cloud regions from which you can access the NSX Advanced Threat Prevention cloud service – This will depend on your license. I selected Europe below.
NOTE: The same Cloud Region selection is used in both the Malware Protection and the Network Detection and Response features.

The system uses the NSX Advanced Threat Prevention cloud service to perform deeper analysis of detected threat events, perform event correlation and visualization, and fetch periodic updates on those detected threat events. If you previously activated the VMware NSX® Malware Prevention feature, the cloud region selected for that feature is preselected and is used for the NSX Network Detection and Response feature.
Step 4 – Now Click the RUN PRECHECKS
NOTE: It is mandatory to run the prechecks to ensure all prerequisites are met.
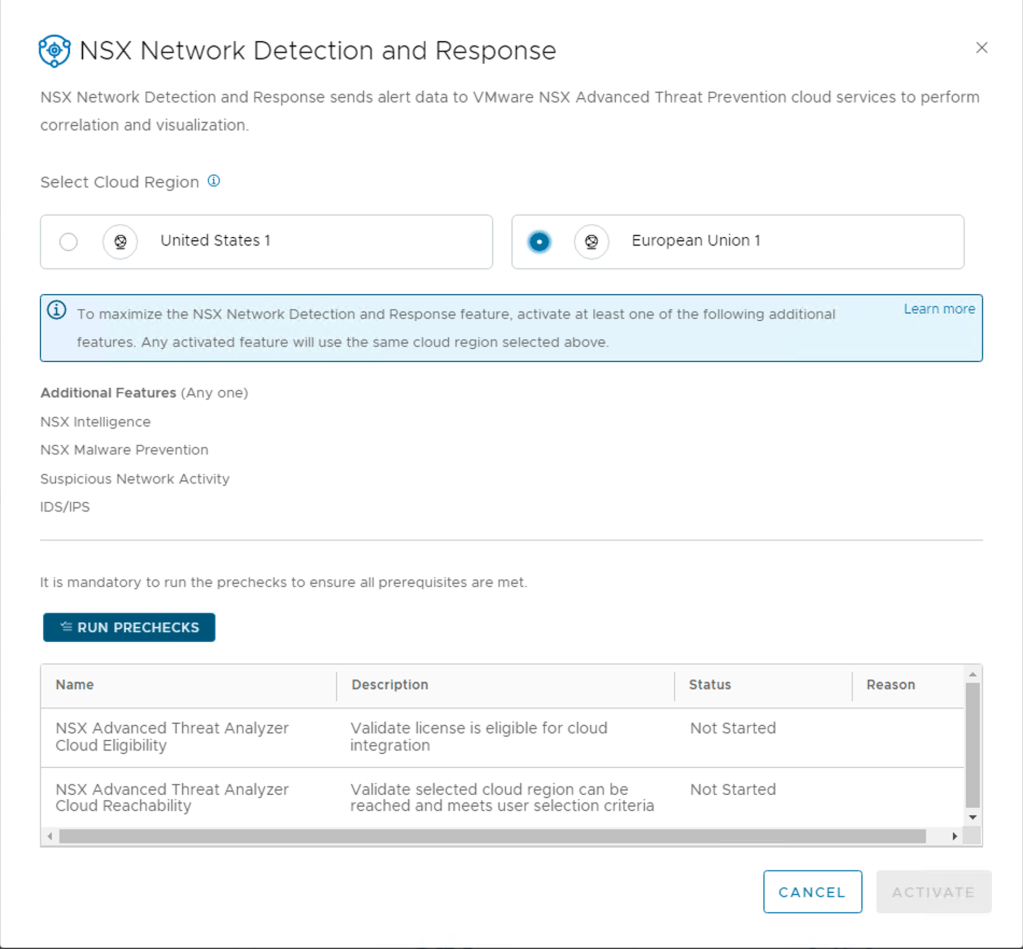
This precheck process can take some time as the activation wizard validates that the minimum license requirement is met. The wizard also performs the connectivity checks between the NSX Manager appliance and the NSX Advanced Threat Prevention cloud service. It also validates that the selected cloud region is reachable.

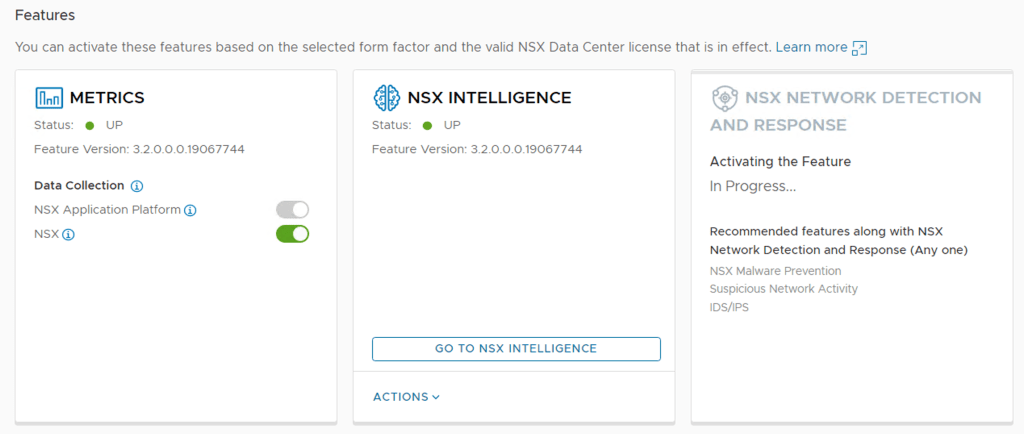
Step 5 – Last Step is to Activate, Click Activate if all the pre-checks where successful.

After clicking activating NSX does the needful to get Network Detection and Response up and running. This may take some while it’s doing all the configurations.
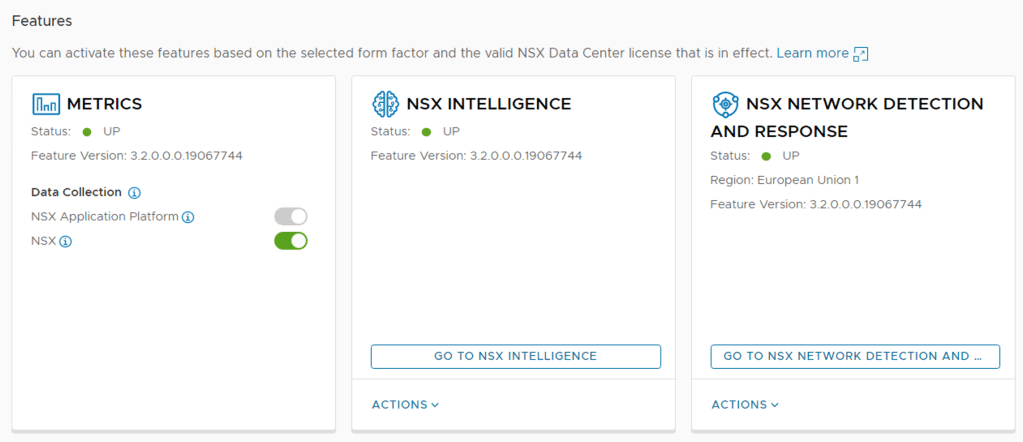
Once completed, the Status should be Green and shows UP
Step 6 – Once the status has turned green, you will want to logout off the NSX Manager and log back in, this will update the UI to include the NSX Network Detection and Response landing page.
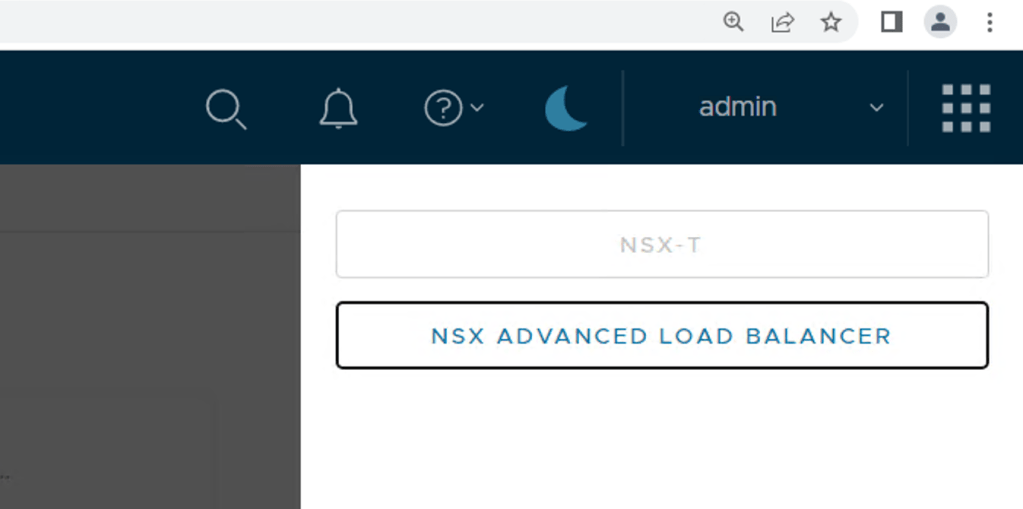
You can check it before logging out too, click on the top right hand corner where the nine dots are (3×3). This is a new addition to the UI in 3.2 and from the screen shot below you notice that my NSX Manager has been integrated with the NSX Advanced Load Balancer but you do not see NSX Network Detection and Response here.
Step 7 – I logged out and logged back into my NSX Manager as admin, clicked on those same nine dots again and there you find the button to click to launch the NSX Network Detection and Response land. It will open a new window once you have clicked it.

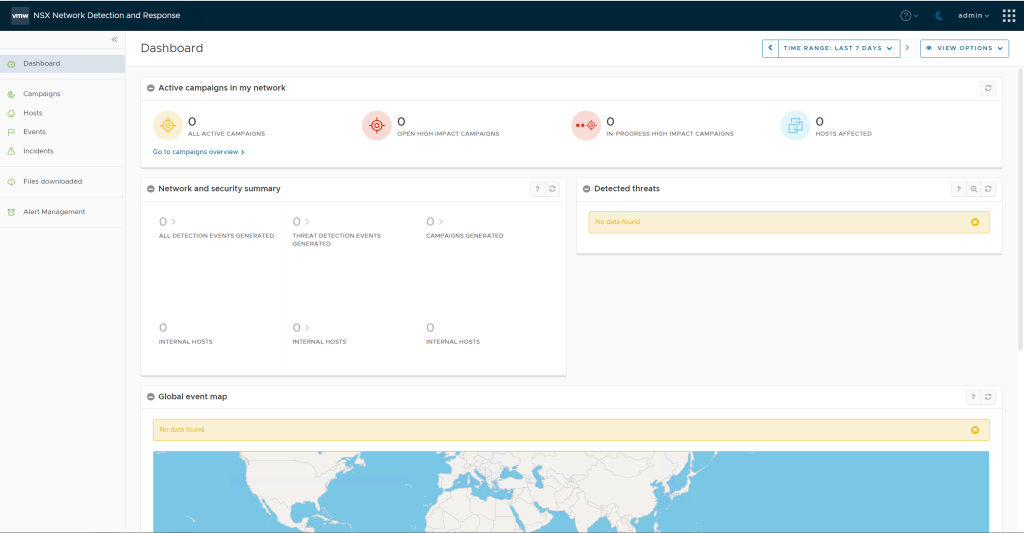
At this stage my page is still empty since I have not enabled any of the additional features, I will do these in follow-up blogs posts and you will be able to see how all my security events from NSX Intelligence, NSX Malware Prevention, Suspicious Network Activity and IDS/IPS are all correlated here.
Step 8 – Go back to the NSX Manager and go to the Security Overview page and should now see the dashboard showing with highlights of various security related activities. In future posts we will some traffic populating here.

A quick win would be turning on NSX Suspicious Traffic detectors.
Note: In NSX-T 3.2.0.1 you want to avoid enabling these two detectors as there is a software bug that will meltdown your NSX Intelligence environment, so best not to enable Horizontal Port Scan and Uncommonly Used Port. I would advise checking the release notes to see when this bug has been fixed.
***Update February 2023 – The concern raised above has been fixed in NSX 3.2.1 and 4.0.X, the impact of enabling these two detectors is limited to your NAPP/NSX-Intelligence environment and not your complete network***
Summary
Activating NSX Network Detection and Response is fairly straightforward, but the true value comes in once you have enabled all features which feed data into the solution.
So make sure to get these additional features enabled to take full advantage of the NSX NDR solution:
- NSX Intelligence
- NSX Malware Prevention
- Suspicious Network Activity
- IDS/IPS

One thought on “VMware NSX Network Detection & Response 3.2 Deployment”