In this blog post I will cover the installation and activation of the VMware NSX Malware Prevention solution. The activation and deployment will be done on my NSX Application Platform previously deployed. This post will include the deployment requirements and deployment process of the Service Virtual Machines (SVM’s). In a follow-up blog post, I will cover enabling and demonstrating the distributed Malware Prevention and the Gateway Malware Prevention use cases.
Overview – NSX Malware Prevention

This feature detects and prevents malicious files (malware) from entering into your NSX-T Data Center environment and from spreading laterally across the data center. It uses NSX Advanced Threat Prevention cloud services to fetch periodic detection updates and to upload the data for further analysis.
NSX Malware Prevention can detect and prevent known malicious files and unknown malicious files. Unknown malicious files are also referred to as zero-day threats. To detect malware, NSX Malware Prevention uses a combination of the following techniques :
- Hash-based detection of known malicious files
- Local analysis of unknown files
- Cloud analysis of unknown files
In NSX-T Data Center 3.2, NSX Malware Prevention supports the following capabilities:
- On the Gateway Firewall, only detection of malware is supported. Both local analysis and cloud analysis of malware files is supported. To view the list of supported file categories, see File Categories Supported for NSX Malware Prevention.
- On the Distributed Firewall, malware detection and prevention is supported only for Windows guest endpoints (VMs) running on vSphere host clusters that are prepared for NSX. Only Windows Portable Executable (PE) files are supported for local analysis and cloud analysis. Other file categories are not supported currently by NSX Distributed Malware Prevention.
- The supported maximum file size limit is 64 MB.
Getting Started with the Deployment
Let’s cover the base requirements needed to get Malware Prevention Activated and deployed. Part of the deployment is a Service VM that gets deployed on each ESXi host in the vCenter cluster where this capability will be enabled. The SVM leverages the Guest Introspection frame work so currently only supported with Windows workloads and these need to have the required VM Tools drivers installed – more details below.
Requirements
License needed – NSX Malware Prevention security feature is part of the VMware NSX® Advanced Threat Prevention solution.
System
- NSX Application Platform must be deployed and the NSX Malware Prevention feature must be activated on the platform.
- On Gateway Firewall, NSX Edge VMs with Extra Large form factor must be deployed.
- On Distributed Firewall, NSX Malware Prevention service virtual machine must be deployed on vSphere host clusters.
- NSX Manager requires Internet Access to validate the license, can be done via Proxy.
- VM Tools deployed with NSX Drivers
- The Service VM’s require a Management IP which is reachable to the NSX-T Manager and NAPP platform
- Each SVM requires 4vCPU, 6GB RAM, 80GB Disk – Not Configurable today.
- This deployment is done using NSX-T Version 3.2.0.1.0.19232396
Others
- A Web Server to host the OVA of the Service VM, the Malware Prevention OVA needs to be downloaded from VMware’s website.
- Postman or similar tool to send some API calls to the NSX-T Manager
- Gateway Malware Prevention requires Gateway IDPS enabled
Note:
- NSX Malware Prevention is currently not supported on NSX Edge bare metal and Public Cloud Gateways.
- NSX Malware Prevention feature can function as designed only when your NSX-T Data Center is connected to the Internet.
- NSX Manager nodes and vSphere hosts must have connectivity to the NSX Application Platform for NSX Malware Prevention to function properly.
Step 1 – Security -> Security Overview -> Malware Prevention -> select GO TO SETUP MALWARE PREVENTION & IDS/IPS

Step 2 – The UI redirects you to the NAPP Deployment where you will see the option to select Malware Detection at the bottom right.

Go ahead click on NSX MALWARE PREVENTION and click Activate
Step 3 – You will need to run the Pre Checks to validate your license and your Internet access to the VMware Cloud bases solution where files will be sent for dynamic analysis. The option to send files to the cloud can be controlled using the profiles, covered later in the use case demo.
Click RUN PRECHECKS
This step can take some time to finish as the resources get allocated in the background.
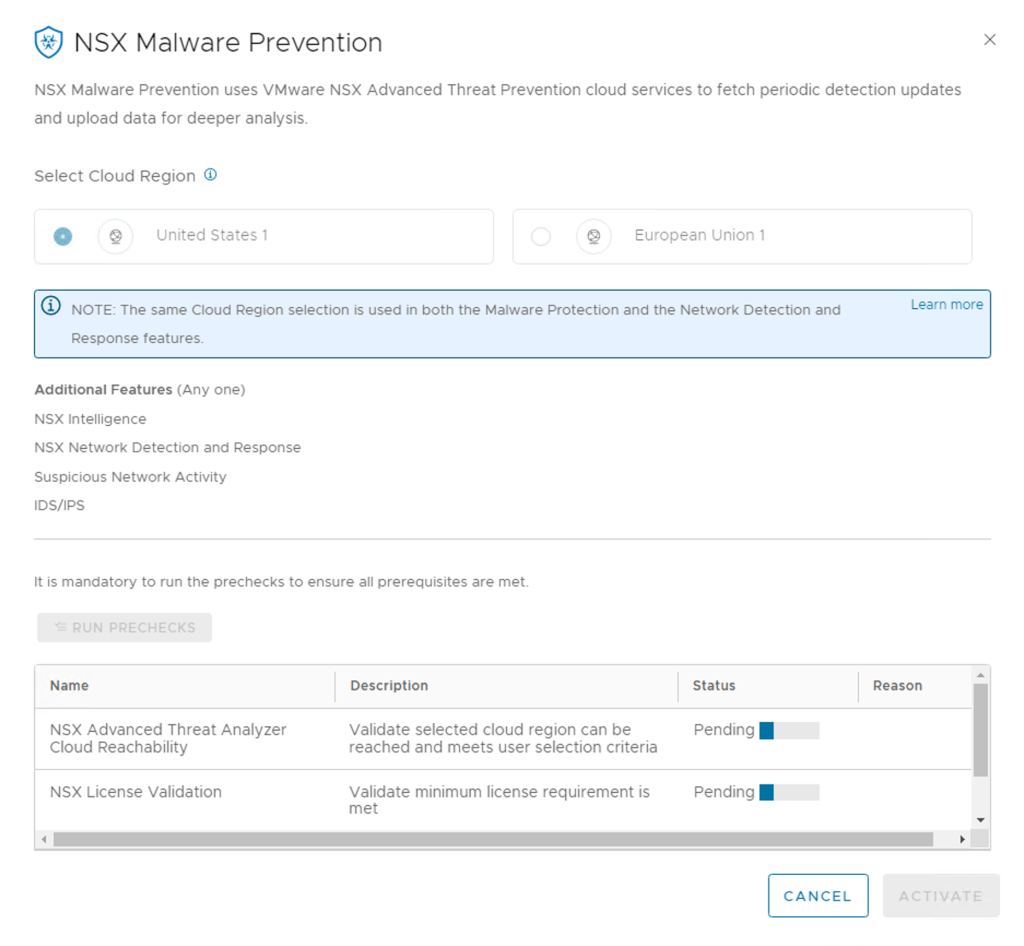
NOTE: The same Cloud Region selection is used in both the Malware Protection and the Network Detection and Response features.
Step 4 – Assuming all the Pre Checks pass, you can proceed and click Activate


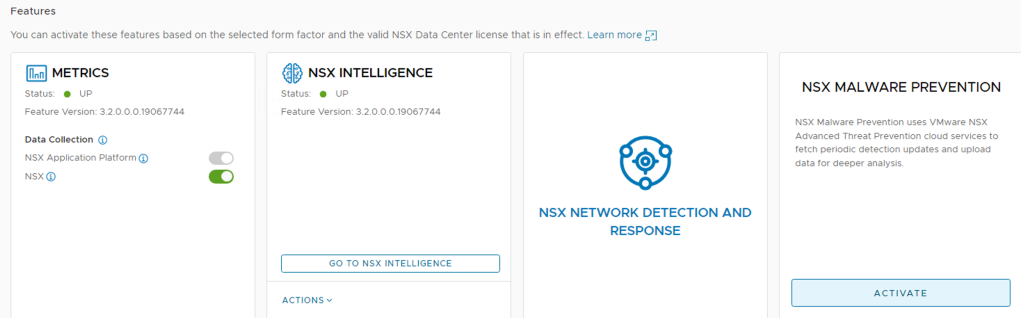
Step 5 – Click on GO TO NSX MALWARE PREVENTION
The activation is now complete as shown below.

Since I have not enabled any Gateway Malware Prevention policies or deployed the Malware Prevention SVM’s for the distributed Malware Prevention capability the dashboard shown below is pretty empty.

Distributed NSX Malware Prevention
NSX Malware Prevention on a Distributed Firewall uses the NSX Guest Introspection (GI) framework. To detect and prevent malware on the Windows guest endpoints (VMs), you must deploy the NSX Distributed Malware Prevention service on the ESXi host clusters that are prepared for NSX.
To activate NSX Malware Prevention on vSphere host clusters, deploy the NSX Distributed Malware Prevention service on each host cluster.
Note:On the distributed east-west traffic, malware detection and prevention is supported only for Windows Portable Executable (PE) files that are extracted by the GI thin agent on the workload VMs (endpoints). Other file categories are not supported currently by NSX Distributed Malware Prevention. The supported maximum file size limit is 64 MB.
Prerequisites for the SVM Deployment
I am going to assume that NSX-T 3.2.0.1 and above has been correctly installed and all hosts in the cluster you plan to enable this have been prepared with all the NSX bits.

Step 1 – Generate Public-Private Key Pair for SSH Access to SVM
To download log file from the SVM for troubleshooting purposes, read-only SSH access to the NSX Malware Prevention SVM is required.
I used PuTTYgen to generate they Public-Private Key. Right Click on the Putty Icon and you see the Run PuTTYgen option. The public key must adhere to a specific format, as described in the following subsection. Examples of SSH key generation tools are: ssh-keygen, PuTTY Key Generator, and so on. Supported key sizes are 1024 bits, 2048 bits, and 4096 bits.

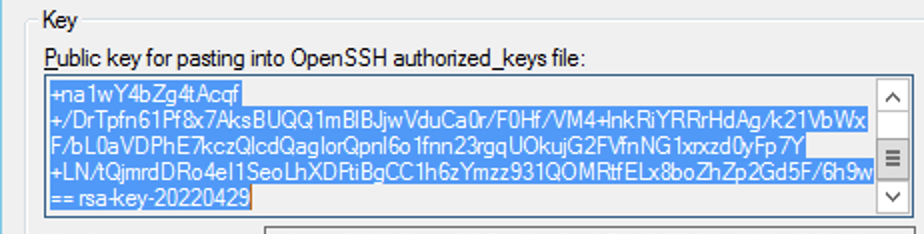
Once PuTTYgen opens it asks you to key moving your mouse cursor around in the box so that it does the random generation and once completed you will see the following output
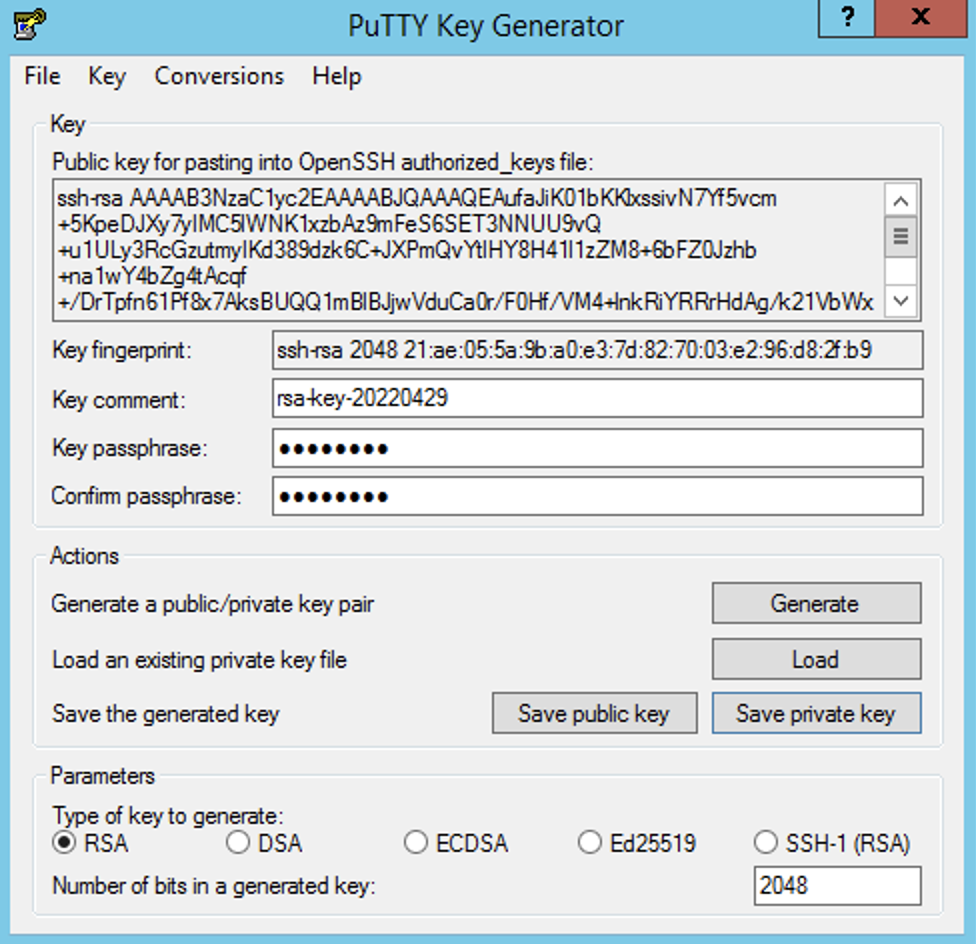
You are going to need to copy the text from this box to a text file as you going to need this later.

I just saved the Public Key and Private Key to files on my desktop – don’t forget to add a key passphrase first. Store the private key securely. Loss of the private key can lead to a loss of SSH access to the NSX Malware Prevention SVM.
SSH access to the admin user of the SVM is key-based (public-private key pair). A public key is needed when you are deploying the service on an ESXi host cluster, and a private key is needed when you want to start an SSH session to the SVM.
NOTE: NSX Distributed Malware Prevention service deployment is done at the level of a host cluster. So, a key pair is tied to a host cluster. You can create either a new public-private key pair for a service deployment on each cluster, or use a single key pair for service deployments on all the clusters.
Step 2 – Verify VM Hardware Configuration on Guest VMs
Verify that VM Hardware Configuration version 9 or later is running on the Windows guest VMs. Do these steps:
- Log in to the vSphere Client.
- Go to Hosts and Clusters and navigate to the cluster.
- Click the VMs in the cluster, one at a time.
- On the Summary page, expand the VM Hardware pane, and observe the Compatibility information of the VM. The VM version number must be 9 or later.

Step 3 – Install NSX File Introspection Driver
I would recommend checking this again with our system owners as the default VM Tools deployment does not include installing these drivers.
For detailed instructions, see Install the Guest Introspection Thin Agent on Windows Virtual Machines.
Step 4 – Download the OVA File of NSX Malware Prevention Service Virtual Machine
At this point we are going to use that Web Server I referred to in the initial system requirements. I believe in future releases this would be made a little simpler but this is what we need to do at the moment.
I used Windows 2012 Server which I was using as FTP Server for vCenter backups and just enabled an IIS page to host the files listed below. See some screen shots of my setup in the steps
- In a Web browser, open the Download VMware NSX-T Data Center page, and log in with your VMware ID.
- Download the OVA file. (VMware-NSX-Malware-Prevention-appliance-3.2.0.0-build_namber.ova)
- Extract the OVA file with the following command:tar -xvf filename.ovaReplace filename with the exact name of the OVA file that you downloaded in the previous step.Observe that the following four files are available in the root directory where the OVA file is extracted.
- OVF file (.ovf)
- Manifest file (.mf)
- Certificate file (.cert)
- Virtual machine disk file (.vmdk)
- Copy all the extracted files to a Web server that meets the following prerequisites:
- The Web server must have unauthenticated access over HTTP.
- The Web server must be accessible to NSX Manager, all ESXi hosts where you plan to deploy the NSX Malware Prevention SVM, and the vCenter Server that is registered to NSX-T.
- The MIME types for the extracted files must be added to the Web server. For information about adding MIME types to the Web server, see your Web server documentation.

My Web Server Setup on Win2012

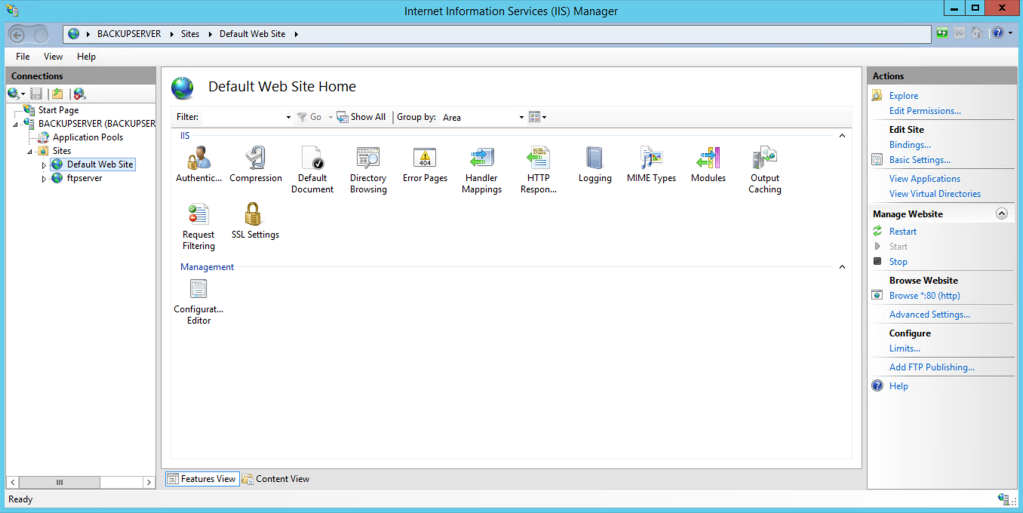

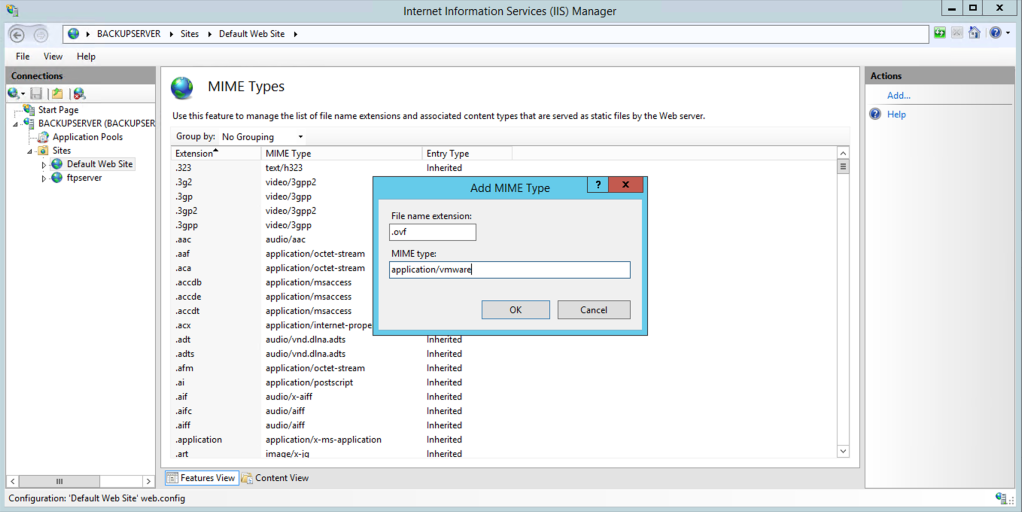
Click on the Mimes Icon to add the 4 extension listed above – top right in blue add
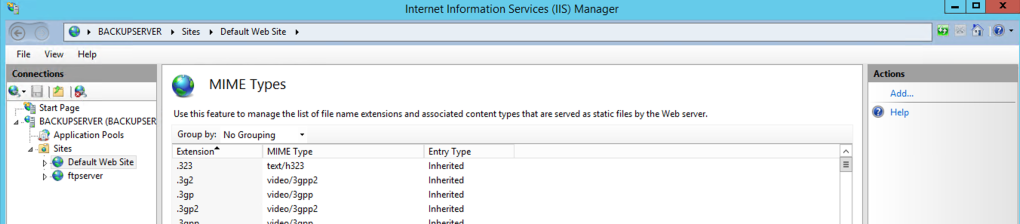
Below is an example for adding .ovf and you will need to repeat this steps for the other three list above.
To make sure that your Web server is correctly setup you can test downloading the OVF file by simply browsing to this link.
http://Your_Server_IP/optional_location/nsx-svm-appliance-3.2.0.0.0.19058371.ovf
In my case it was, the link below as I configured the WebServer to point to the directory where I have stored the files on the Windows Server under Basic Settings.
http://192.168.10.10/nsx-svm-appliance-3.2.0.0.0.19058371.ovf

Step 5 – Register the NSX Distributed Malware Prevention Service
Now we are going to need test our API skills using Postman or a similar tool you prefer using to send an API to the NSX-T Manager. This API call will basically instruct the NSX Manager where it will find/download the files it needs to create the SVM which get deployed in a few steps from here.
To make sure that your Web server is correctly setup you can test downloading the OVF file by simply browsing to this link.
http://Your_Server_IP/optional_location/nsx-svm-appliance-3.2.0.0.0.19058371.ovf
First API Call
Run the following POST API:
POST https://{nsx-manager-ip}/napp/api/v1/malware-prevention/svm-spec
Remember to replace {nsx-manager-ip} with your NSX Manager IP so in my case the API call will be as follows:
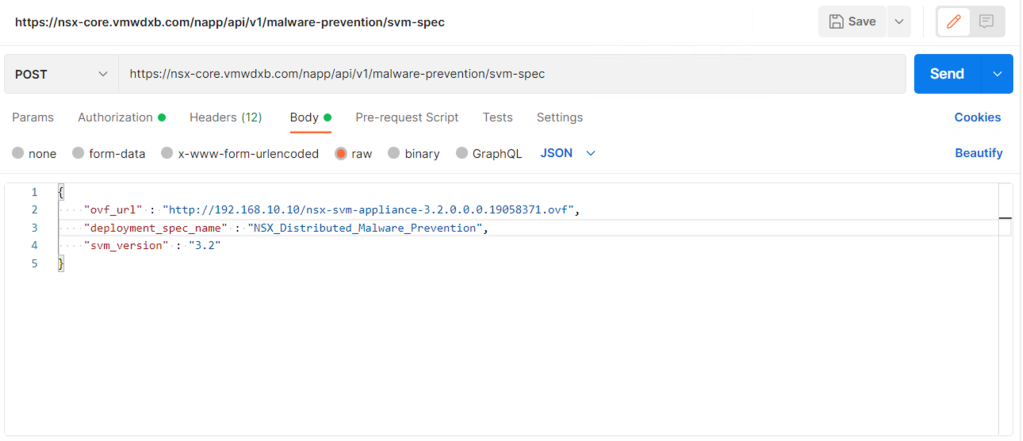
POST https://nsx-core.vmwdxb.com/napp/api/v1/malware-prevention/svm-spec
In the request body of this POST API, specify the following details:
- Complete path to the OVF file on the Web server
- Name of the deployment specification (SVM is identified by this name on the vCenter Server)
- SVM version number
Example Request Body:
{ “ovf_url” : “http://{webserver-ip}/{path-to-ovf-file}/{filename}.ovf”, “deployment_spec_name” : “NSX_Distributed_MPS”, “svm_version” : “3.2” }
Here you are going to need to replace the {webserver-ip}/{path-to-ovf-file}/{filename} details with your Web Server IP and the path and file name. See my example below
{ “ovf_url” : “http://192.168.10.10/nsx-svm-appliance-3.2.0.0.0.19058371.ovf”, “deployment_spec_name” : “NSX_Distributed_MPS”, “svm_version” : “3.2” }
Once your Postman API call is ready, hit the SEND button on the right hand side and Postman will connect to the NSX-T Manager API and post those settings. If successful your output should look like this – You want to 200 OK on the right hand side.

Now you can verify that the service name we just created is listed in the NSX Manager.
- In NSX Manager, navigate to System > Service Deployments > Catalog.
- Verify that the VMware NSX Distributed Malware Prevention Service is listed on the page.

For more examples on details how to register the NSX Distributed Malware Prevention Service see this page
Step 5 – Deploy Malware Prevention Service VM’s
Each of the SVM’s will need a Management IP address when deployed, this can be obtained via DHCP or you can create an IP Pool inside NSX Manager and use this pool to allocate IP’s to the SVP’s. Make sure to leave some room in the pool for potential growth in hosts within the cluster since NSX will automatically deploy an SVM when a host is added to the cluster in the future. Make sure this is in place before proceeding else you going to repeat the steps below.
***Each SVM requires 4vCPU, 6GB RAM, 80GB Disk***
I am using a local pool with in my NSX Manager

Now we are going to create a service which would be deploying the Service VM’s on our selected vCenter Cluster – Select VMware NSX Distributed Malware Prevention Service, and click Deploy.

We need to populate some details in the service definition, give your Service deployment a name. I used Malware Prevention Service

Then select the correct vCenter and vSphere cluster with the datastore for your deployment. Select the
Click Edit Networks and populate the data as per your deployment requirements.

Now we need to populate the Configure Attributes field, this is the ssh key which we copied from that box when we generated the Public-Private key. The one below:
Output below, click Save on the bottom Right

So with all the data populated we can go ahead and save
Now Click OK on the pop up
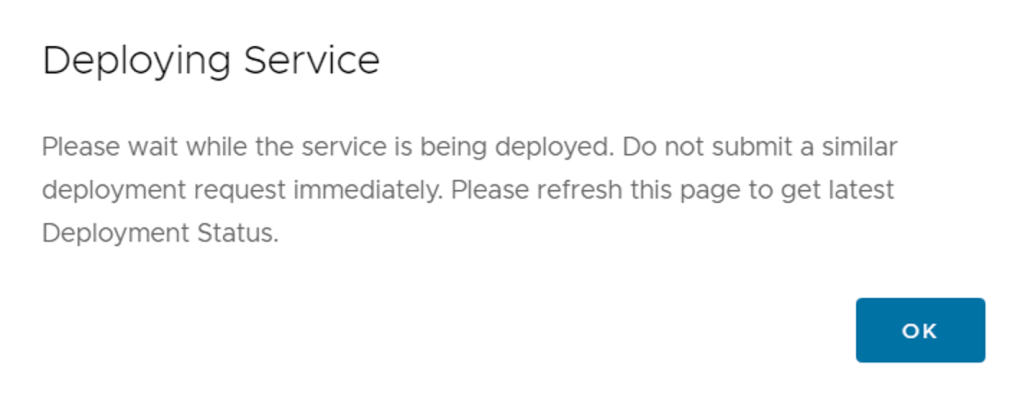
If all your parameters entered are correct you see the orange “progress” status. Depending on your environment and how many ESXi servers in your vCenter cluster, it could a little bit of time as each SVM is created and deployed.

The NSX Manager is now doing the needed to get the SVM’s deployed on the cluster you specified – hope over to your vCenter and you will see a template folder created ESX Agents. If you expand this you will see the first SVM template being created and deployed in vCenter.

You can also monitor the progress in vCenter under recent tasks, you will see below that all four my hosts in my Compute cluster are in progress.

Once this has completed you should see one SVM per ESXi host in your Cluster, in my case 4 have been deployed.

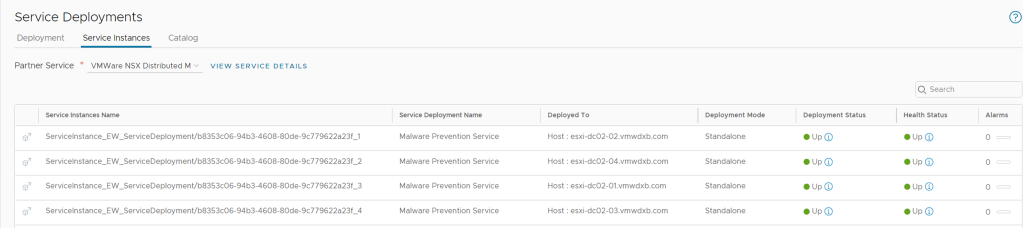
You can also monitor some progress from the NSX Manager, go to System -> Service Deployments ->Service Instances -> Select VMware NSX Distributed Malware Prevention Service

It does take a little time for all the SVM’s to be deployed, configured and powered up but once this has completed you can see their status from vCenter and the NSX Manager.
In vCenter the SVM is powered up and I can see its connected to the portgroup which I specified and it has an IP from my IP Pool too.

From the NSX Manager if you refresh page in the services instances, if all went well you will see your SVM’s deployment status and health status Up and the dot turn Green
The Service also shows up on the Service Deployment dashboard

Step 6 – Accessing the Malware Prevention Service VM’s
We are going to need to access the SVM’s from vCenter console and we need the public-private key pair which we generated at the start of this blog.
By default, an admin user on the NSX Malware Prevention service virtual machine (SVM) does not have an SSH access to the SVM. The vCenter Server administrator must activate SSH access to the SVM.
SSH access to the admin user of the SVM is key-based (public-private key pair). A public key is needed when you are deploying the service on an ESXi host cluster, and a private key is needed when you want to start an SSH session to the SVM.
From vCenter -> Hosts & Clusters -> Expand the Cluster where you deployed the SVM’s -> ESX Agents Folder -> Click on the first SVM (VMWare_NSX_Distributed_Malware_Preven (1)
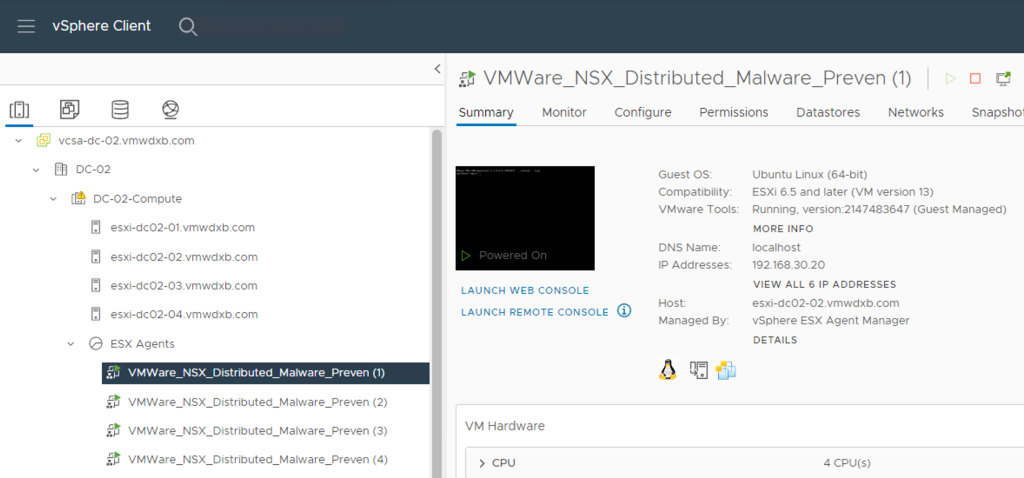
Double Click on the black box on the right or click on Launch Web Console or Launch Remote Console and it should pop up a warning and select Yes

Now in the new window you will have the SVM console access, you need to login here with user root and the default password is vmware

Next step would be to reset the default password for the local user root – take note the first password is the current password vmware and then enter your newly selected password.
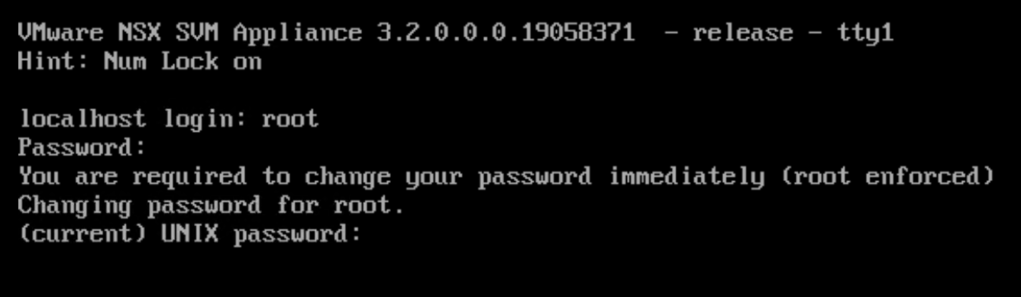
Enter the new password – note this is a local user root for the SVM and it is not synchronised to the NSX-T Manager root username/password. So take note of the changes and save it somewhere.

Now we can start the SSH service locally on the SVM using the following:
/etc/init.d/ssh start

Now, you can log in to the SVM as an admin user and use the SVM private key to start an SSH session.
Procedure
You can get the Management IP for the SVM’s from vCenter as shown below
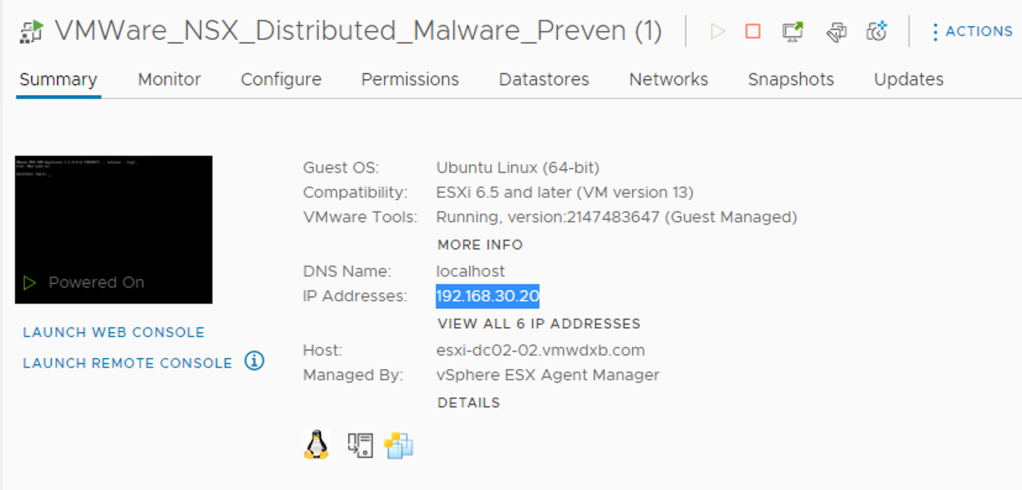
I am going to use Putty to ssh to the first SVM – 192.168.30.20. We need to select the private key for authenticating the SSH session with the SVM. Without this you will not be able to successfully ssh to the SVM.

In the Putty UI scroll down to Connection – > SSH -> Auth -> Click Browse. Select your Private-Key file from your local machine or where you have saved it.
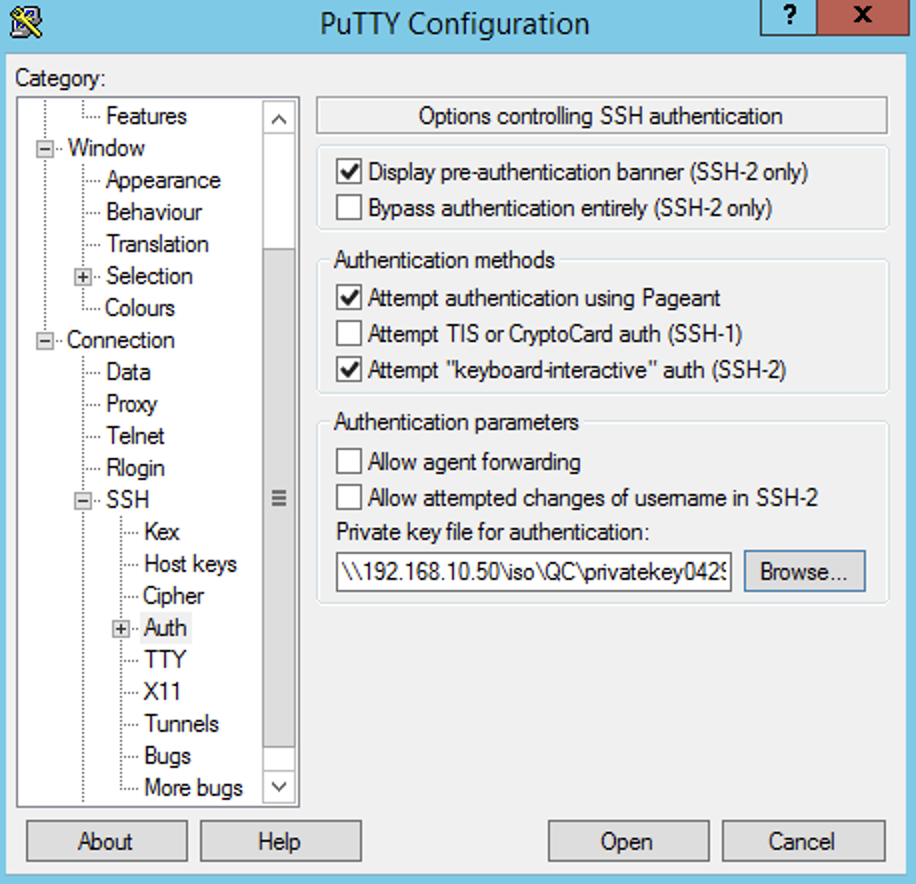
Click Open to start the SSH session to the SVM
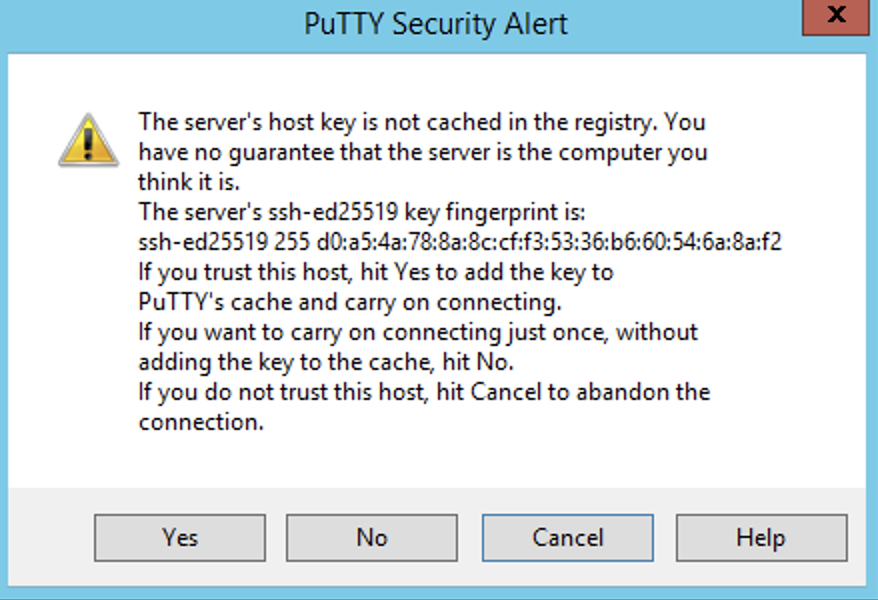
If your key upload was successful, you can enter the username admin and you will be asked for the Passphrase you used when you created the private/public key

Once the correct Passphrase is entered you now have admin access to the SVM local CLI.

Remember to repeat these steps on all the SVM’s in your cluster
Conclusion
Now that I have the Malware Prevention SVM’s successfully deployed, I can start with the Policy creations. I will cover this in the next blog.
I hope this was helpful and managed to get your environment ready to see the new NSX Malware Prevention feature in action.

Thank you
You make it clear for me
LikeLiked by 1 person
Thank you
LikeLiked by 1 person